
rare timber should be inspected before it is celebrated. In this Massive Wood Workshop source, the useful lesson is not a claim about price or age. The practical lesson is how woodworkers can read a large timber: check support, grain direction, defects, machine order, exposed surfaces, and the next safe step.
Table of Contents
Rare Timber Inspection: Short Answer
Rare timber inspection means slowing down before making big claims. A source video can show how a large workpiece is staged, how the operator approaches the first cut or shaping step, and how the exposed face is judged. It cannot, by itself, prove exact species, age, price, or final grade. Tecatool treats the visible process as the useful evidence.
That is the difference between a watchable woodworking clip and a dependable shop note. The title may create curiosity, but the transferable value is the sequence: stabilize the material, read what is visible, make a controlled pass, inspect the new face, and only then decide whether the timber deserves more time, better tools, or a different plan.
What The Video Evidence Supports
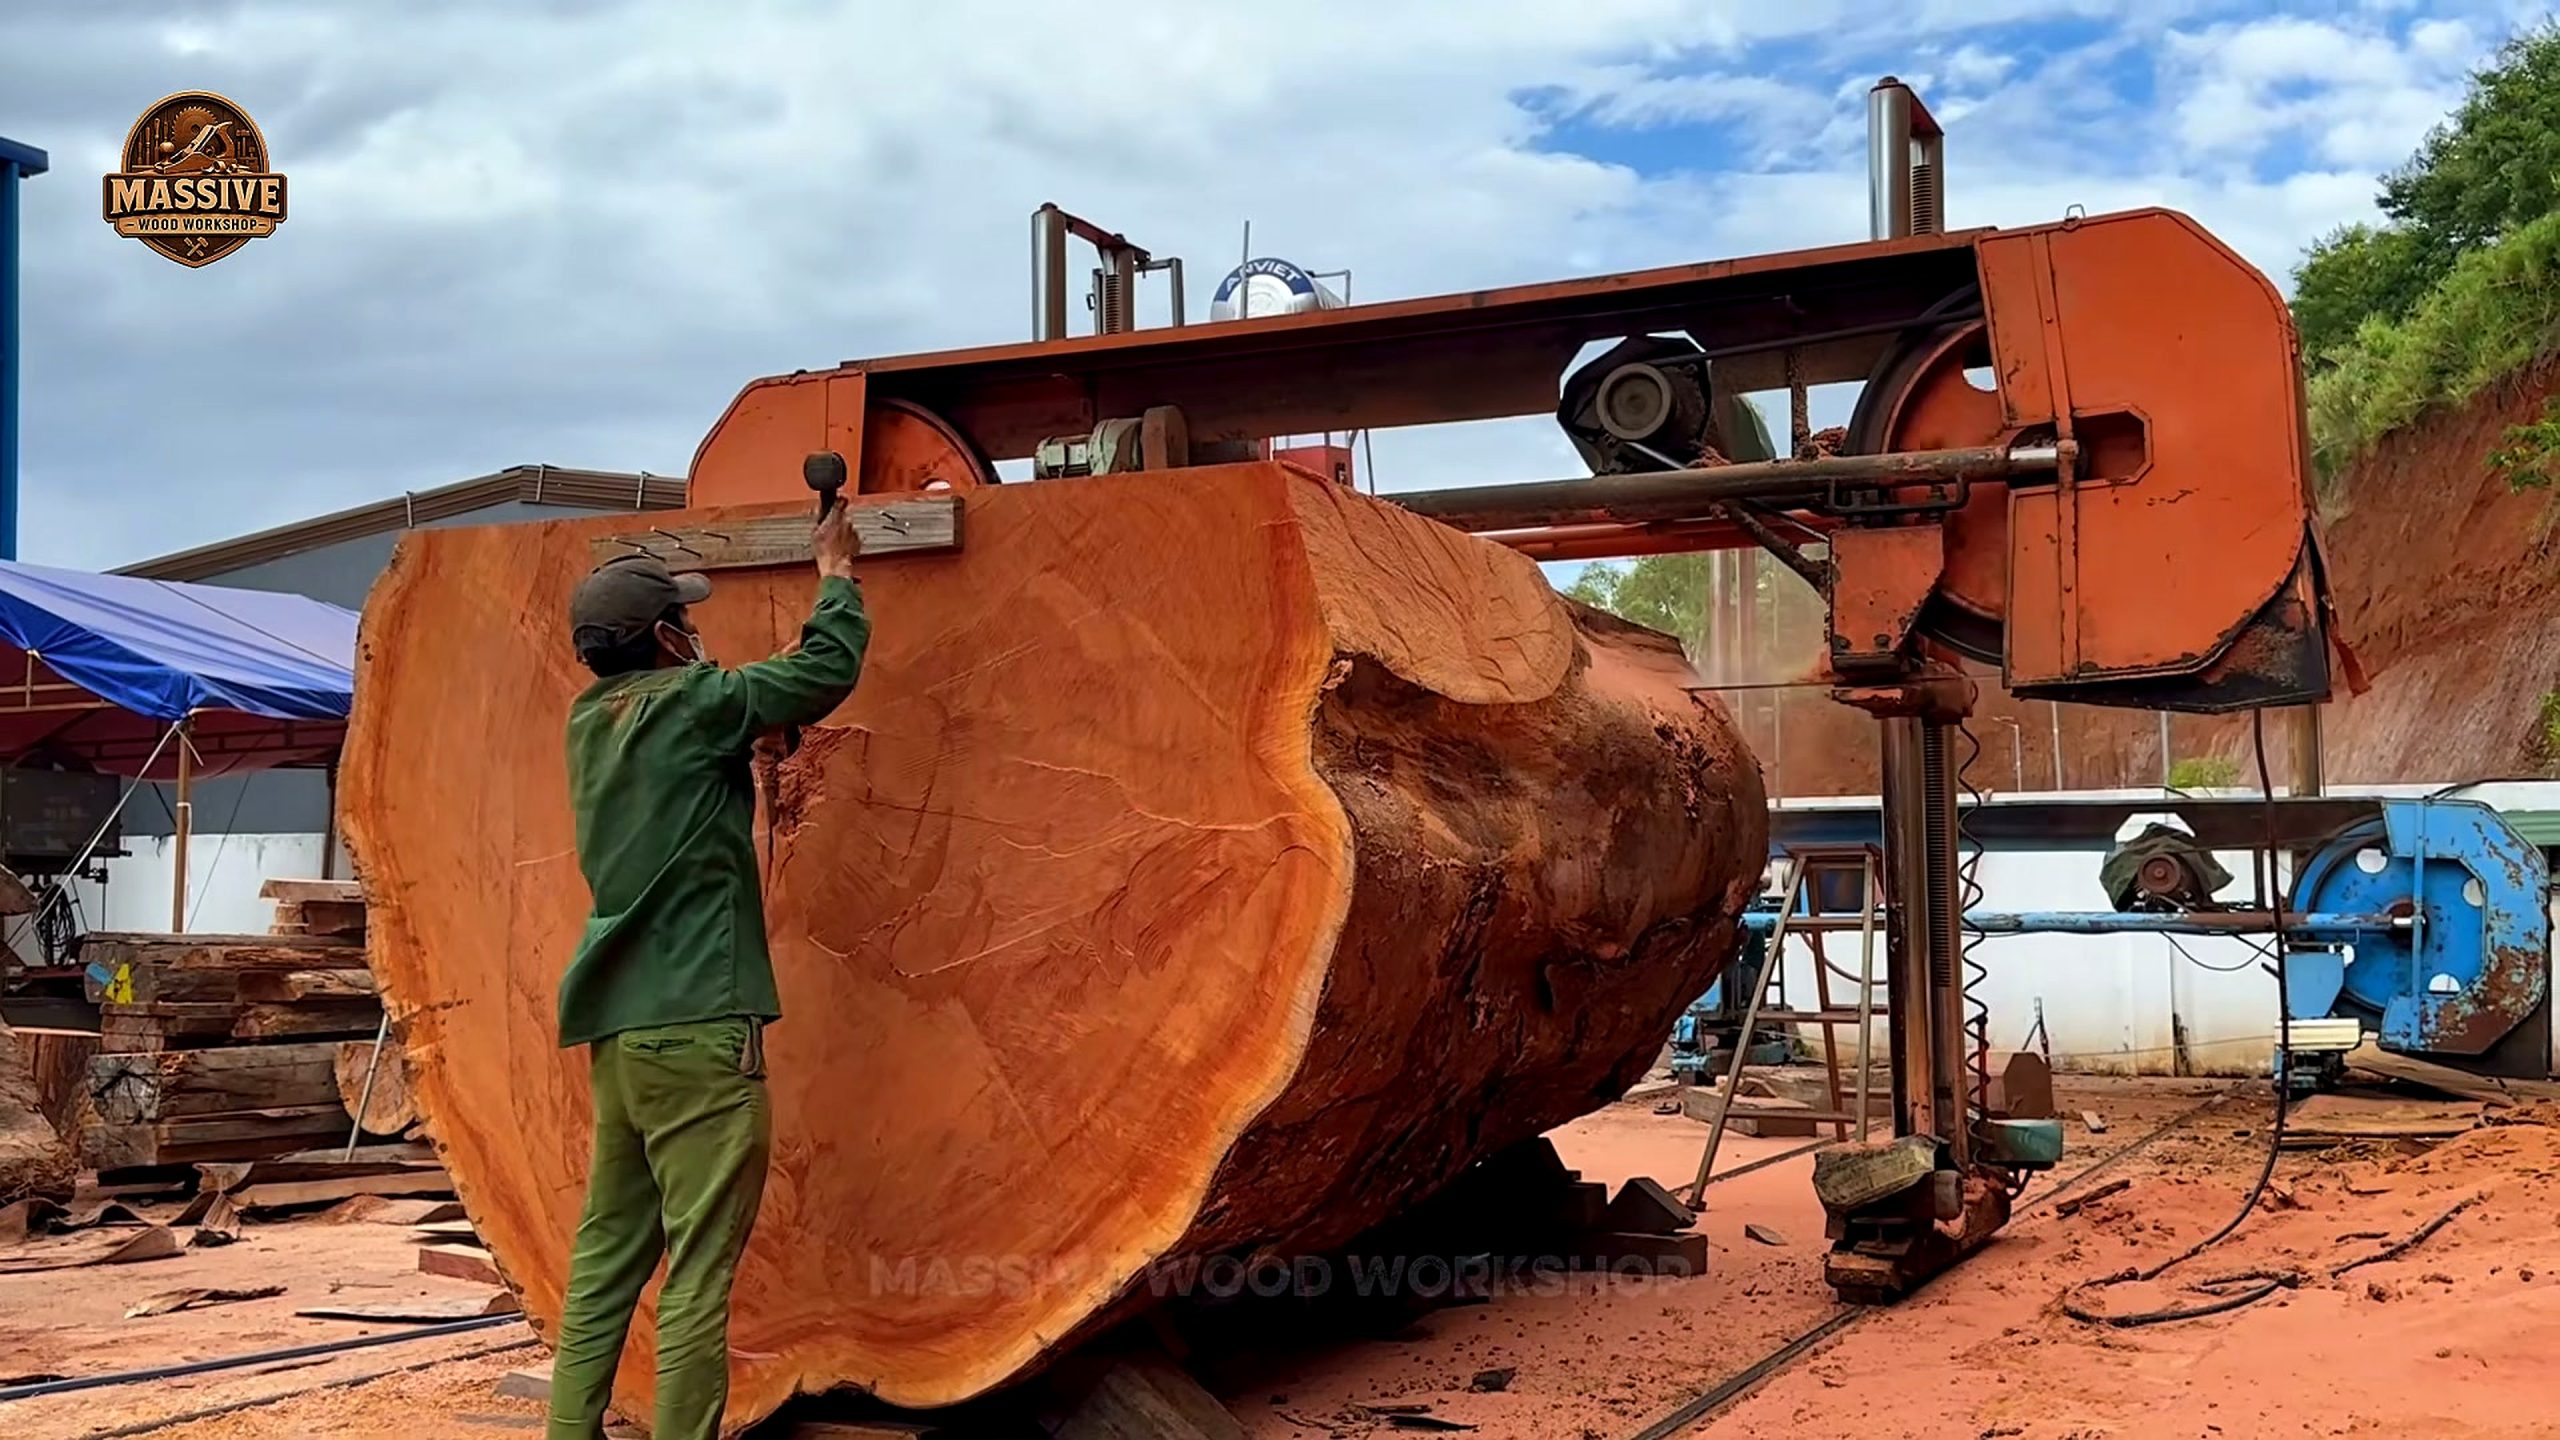
The source shows a woodworking process built around a large and visually interesting timber. The strongest supported claims are about workflow: visible staging, handling, cutting or shaping order, and inspection after material is opened. Those are enough for a useful article because many woodworking mistakes happen before the final surface appears.
The video does not give a complete laboratory record. It does not document moisture percentage, hidden metal, structural rating, full species confirmation, drying schedule, purchase price, or buyer identity. A careful reader should separate what the eye can verify from what would require shop paperwork, invoices, meters, or local grading rules.
This evidence boundary makes the article more useful for searchers. Someone looking for rare timber does not only need excitement. They need a repeatable way to decide whether a large piece is worth processing. The best answer is a checklist tied to what the footage actually shows.
First Look: Support, Scale, And Work Area
The first inspection happens before any dramatic reveal. Large timber is heavy, irregular, and sometimes unstable. The operator must know where the weight sits, where the workpiece could roll, and whether the receiving area can handle the next piece of waste or finished stock. Poor support can turn good material into a dangerous cut.
Viewers should pause early and ask simple questions. Is the timber sitting flat enough for the next move? Is there enough clearance for the tool and the operator? Are hands, feet, and helper positions outside pinch zones? Does the setup show a reference face or line that explains the direction of work?
These questions are not glamorous, but they are the reason an impressive piece can become usable lumber. If the setup is rushed, later steps inherit the mistake. If the setup is calm, the first exposed face gives better information for layout, trimming, and drying.
Support should be read in three directions. First, check vertical support, because the timber must not sag or rock while the tool is engaged. Second, check side support, because a round or uneven piece can roll when material is removed. Third, check the exit path, because the offcut, slab, or blank needs somewhere to go after the pass is complete.
Scale also changes communication. A small board can often be corrected by one worker, but a large timber needs planned signals. One person may control feed or cutting while another watches clearance, waste movement, or surface condition. If the crew has no visible pause point, the process becomes harder to trust.
The work area deserves the same attention as the timber. Loose offcuts, poor lighting, tangled cords, and unclear walking paths all increase risk. A clean floor does not make the wood rare, but it makes the process repeatable. Repeatability is what turns a striking source video into a lesson a shop can actually use.

Reading Grain, Cracks, And Defects
Rare timber becomes useful only after the wood is read honestly. Grain direction can tell a shop whether a board may move, tear out, or show figure after finishing. Cracks and checks can decide whether the material becomes a full slab, shorter blanks, turning stock, or waste. Color changes can be beautiful, but they can also signal decay or stress.
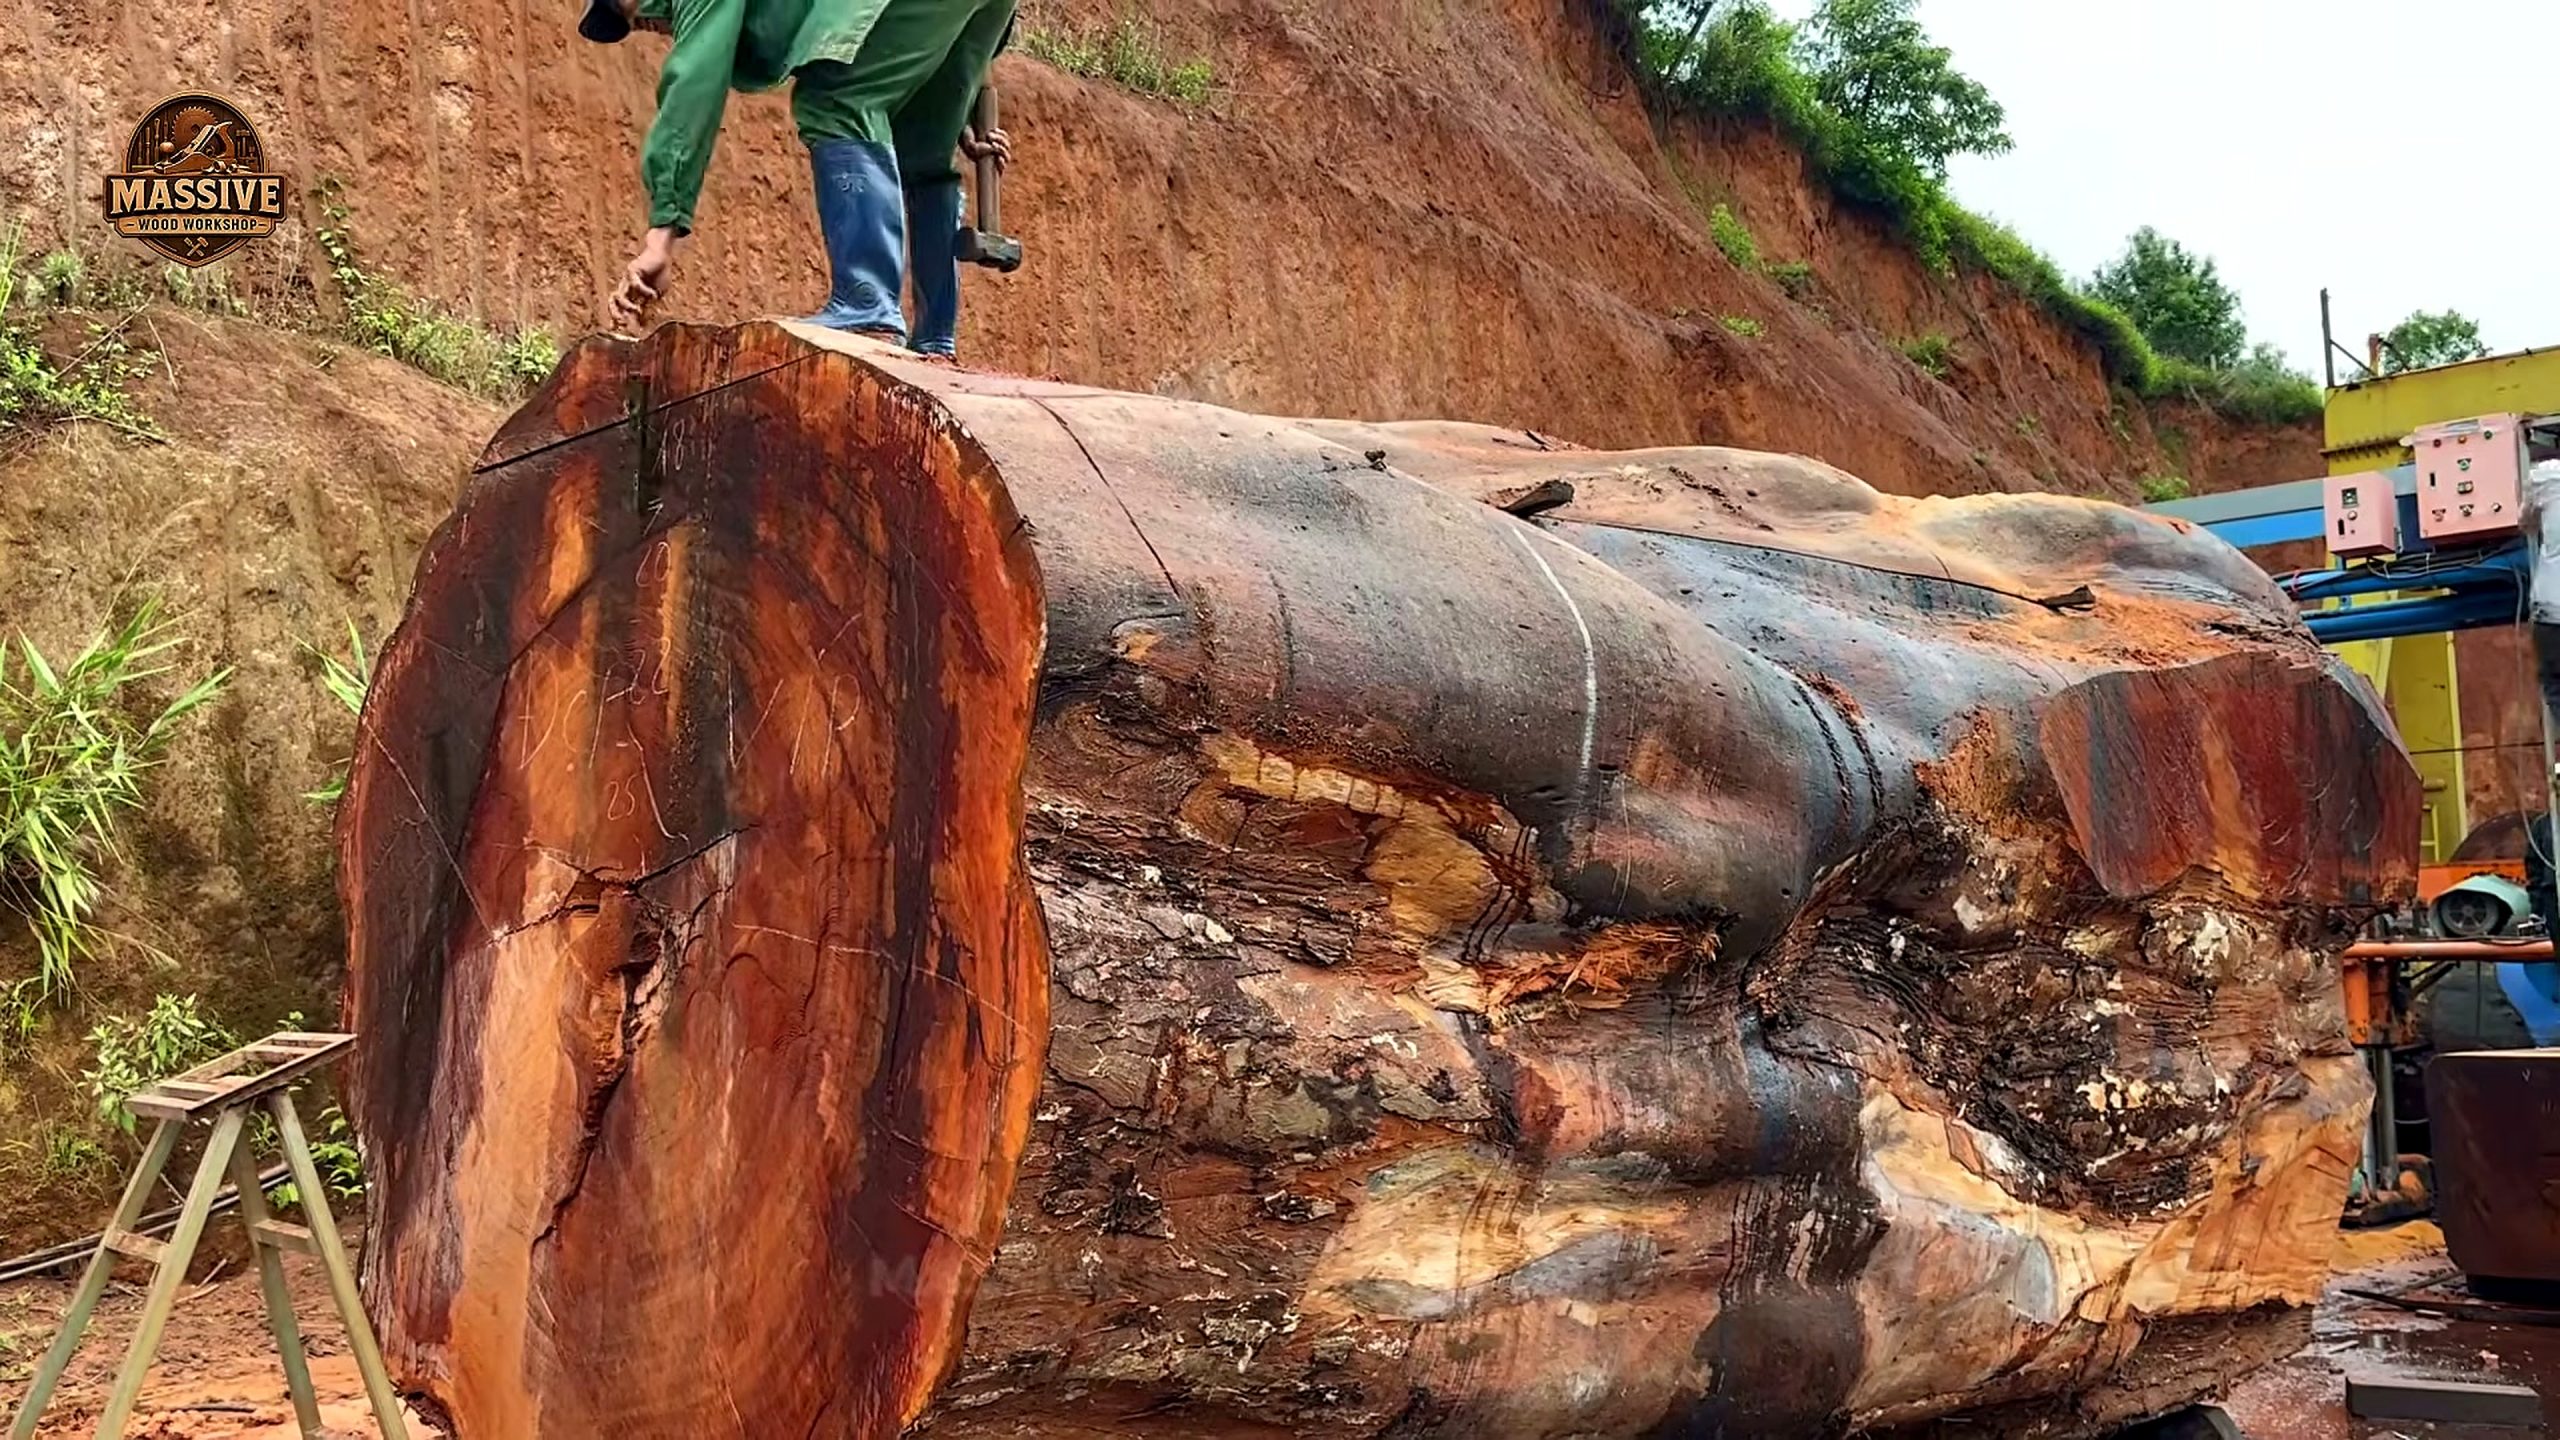
A good inspection order starts with the ends, then the sides, then the first new face. End grain may show cracks, growth rings, or tension. The outer surface may show bark damage, dirt, embedded grit, or twist. The first opened surface shows whether the work is following the best figure or cutting away value.
Woodworkers should avoid judging the whole piece from one attractive shot. A wide board with a center split may need to be ripped into narrower parts. A rough-looking section may hide stable stock after trimming. The source is most valuable when it teaches the habit of testing each assumption before committing to the next irreversible cut.
Grain direction affects both appearance and machining. Interlocked, wavy, or reversing grain can create strong visual figure, but it can also tear out under a planer or scraper. Straight grain may look less dramatic but can be easier to dry, flatten, and join. A rare timber buyer should ask which outcome matters more for the intended project.
Defect reading should be practical instead of fearful. A crack is not always a reason to reject material. It may become a design boundary, a natural edge, a bowtie repair, or a section removed before final layout. The important point is to decide before cutting deeper. Once too much wood is removed, the shop may lose the option to work around the defect.
Color is another signal that needs caution. Dark streaks, mineral marks, spalting, or age-related color can be beautiful, but beauty is not the same as strength. If the piece will become a tabletop, shelf, door, bench, or structural element, the surface must be judged for both visual value and service risk. That is why inspection continues after the first reveal.
Machine Order And Handling Control
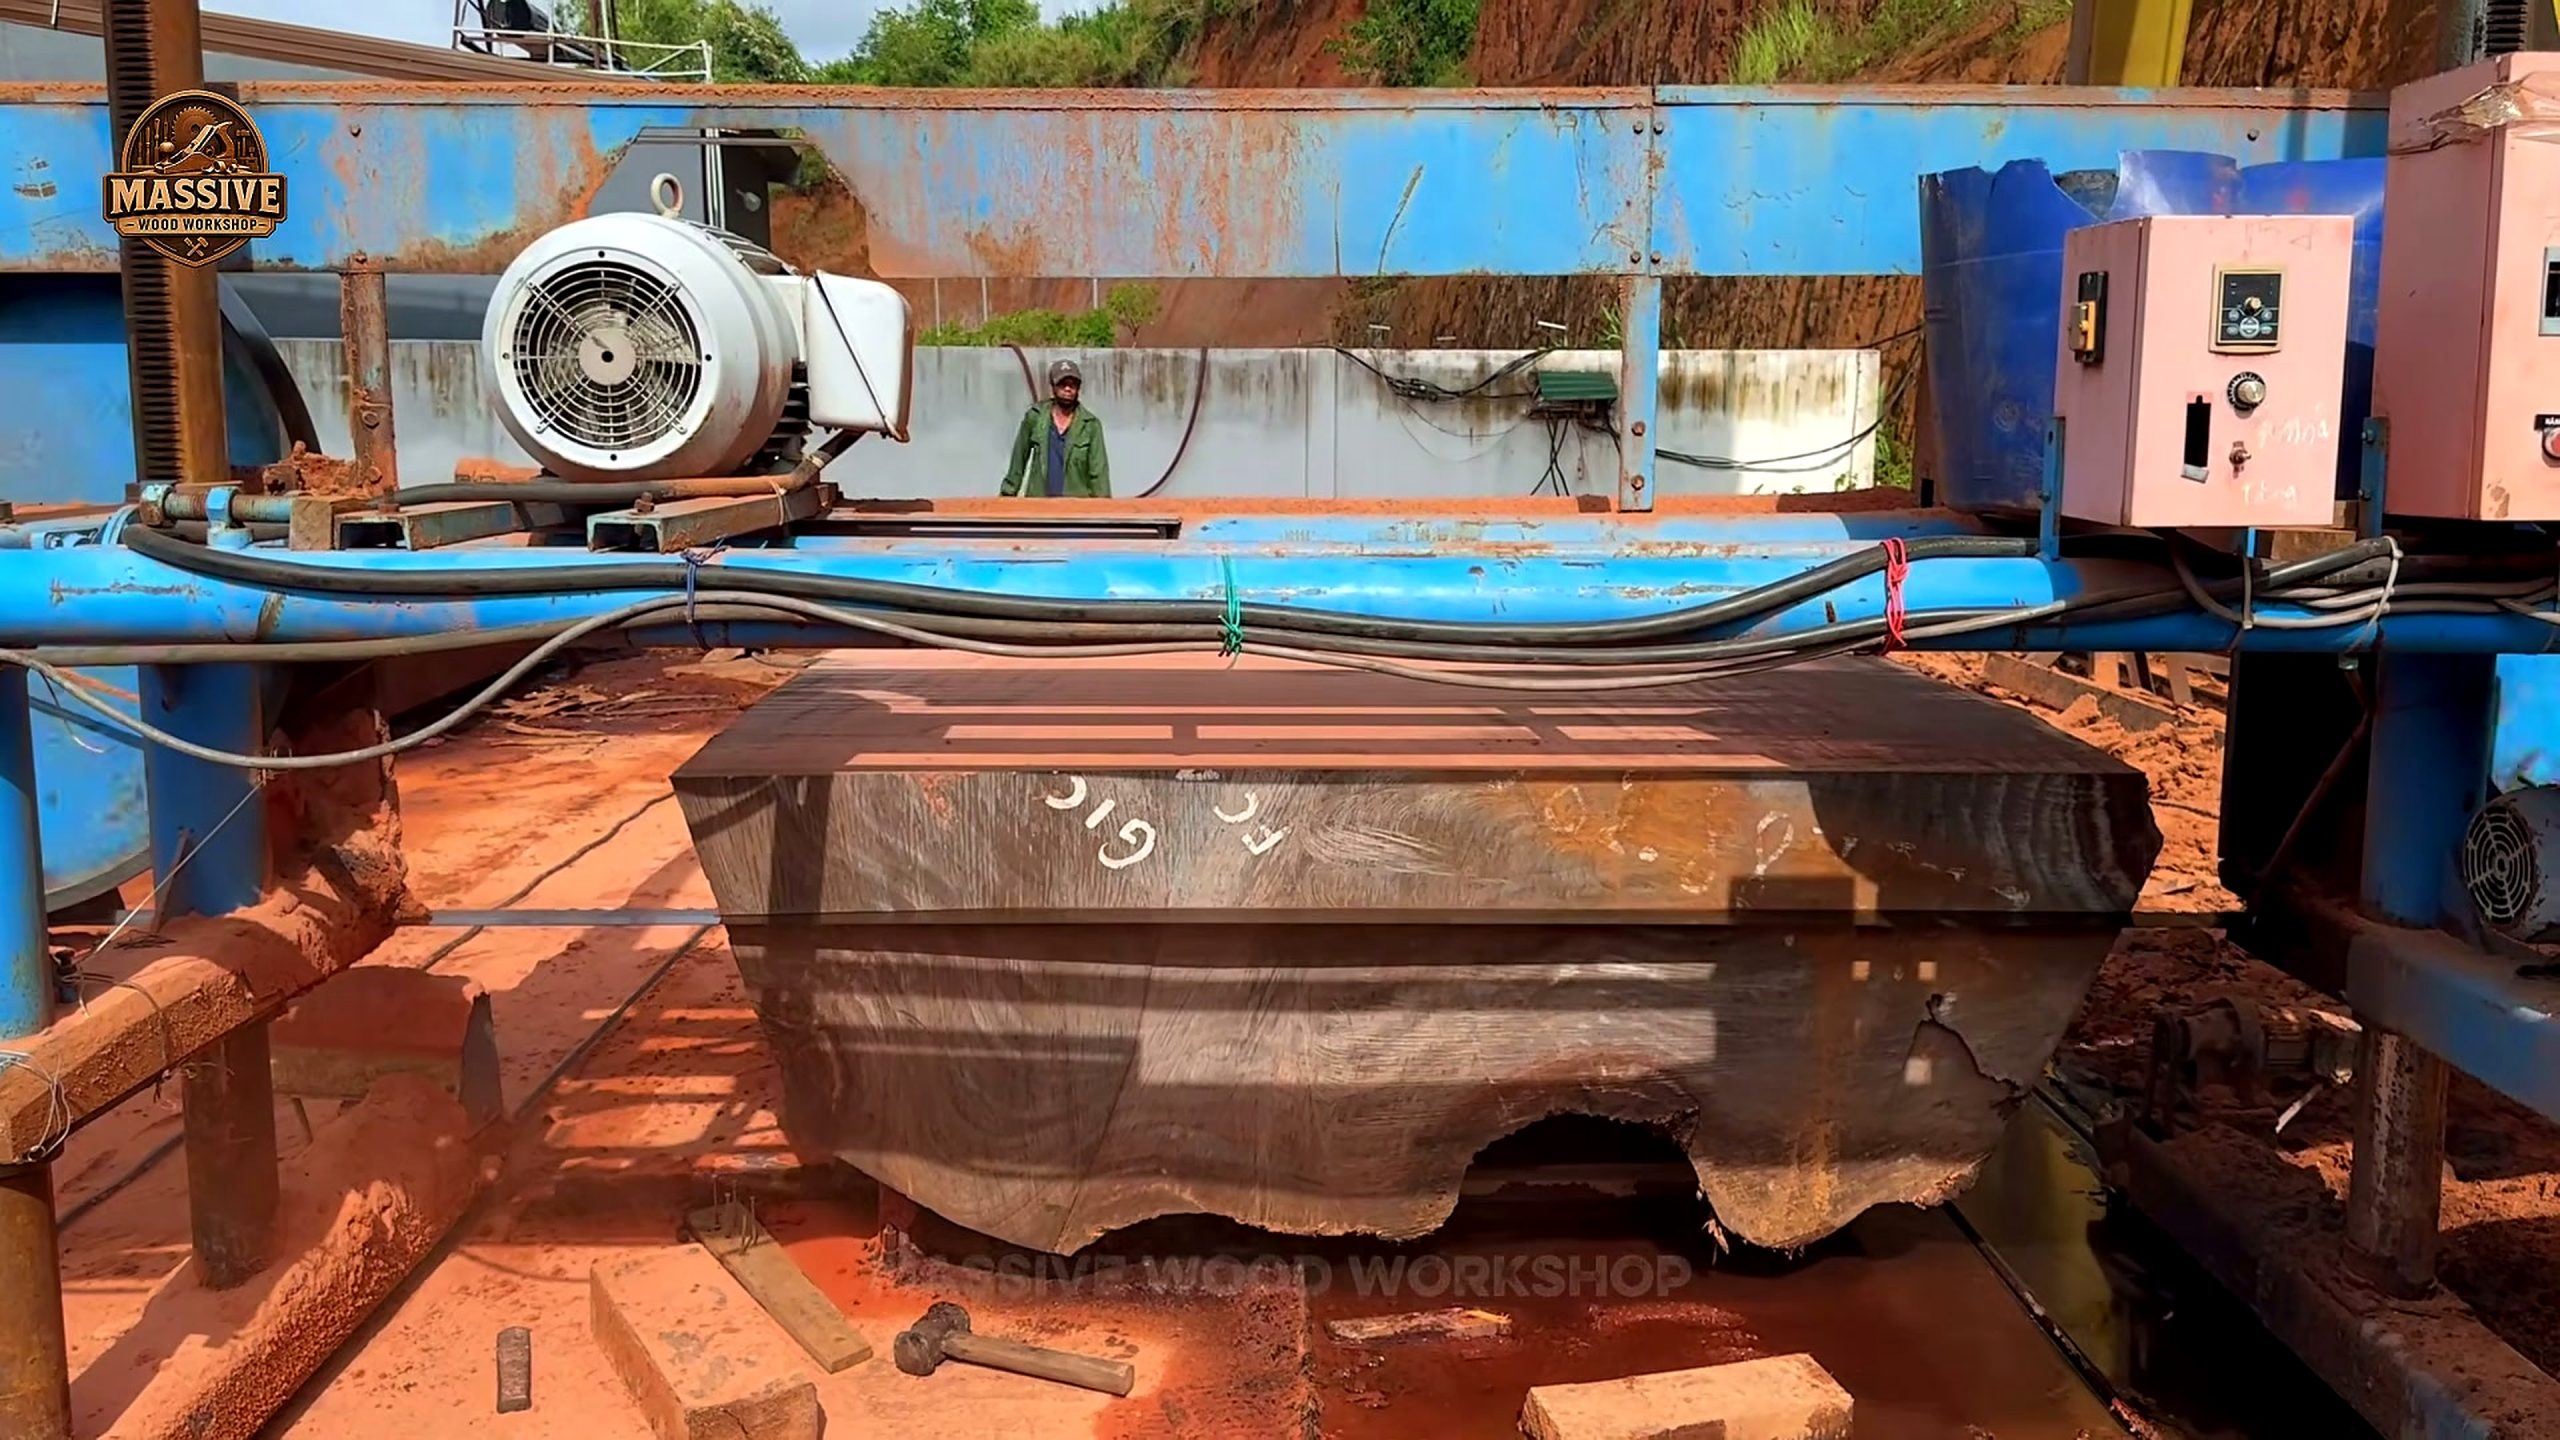
The machine sequence is where the video becomes a practical case study. The visible order matters more than the speed. Staging, measuring, clamping, feeding, stopping, brushing away debris, checking the result, and resetting the work support all affect whether the operation remains controlled.
For sawmill-style work, feed control is especially important. A blade can wander if the timber shifts, if the support is uneven, or if internal stress closes the cut. For woodworking machines, the same idea applies at smaller scale. A planer, band saw, table saw, router sled, or jointer needs stable reference surfaces and enough support before it can produce a trustworthy result.
The operator’s pauses are part of the process. When the exposed face changes the plan, the best response is not to force the next cut. The best response is to stop, inspect, and choose whether to rotate the stock, trim a defect, change blade path, or save a section for another use.
Handling control also includes the tools around the main machine. Wedges, clamps, rollers, stickers, pry bars, layout pencils, moisture meters, and dust collection may look secondary, but they decide whether the headline machine can do clean work. A video that shows only the blade still depends on all the quiet support tools outside the center of the frame.
Feed speed should be treated as a result, not a goal. The correct pace depends on blade condition, material hardness, thickness, support, and the amount of internal stress released by the cut. If a viewer copies speed without copying support and inspection, the lesson has been misunderstood.
There is also a difference between rough processing and final woodworking. Opening a timber creates information. It does not complete joinery, flattening, sanding, finishing, or quality control. Readers should use the machine sequence to understand the start of the chain, then plan the slower finish work that gives the material its final value.
Surface Review After The Reveal
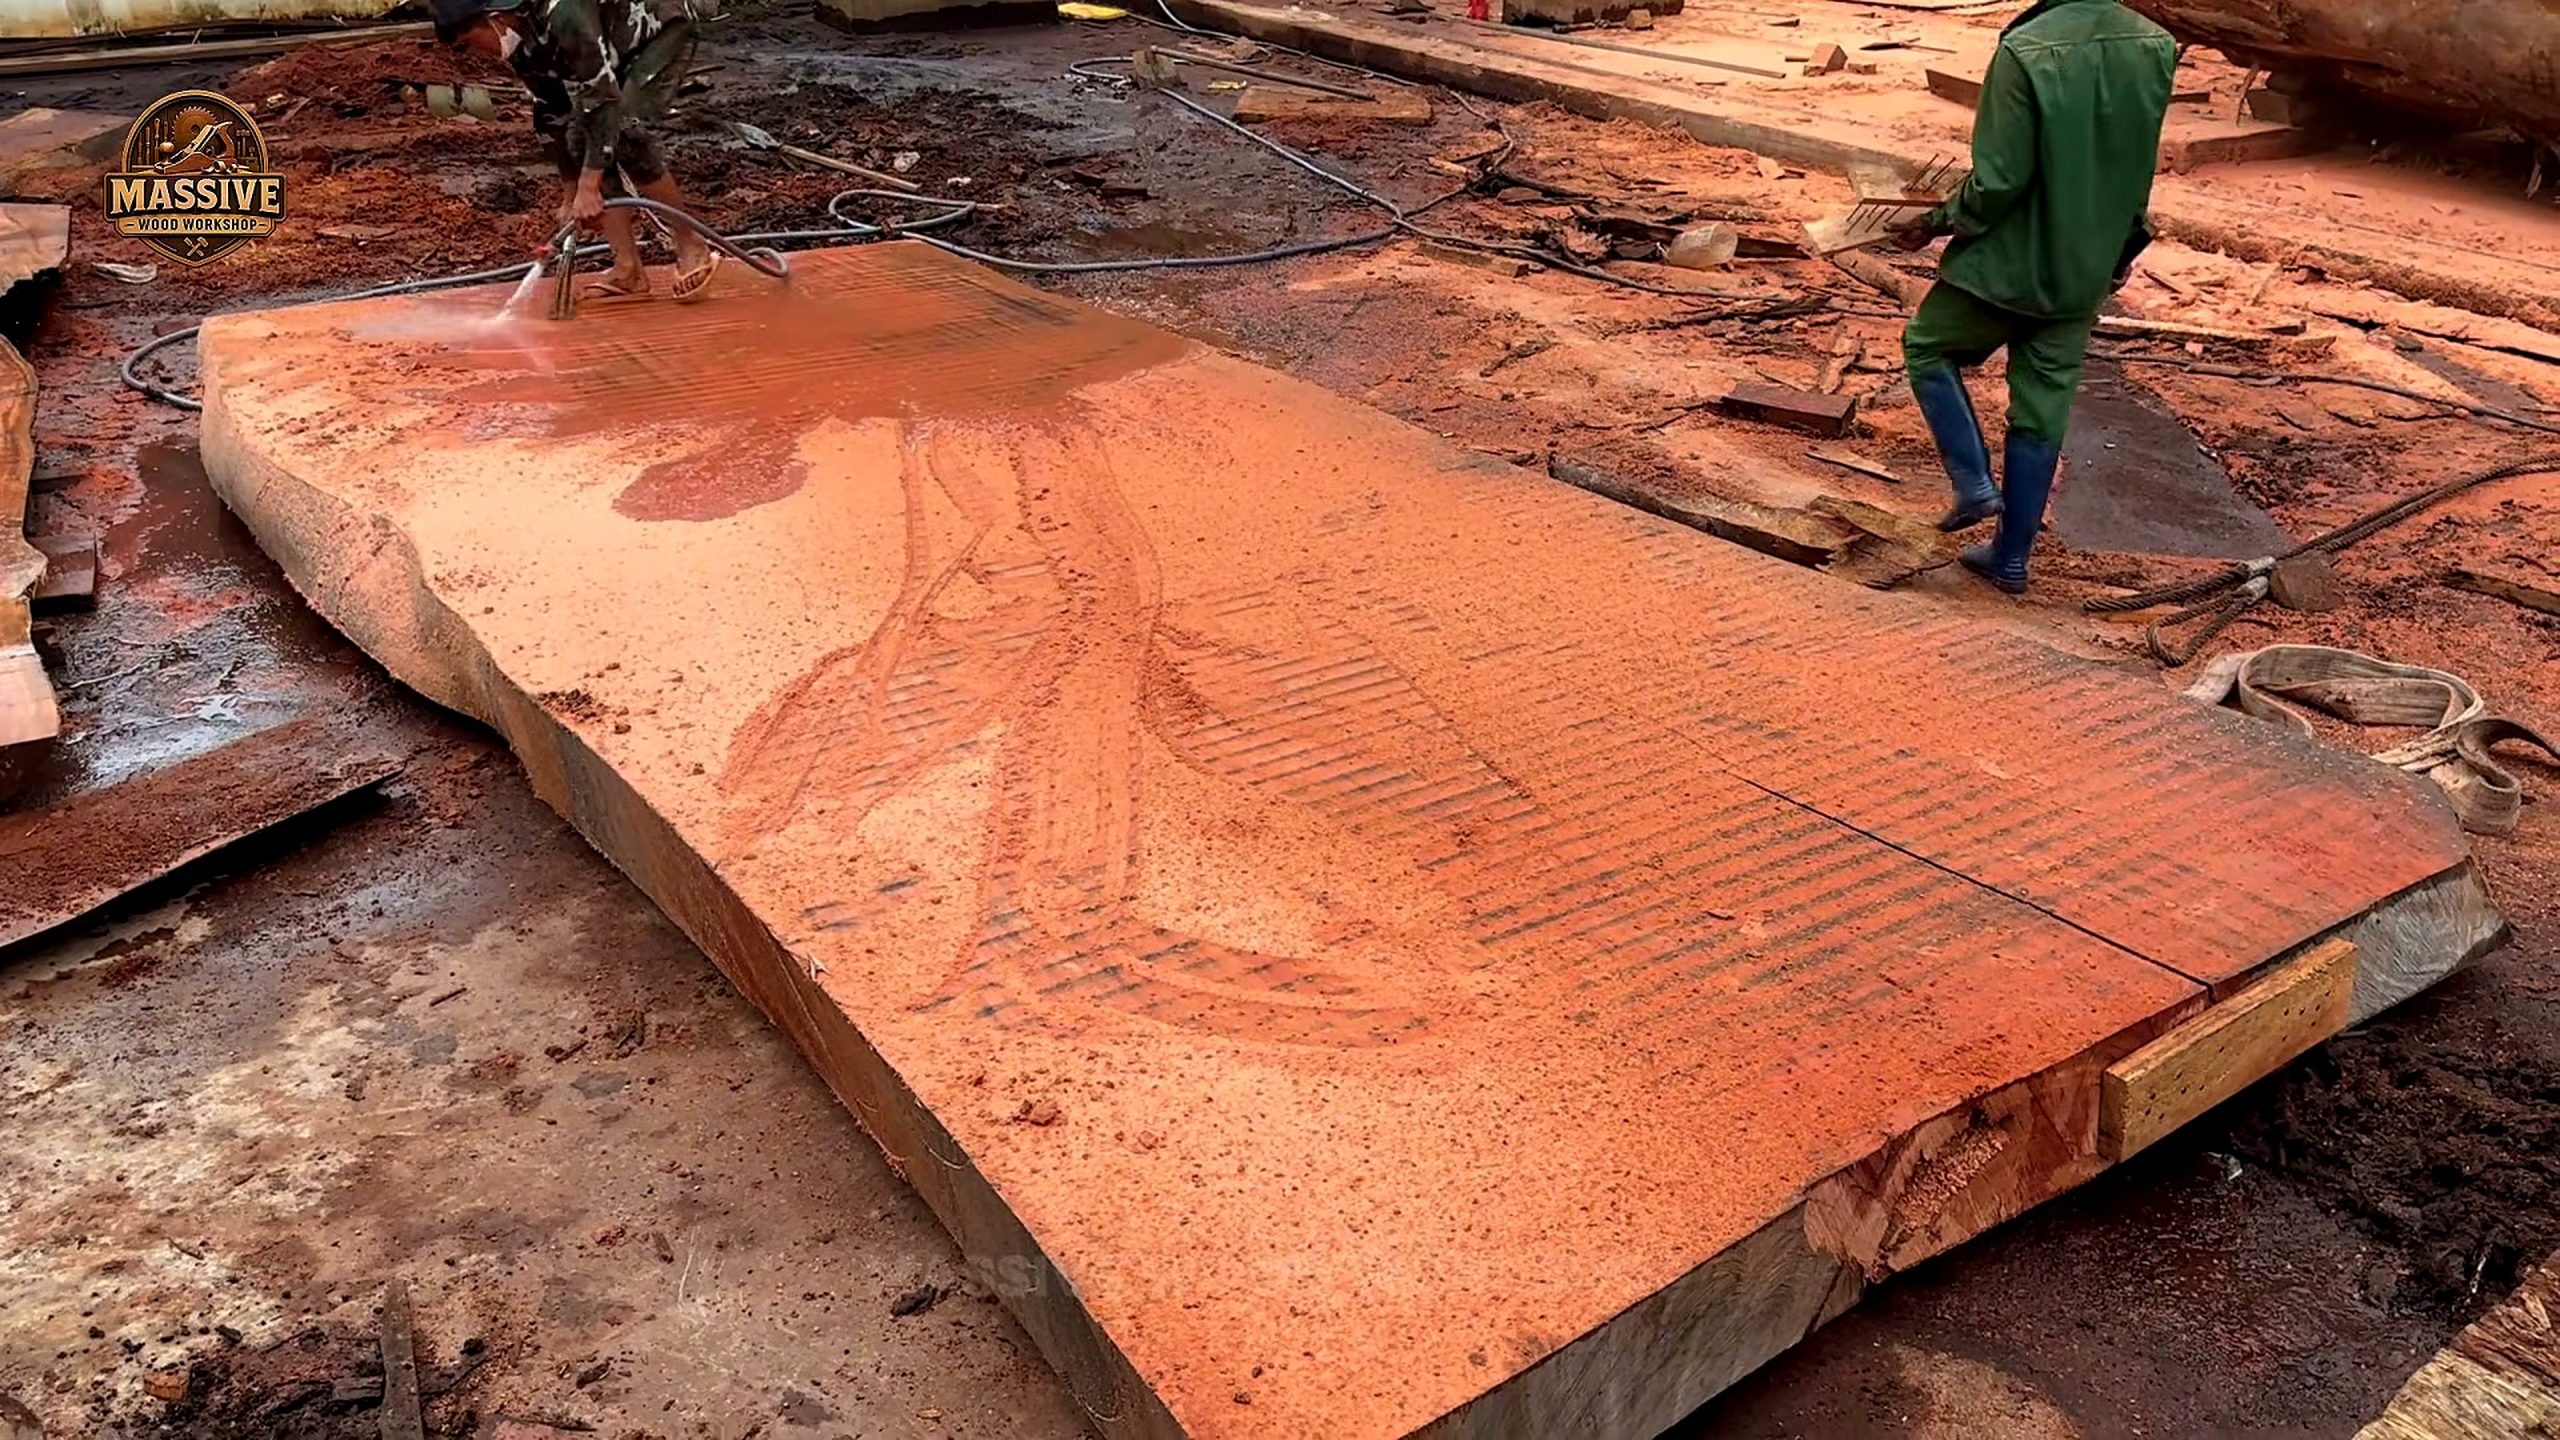
The reveal is only the start of evaluation. A fresh face can show figure, color, cracks, bark inclusions, voids, stress, or tool marks. Each detail changes the next decision. Some areas may become show surfaces. Some may be better for structural parts. Some may need to be removed before drying or finishing.
Readers should divide the exposed face into zones. One zone may have the best visual figure. Another may contain unstable cracks. Another may be suitable for short parts instead of one wide piece. This mental zoning protects the timber from emotional cutting. It also helps a shop price the work honestly because not every part of a rare timber carries the same value.
Moisture remains a major unknown. A beautiful face is not proof that the material is ready for furniture. Drying, flattening, checking, and acclimation still matter. If a video does not show those later steps, the honest conclusion is that the source shows processing and inspection, not finished performance.
A strong review habit is to mark the face while the evidence is fresh. Circle cracks, draw arrows with grain direction, mark possible show areas, and note parts that should be cut shorter. Photographs are useful because they preserve the reasoning behind each decision. When a customer asks why a section was saved or removed, the shop can point to visible evidence instead of memory.
The reveal should also trigger a cost review. A piece that looks valuable may require extra drying time, oversized flattening, resin work, special transport, or custom finishing. Those costs are part of the material, not surprises after the sale. Honest pricing begins at the same moment as honest inspection.
For Tecatool readers comparing projects, the best result is not always the largest uninterrupted slab. Sometimes the best use is a set of matched panels, shorter furniture parts, turning blanks, or decorative inserts. Rare timber creates options, and inspection is the step that keeps those options open.
How Small Shops Can Use The Lesson
Most Tecatool readers will not run an industrial mill every day, but the inspection habit transfers well. A small shop opening a heavy slab, reclaimed beam, turning blank, or thick board should still start with support, reference, defect review, and a safe path for the tool.
The scaled-down version is straightforward. Photograph the stock before cutting. Mark cracks and direction of grain. Decide which face must be preserved. Support the piece so it cannot rock. Make the first operation conservative. Stop after the first new surface appears and update the plan before removing more material.
This habit also helps when working with paid milling services. A customer who understands inspection can ask better questions: where will the first face be taken, how thick should the slab remain for drying, which defects are worth saving, and how will the shop handle movement after the cut?
A small shop can turn the source into a simple bench checklist. Before cutting, write the project goal, final dimensions, best face, risky defect, and tool sequence. During cutting, stop after each major surface change. After cutting, label the parts and record why each part was kept. This slows the work slightly, but it protects expensive material.
The same checklist helps beginners avoid buying beyond their capacity. A thick slab may need a larger jointer, a router sled, a flattening service, or months of drying space. A heavy beam may need two people to move safely. A beautiful offcut may need stabilization before it can become a bowl or box. Planning those realities before purchase saves money.
Experienced shops can use the video as a teaching prompt. Ask apprentices to identify the first reference face, likely defect zones, safe standing areas, and next inspection point. Then compare answers. The exercise builds judgment because it teaches people to see process, not only spectacle.
Tool And Service Buying Context
A rare timber project often fails because the buyer budgets for the wood but not for the process. Large stock may require lifting help, milling service, extra blades, dust control, a moisture meter, stickers for drying, a flat storage area, a router sled, epoxy, long clamps, and more finishing time than expected.
Before buying, write down the full chain. How will the timber be moved? Who will make the first heavy cut? Where will the boards dry? What tool will flatten them? How will defects be stabilized? What size can the shop actually finish without twisting, checking, or losing the best figure?
For service providers, the video suggests a better customer conversation. Show the customer the first face, explain visible risks, give options before removing more material, and document why a cut path was chosen. That transparency turns a dramatic timber reveal into a professional woodworking service. Readers who want more process guides can start from the Tecatool woodworking homepage.
Tool buyers should resist the urge to buy only the largest cutting machine. A rare timber workflow may benefit more from measurement and support tools: a reliable straightedge, winding sticks, a moisture meter, a track system, quality blades, respirators, clamps, rollers, and a dust plan. Those tools help the wood arrive at a finished surface instead of stopping at a dramatic rough cut.
Service buyers should ask for documentation. Good questions include: what thickness will be left for drying, how will the timber be stacked, what defects were seen during the first pass, what parts should be avoided, and what follow-up machining is recommended? A clear service answer is often more valuable than a quick promise.
The financial lesson is simple. Rare timber is not only purchased; it is processed. The cost includes handling, waiting, waste, sharpening, sanding, finishing, and the possibility that some sections will not be usable. A careful inspection workflow protects both the buyer and the worker because it makes those costs visible early.
Quick Checklist For Readers
Use this checklist when watching the source or planning a similar project. First, identify the intended final use: slab, board, turning blank, panel, or decorative piece. Second, check support and safe movement before the tool starts. Third, read grain, cracks, knots, color changes, and any sign of embedded debris. Fourth, make a conservative first pass. Fifth, inspect the new face before continuing.
Sixth, record the decision. A photo, pencil mark, or short note prevents confusion later. Seventh, plan drying or acclimation before finishing. Eighth, choose tools based on the next real step, not on the most dramatic moment in the video. Ninth, price the hidden work, including waste and consumables. Tenth, stop if the material behaves differently than expected.
This checklist keeps the article grounded in practical woodworking. It gives readers a way to learn from the visible source without copying unknown conditions. That is the safest and most useful way to approach rare timber content.
FAQ
What makes rare timber difficult to judge from video?
Video can show scale, support, cutting order, and visible grain, but it cannot prove exact species, age, moisture content, structural grade, or market value without separate documentation.
What should woodworkers check first when a large timber is opened?
They should check stability, grain direction, cracks, color changes, metal risk, movement after the first cut, and whether the exposed face can become a reliable reference surface.
Does a dramatic reveal mean the timber is ready for furniture?
No. The reveal is only one stage. The material still needs drying, trimming, flattening, defect review, joinery planning, sanding, and finish testing before furniture use.
Why does Tecatool use real source frames in this article?
Real frames let readers connect each inspection point to the visible woodworking process instead of relying on generic stock photos or unsupported claims.
Source Video
The embedded video below is the source used for this Tecatool process reading.
Sources: Massive Wood Workshop public YouTube video and the Tecatool frame set captured from that video for process review.