
wheel blank process is a source-based sequence for circle layout, rough cutting, drilling, lathe shaping, sanding, and final workshop checks.
discover unbelievable ways work wood ideas is best read as a compact workshop process: a rough block is marked as a circle, cut close to the line, drilled for alignment, mounted on a lathe, rounded into a wheel-like blank, and cleaned with a handheld grinder or sander. The source video does not prove the wood species, dimensions, or final use, so this Tecatool article stays with what the footage shows.
The practical value is the order of operations. A circular wooden part looks simple after it spins true, but the early choices decide whether it can spin safely at all. The operator has to find a usable face, keep fingers outside the blade path, leave enough margin for cleanup, create a reliable center, and remove the corners before the lathe tool or sanding wheel can do clean work.
This article uses the public Factory Wood Sawmill source video, video ID ZeVVbd2duUY, as its evidence base. It is not a generic sawmill reveal article. The visible workflow is small-shop woodworking: band saw control, drill press layout, circle template work, lathe-mounted shaping, groove/edge cleanup, and final surface correction on a rotating wooden disk.
For related tool-buying context and workshop setup ideas, browse the Tecatool woodworking archive. That archive helps readers compare tool classes, safety habits, and process checklists before treating one source video as a complete build plan.
The wheel blank process begins with a source-based layout check so the circle, center point, and cutting margin are visible before any machine starts. This wheel blank process keeps the article tied to the footage rather than assumptions.
For quality control, the wheel blank process should be checked after layout, rough cutting, drilling, lathe shaping, and final sanding.
Table of Contents
A safe wheel blank process requires a stable face, a clear center mark, and enough waste around the outline for controlled cleanup.
What The Source Video Shows
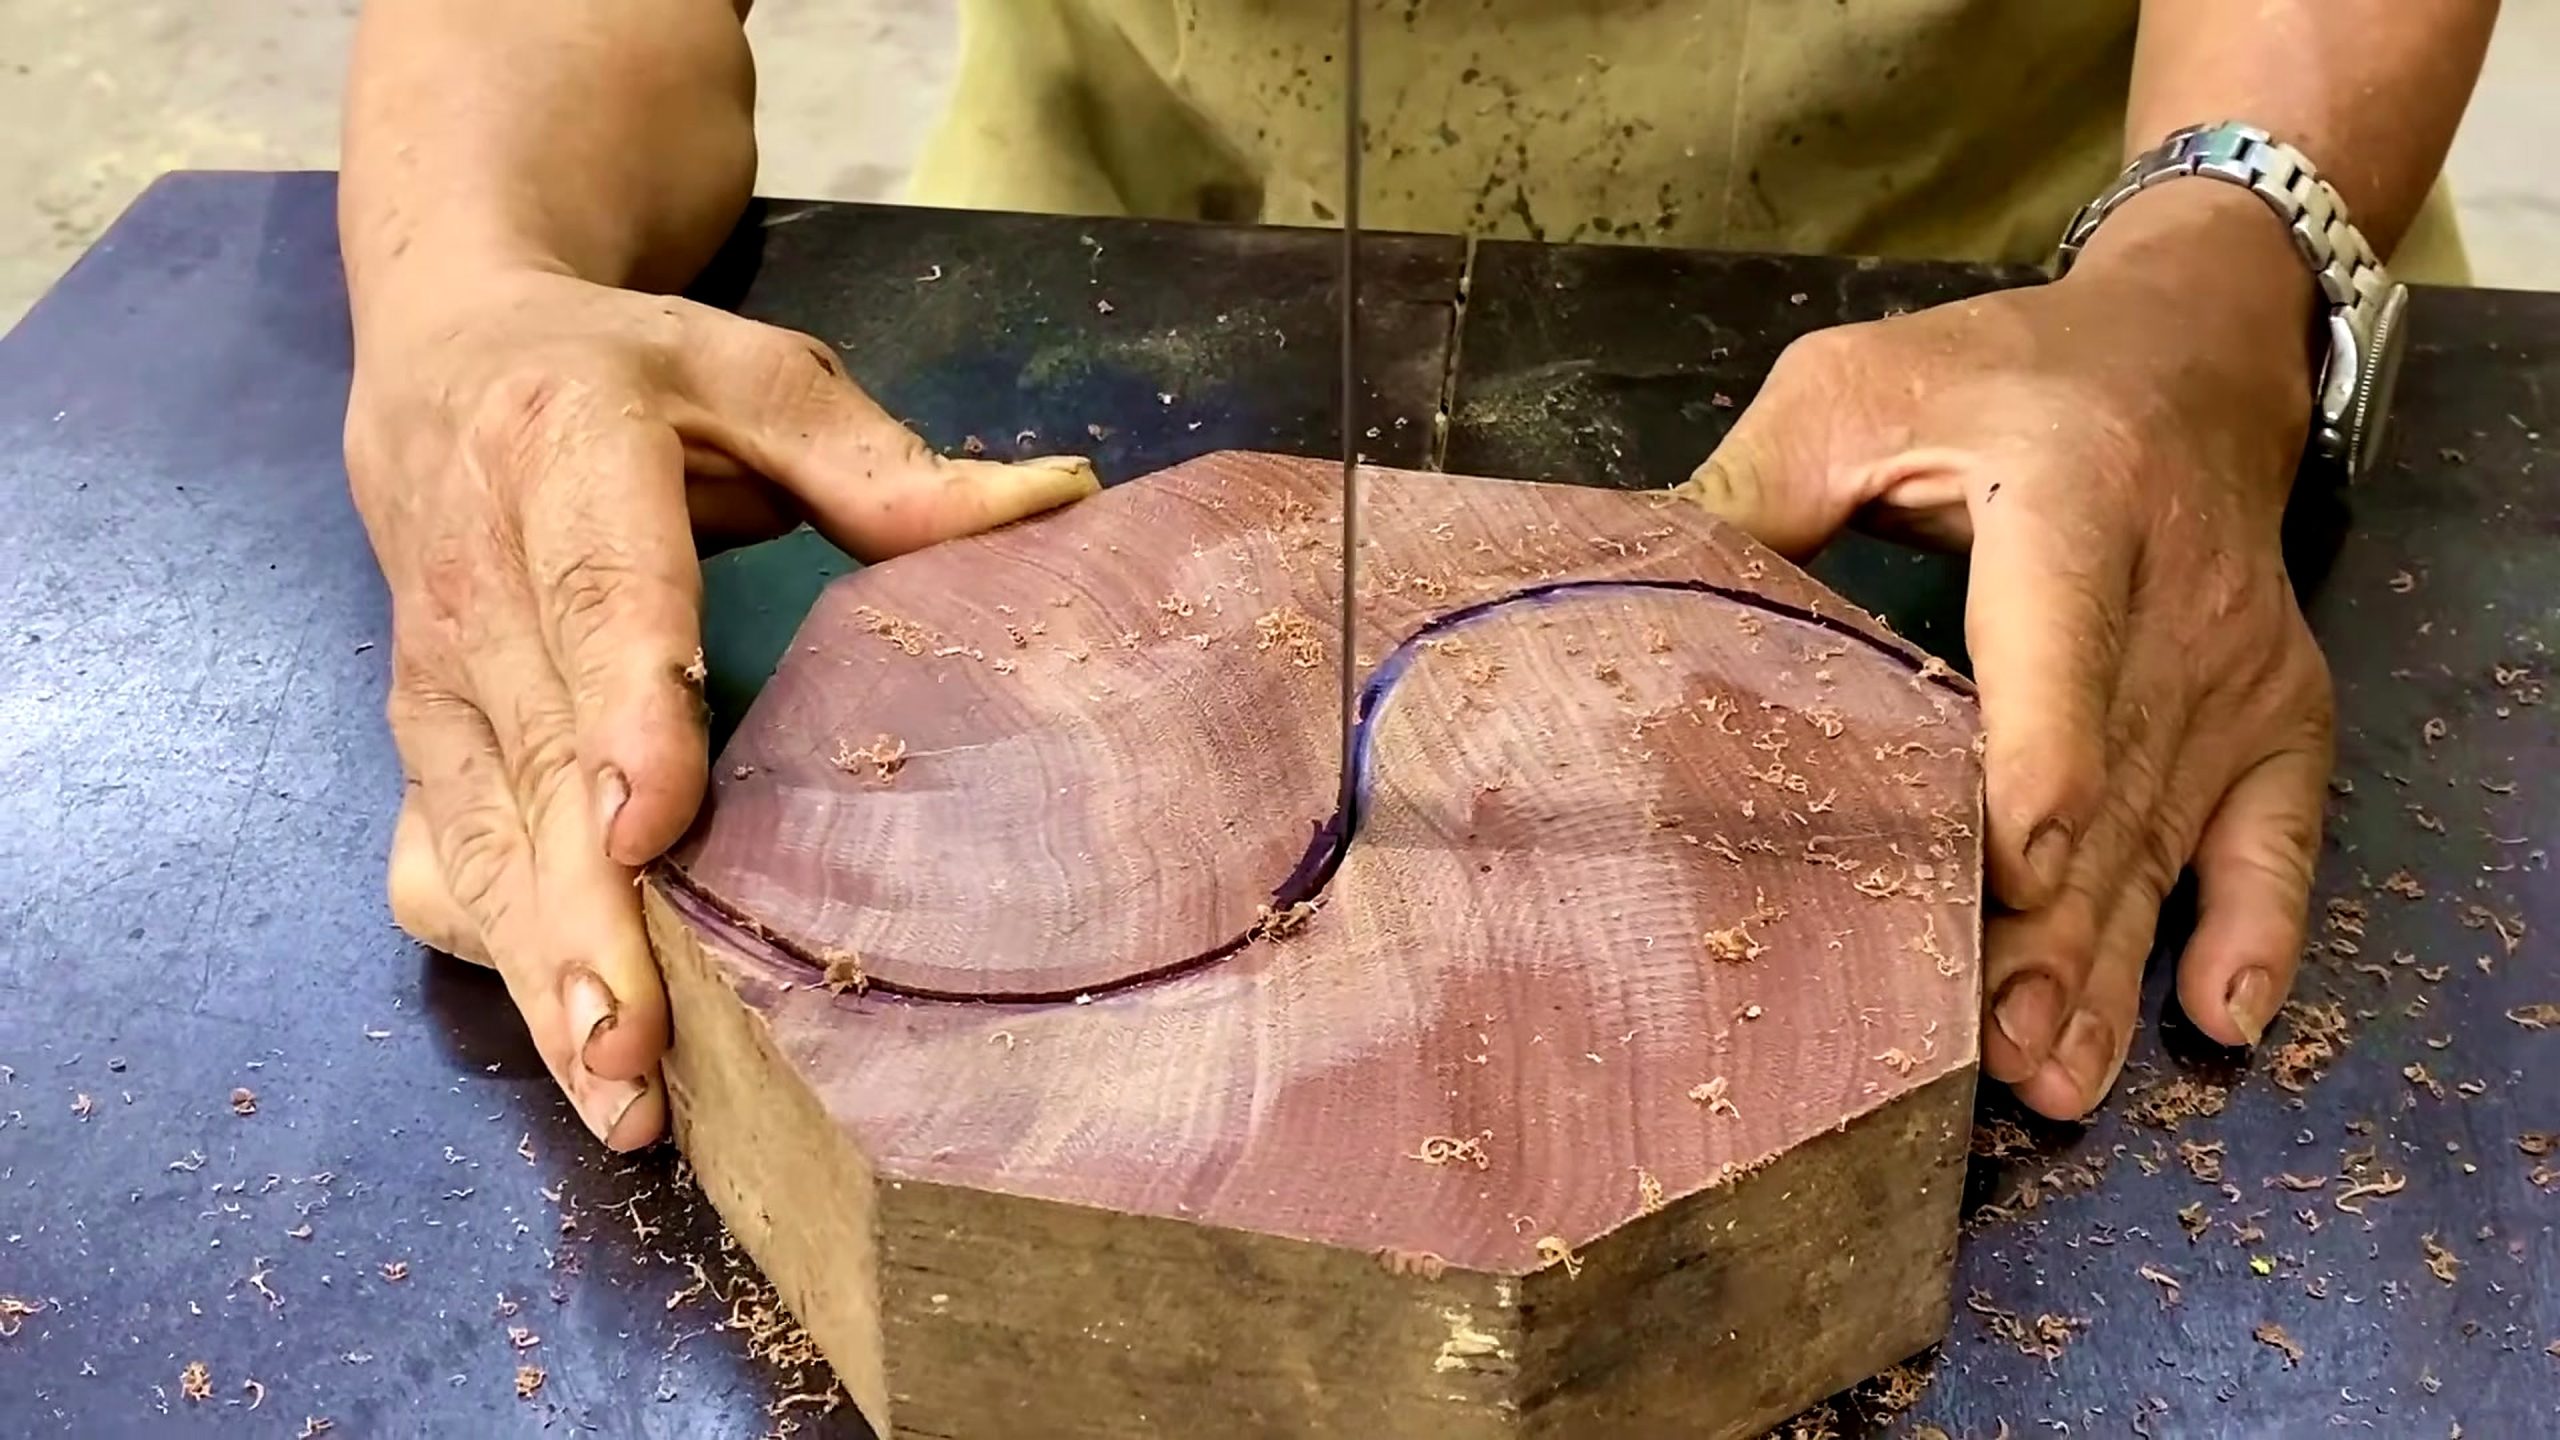
The source title promises surprising wood ideas, but the footage gives a more useful lesson: a round component is built by removing uncertainty one stage at a time. The first frame shows a thick block on a band saw table with a curved marker line already drawn across the face. The line is not decorative. It is the boundary that keeps the rough cut close enough for later turning while still leaving enough material to clean up the curve.
The block appears dense and heavy for its size. Its end-grain-like face shows curved growth or figure lines, but the video does not identify the species. The operator keeps both hands near the workpiece to guide the cut, which makes the safety lesson obvious: the safer path is to steer the block slowly and avoid forcing the blade into a tight radius. A bandsaw can cut curves, but it still needs room for the blade to clear waste.
The article angle is therefore not “a secret trick” or “a miracle result.” It is a disciplined sequence for turning an irregular block into a rotating wooden blank. Readers can inspect the visual evidence: marked circle, drill press work, band saw cleanup, a yellow-toned circular piece, lathe rotation, flying shavings, and a final edge being refined with a powered hand tool.
That sequence matters for search readers because many circular woodworking projects fail before finishing starts. If the center is wrong, the blank wobbles. If the rough cut is too far from the line, the lathe stage wastes time and creates more vibration. If the workpiece is not supported correctly, the tool can catch. The source video is useful because it shows several of those control points in order.
Accuracy in the wheel blank process depends on transferring the circle consistently before drilling or cutting changes the reference surface.
Circle Layout Before Cutting
A circular wooden part needs a clean layout before the first serious cut. In the opening frame, the dark marker line gives the operator a target radius. The block is not already round, so the first job is not finishing. It is waste removal. The bandsaw removes corners and bulk while preserving enough material outside the final line for later cleanup.
For a shop reader, the layout question is simple: where is the center, and how much extra material should stay outside the circle? Too little margin leaves no room to correct blade drift. Too much margin makes the lathe remove large interrupted corners, which can be rough on tools and bearings. The video appears to use a practical middle path: cut near the line, then refine after the blank can rotate.
The marked curve also protects the design intent. A round blank for a wheel, pulley-like part, jig, or decorative disk needs a balanced outside diameter. The source does not state the final product, so the safest wording is “wheel-like blank” rather than a guaranteed pulley, wheel, or furniture component. [GIA DINH – can xac nhan] Final use is not confirmed by the source footage.
Readers should notice the face orientation as well. The operator is not cutting from a random edge without a reference. The top face gives visibility. The line can be followed. The table supports the block. Those details may look basic, but they are the foundation of a clean circular part.
During the wheel blank process, the drill press reference helps the later lathe setup stay centered and easier to inspect.
Drilling, Centering, And Reference Points
The second process stage moves to a drill press. The video frame shows a vertical bit coming down near the workpiece while a rectangular board and a round yellow blank sit on the table. This moment suggests a centering or registration step rather than simple decoration. A round part that will later spin needs a reliable hole, pilot, or fixture reference.
A drill press is useful here because it gives vertical control. Hand drilling a thick round blank can wander, especially if the surface is uneven or the grain changes direction. A drill press helps keep the hole square to the face. If the center is meant to become a mounting point, that square relationship matters once the part reaches the lathe.
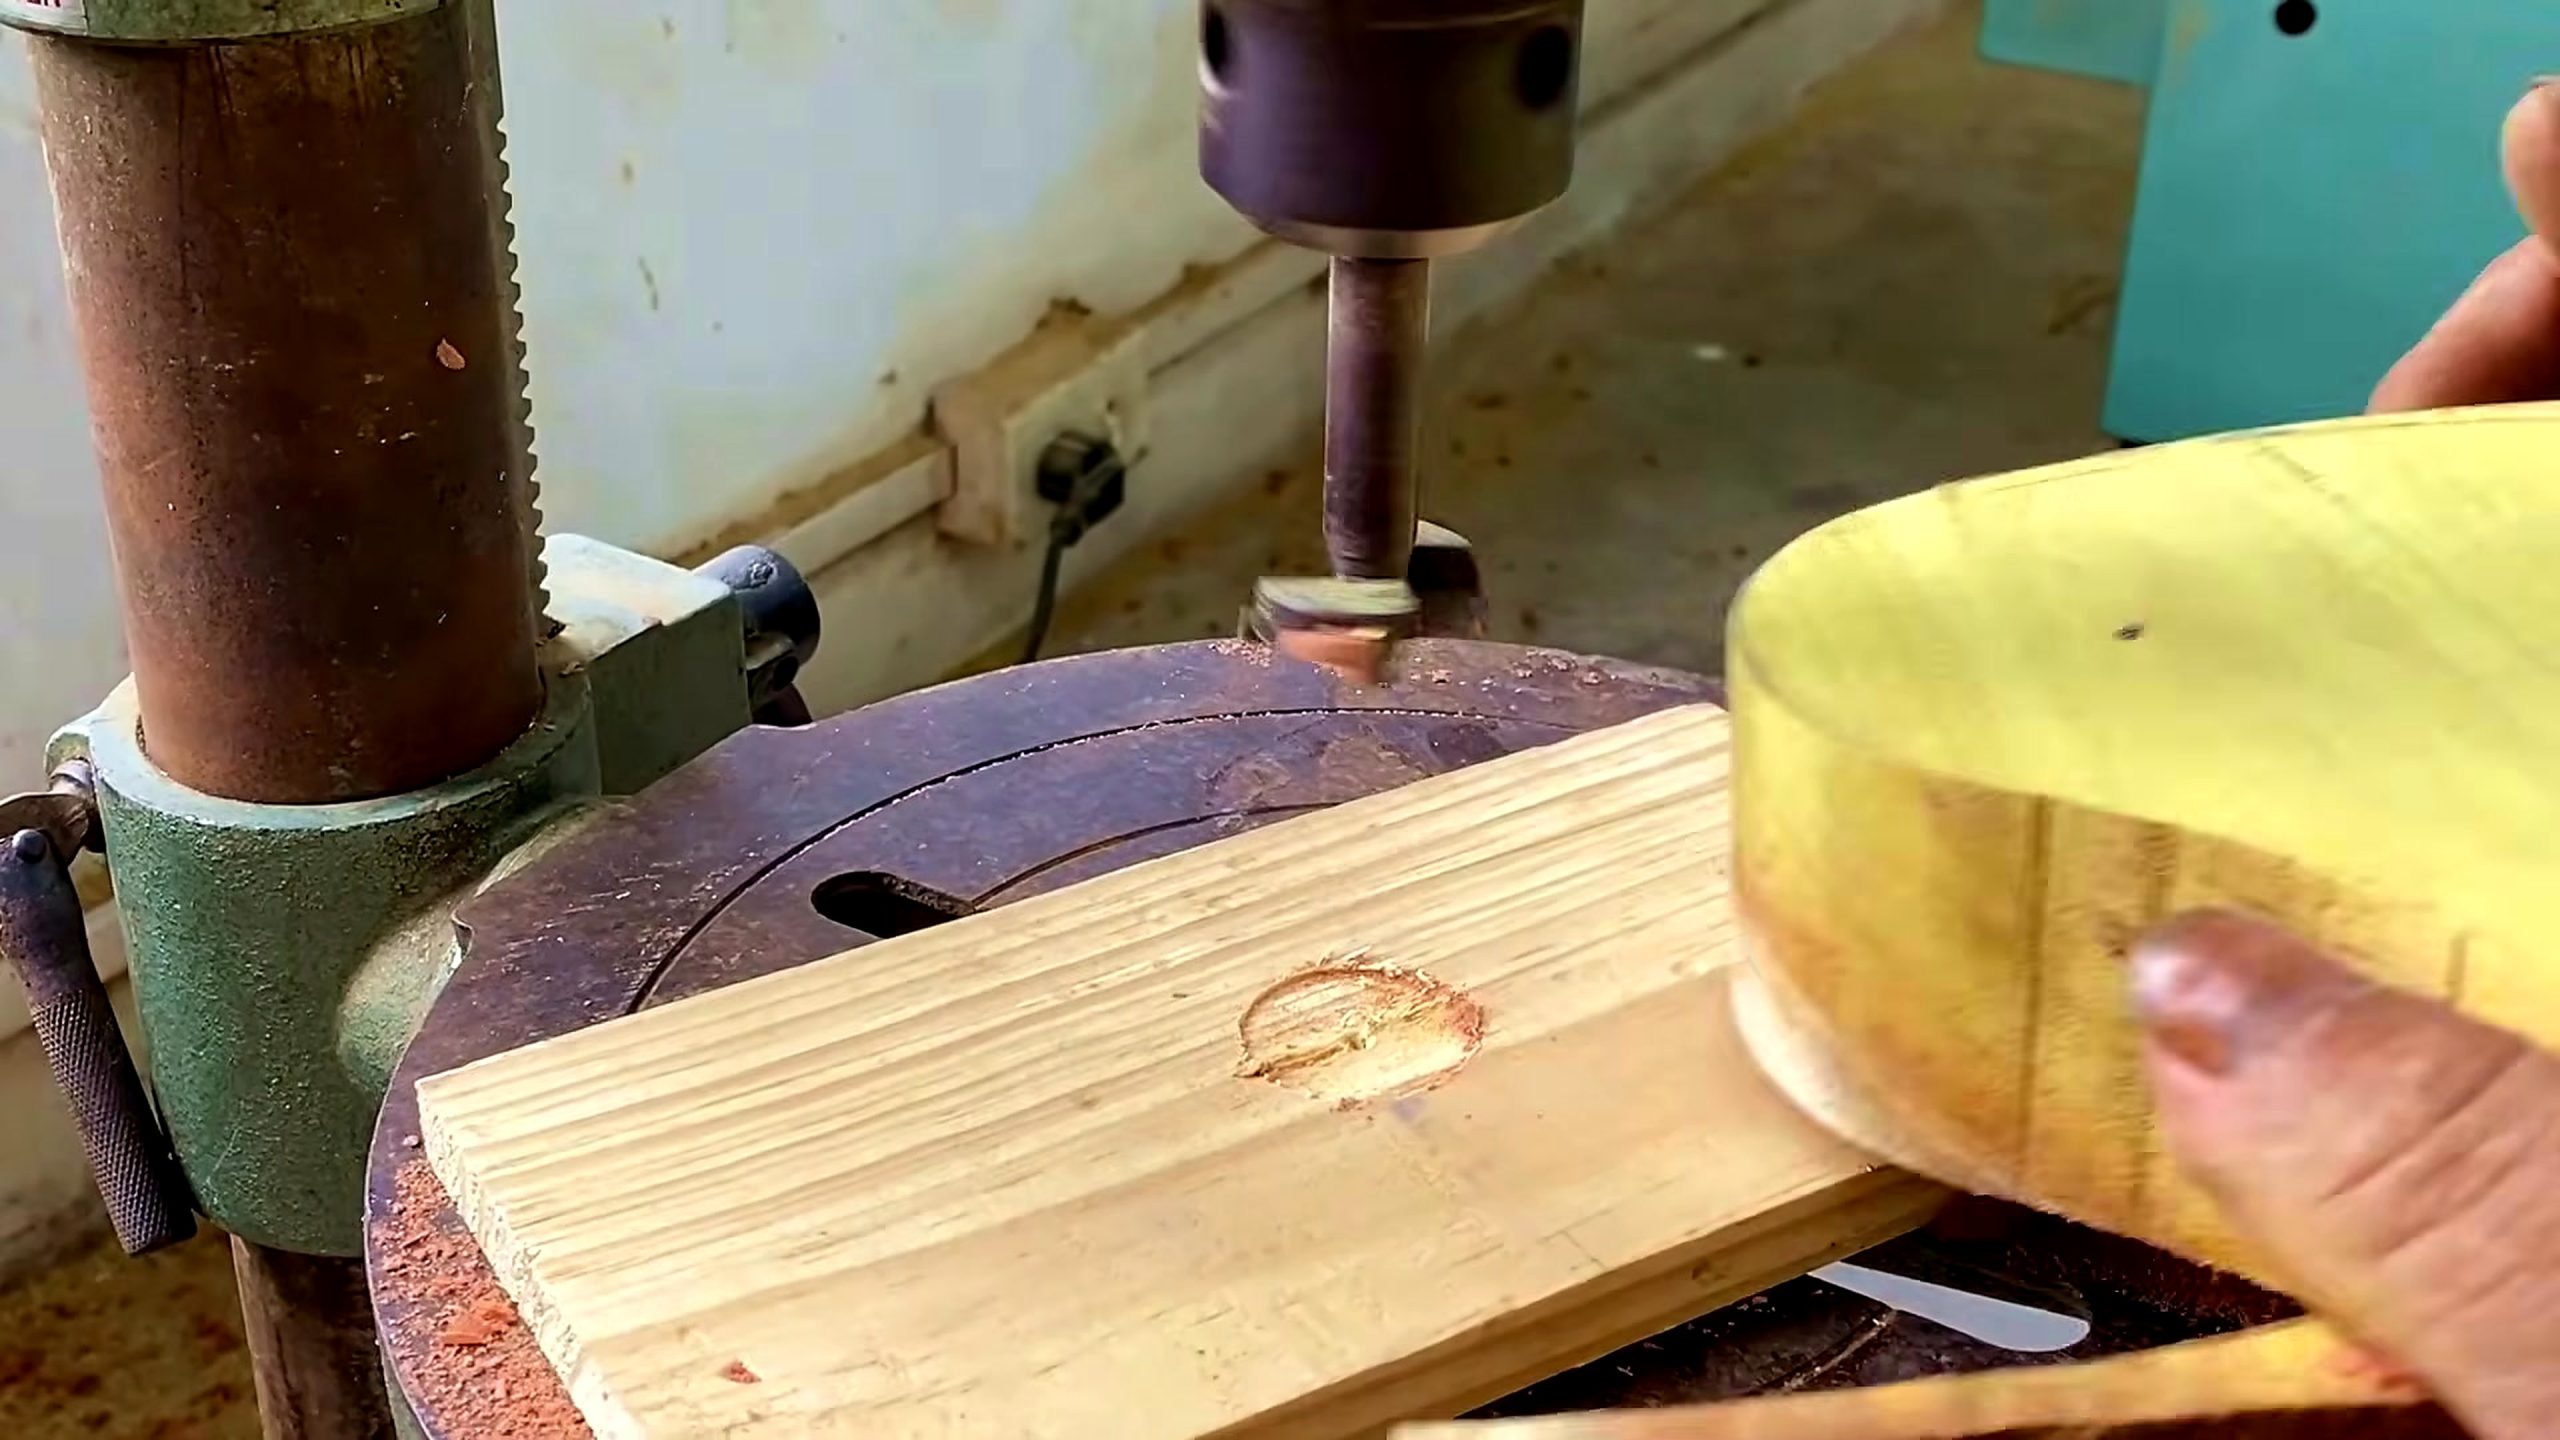
The visible board on the drill press table is also worth noting. It may act as sacrificial backing, a positioning aid, or simply support under the workpiece. The source does not explain it, so the article should not overclaim. What can be said is that the setup shows a controlled drilling environment rather than a casual handheld hole.
For readers planning a similar job, this is a good point to pause. Before drilling, confirm the center mark, clamp or brace the work where practical, keep hands away from the bit path, and use a backing board if tear-out would weaken the part. The video moves quickly, but the real workshop decision is slow: establish a center that will survive the rest of the process.
The band saw stage of the wheel blank process removes corners without crossing the marked circle. That wheel blank process step reduces imbalance before turning.
Band Saw Control For A Round Blank
The third frame shows a yellow-toned blank being cut along a curved path on the band saw. A metal disk or template-like shape is visible on top of the workpiece, and the operator’s hand is close to the line. This is one of the most important visual moments because the saw is following a radius, not a straight rip.
Cutting a circle on a band saw is different from cutting a board to width. The blade must be allowed to turn without twisting too hard. The waste side needs relief. The operator has to feed slowly enough that the blade does not burn, chatter, or drift inside the line. When the curve gets tight, pushing faster usually makes the cut worse.
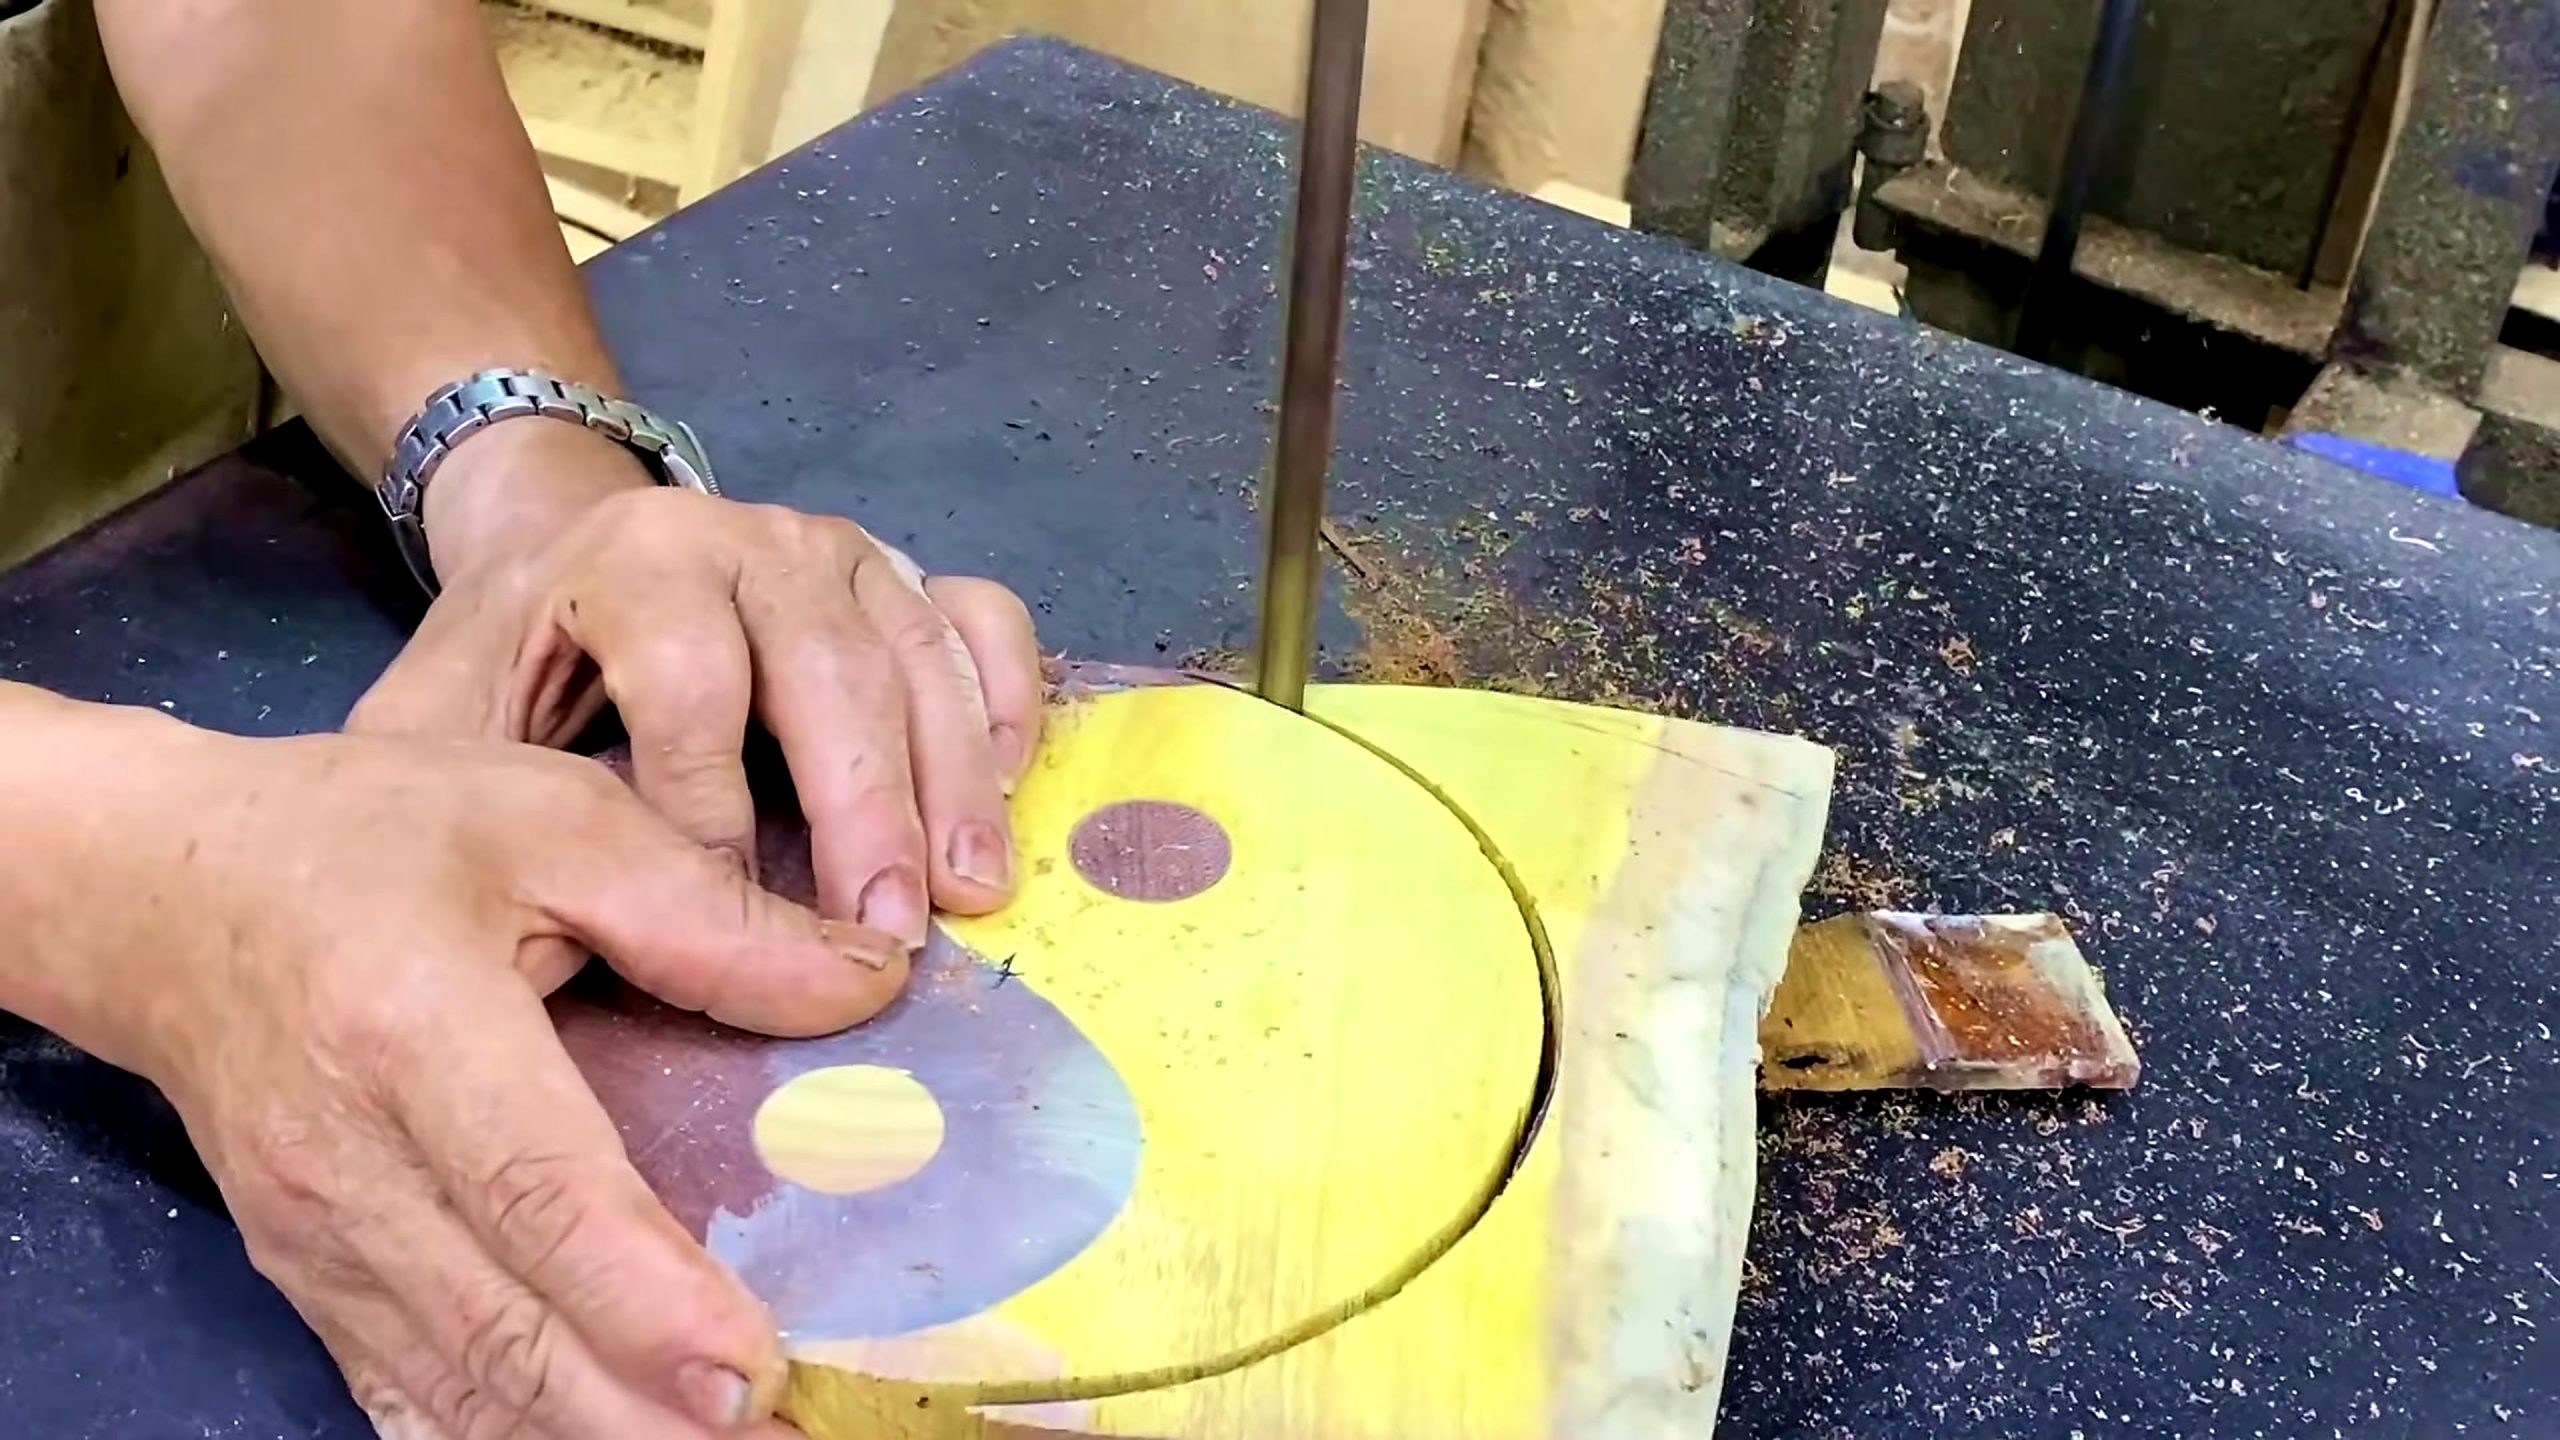
The useful reader takeaway is that the bandsaw does not need to create the finished surface. It needs to create a balanced rough circle. Leaving a thin cleanup margin gives the lathe and sanding steps something to correct. Cutting exactly to the finished line on a thick workpiece is tempting, but one small drift can make the finished diameter uneven.
This is also where hand safety needs plain language. The video shows close manual control, but a reader should not copy hand placement blindly. A push stick, clamp, circle-cutting jig, or safer fixture may be the better choice depending on the blank size and machine. Tecatool does not treat the source video as a universal safety manual. It treats it as visible process evidence.
Lathe work in the wheel blank process should begin conservatively, with speed and tool contact adjusted to the remaining imbalance.
Lathe Shaping And Edge Cleanup
After the rough circle is made, the source video shifts to a lathe-like setup. The round blank spins, yellow shavings fly, and a cutting tool works near the edge. This is the point where the part becomes more than a sawn disk. The lathe can true the outside diameter, smooth the face, and create an edge profile that a bandsaw cannot finish cleanly.
The spinning frame shows why earlier centering mattered. Any error at the drill or mounting stage becomes visible as wobble. A balanced blank cuts more smoothly. An off-center blank makes the tool strike harder on one side than the other. That difference can show up as vibration, chatter marks, uneven grooves, or a surface that takes much longer to sand.
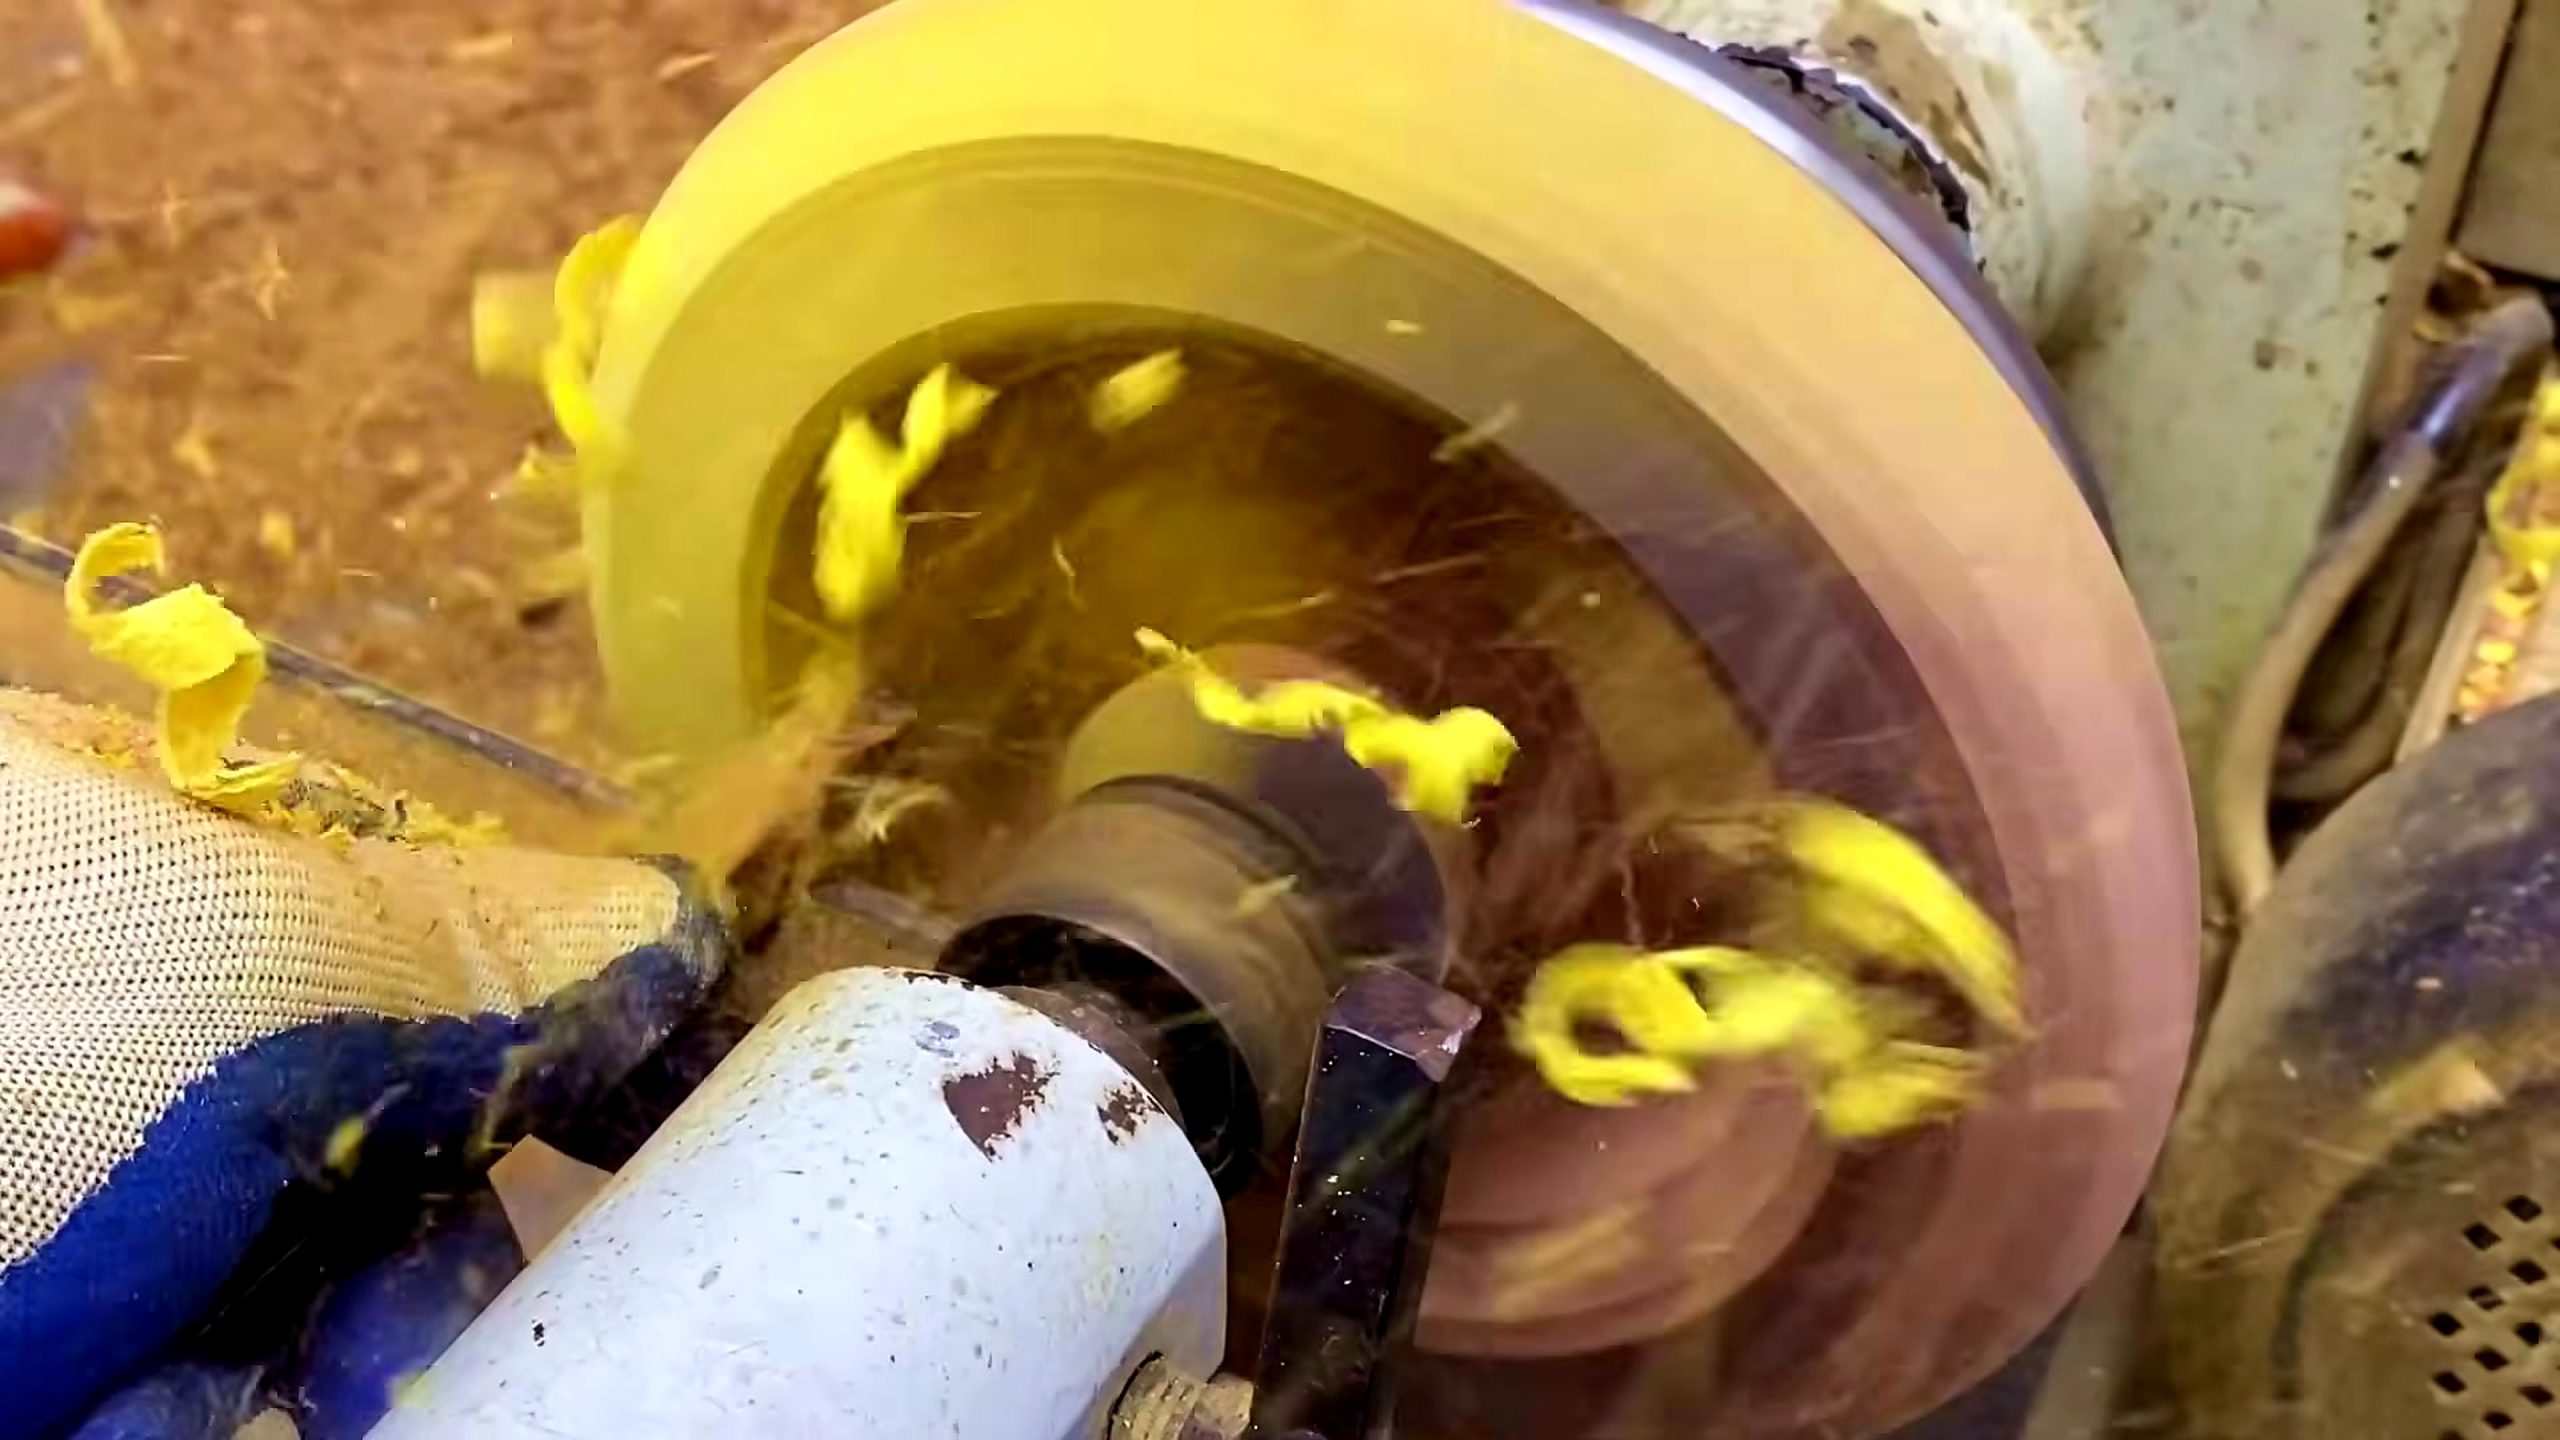
In the frame, the outer rim appears to be rounded or shaped into a smoother profile. It may be a decorative rim, a functional groove, or simply a cleanup pass. The video does not label the final purpose, so this article keeps the description tied to the visible profile rather than naming an exact product.
For readers, the broader lesson is tool sequencing. The bandsaw creates the rough geometry. The drill press establishes alignment. The lathe creates roundness and edge quality. A hand grinder or sander then corrects the surface. Each tool has a job. Problems happen when one tool is asked to do another tool’s work, such as expecting a bandsaw to leave a finished rim or expecting sanding to fix a badly off-center mount.
Sanding completes the wheel blank process only after the rotating part is stable enough for controlled surface contact.
Sanding And Final Surface Check
The final source frame shows the spinning round part against a handheld powered tool. The tool appears to be used for sanding, polishing, or abrasive cleanup on the rim and face. This step is not glamorous, but it is where a rough turning begins to look intentional. Tool marks, fuzzy grain, uneven edges, and small high spots become easier to see as the surface smooths out.
The operator’s glove and the close tool position make another safety point: rotating workpieces can catch loose material or pull tools if pressure is careless. Readers should treat this as a reason to learn the correct safety guidance for their own lathe, grinder, sanding pad, and workholding method. The source video shows a workflow, not a substitute for machine-specific instruction.
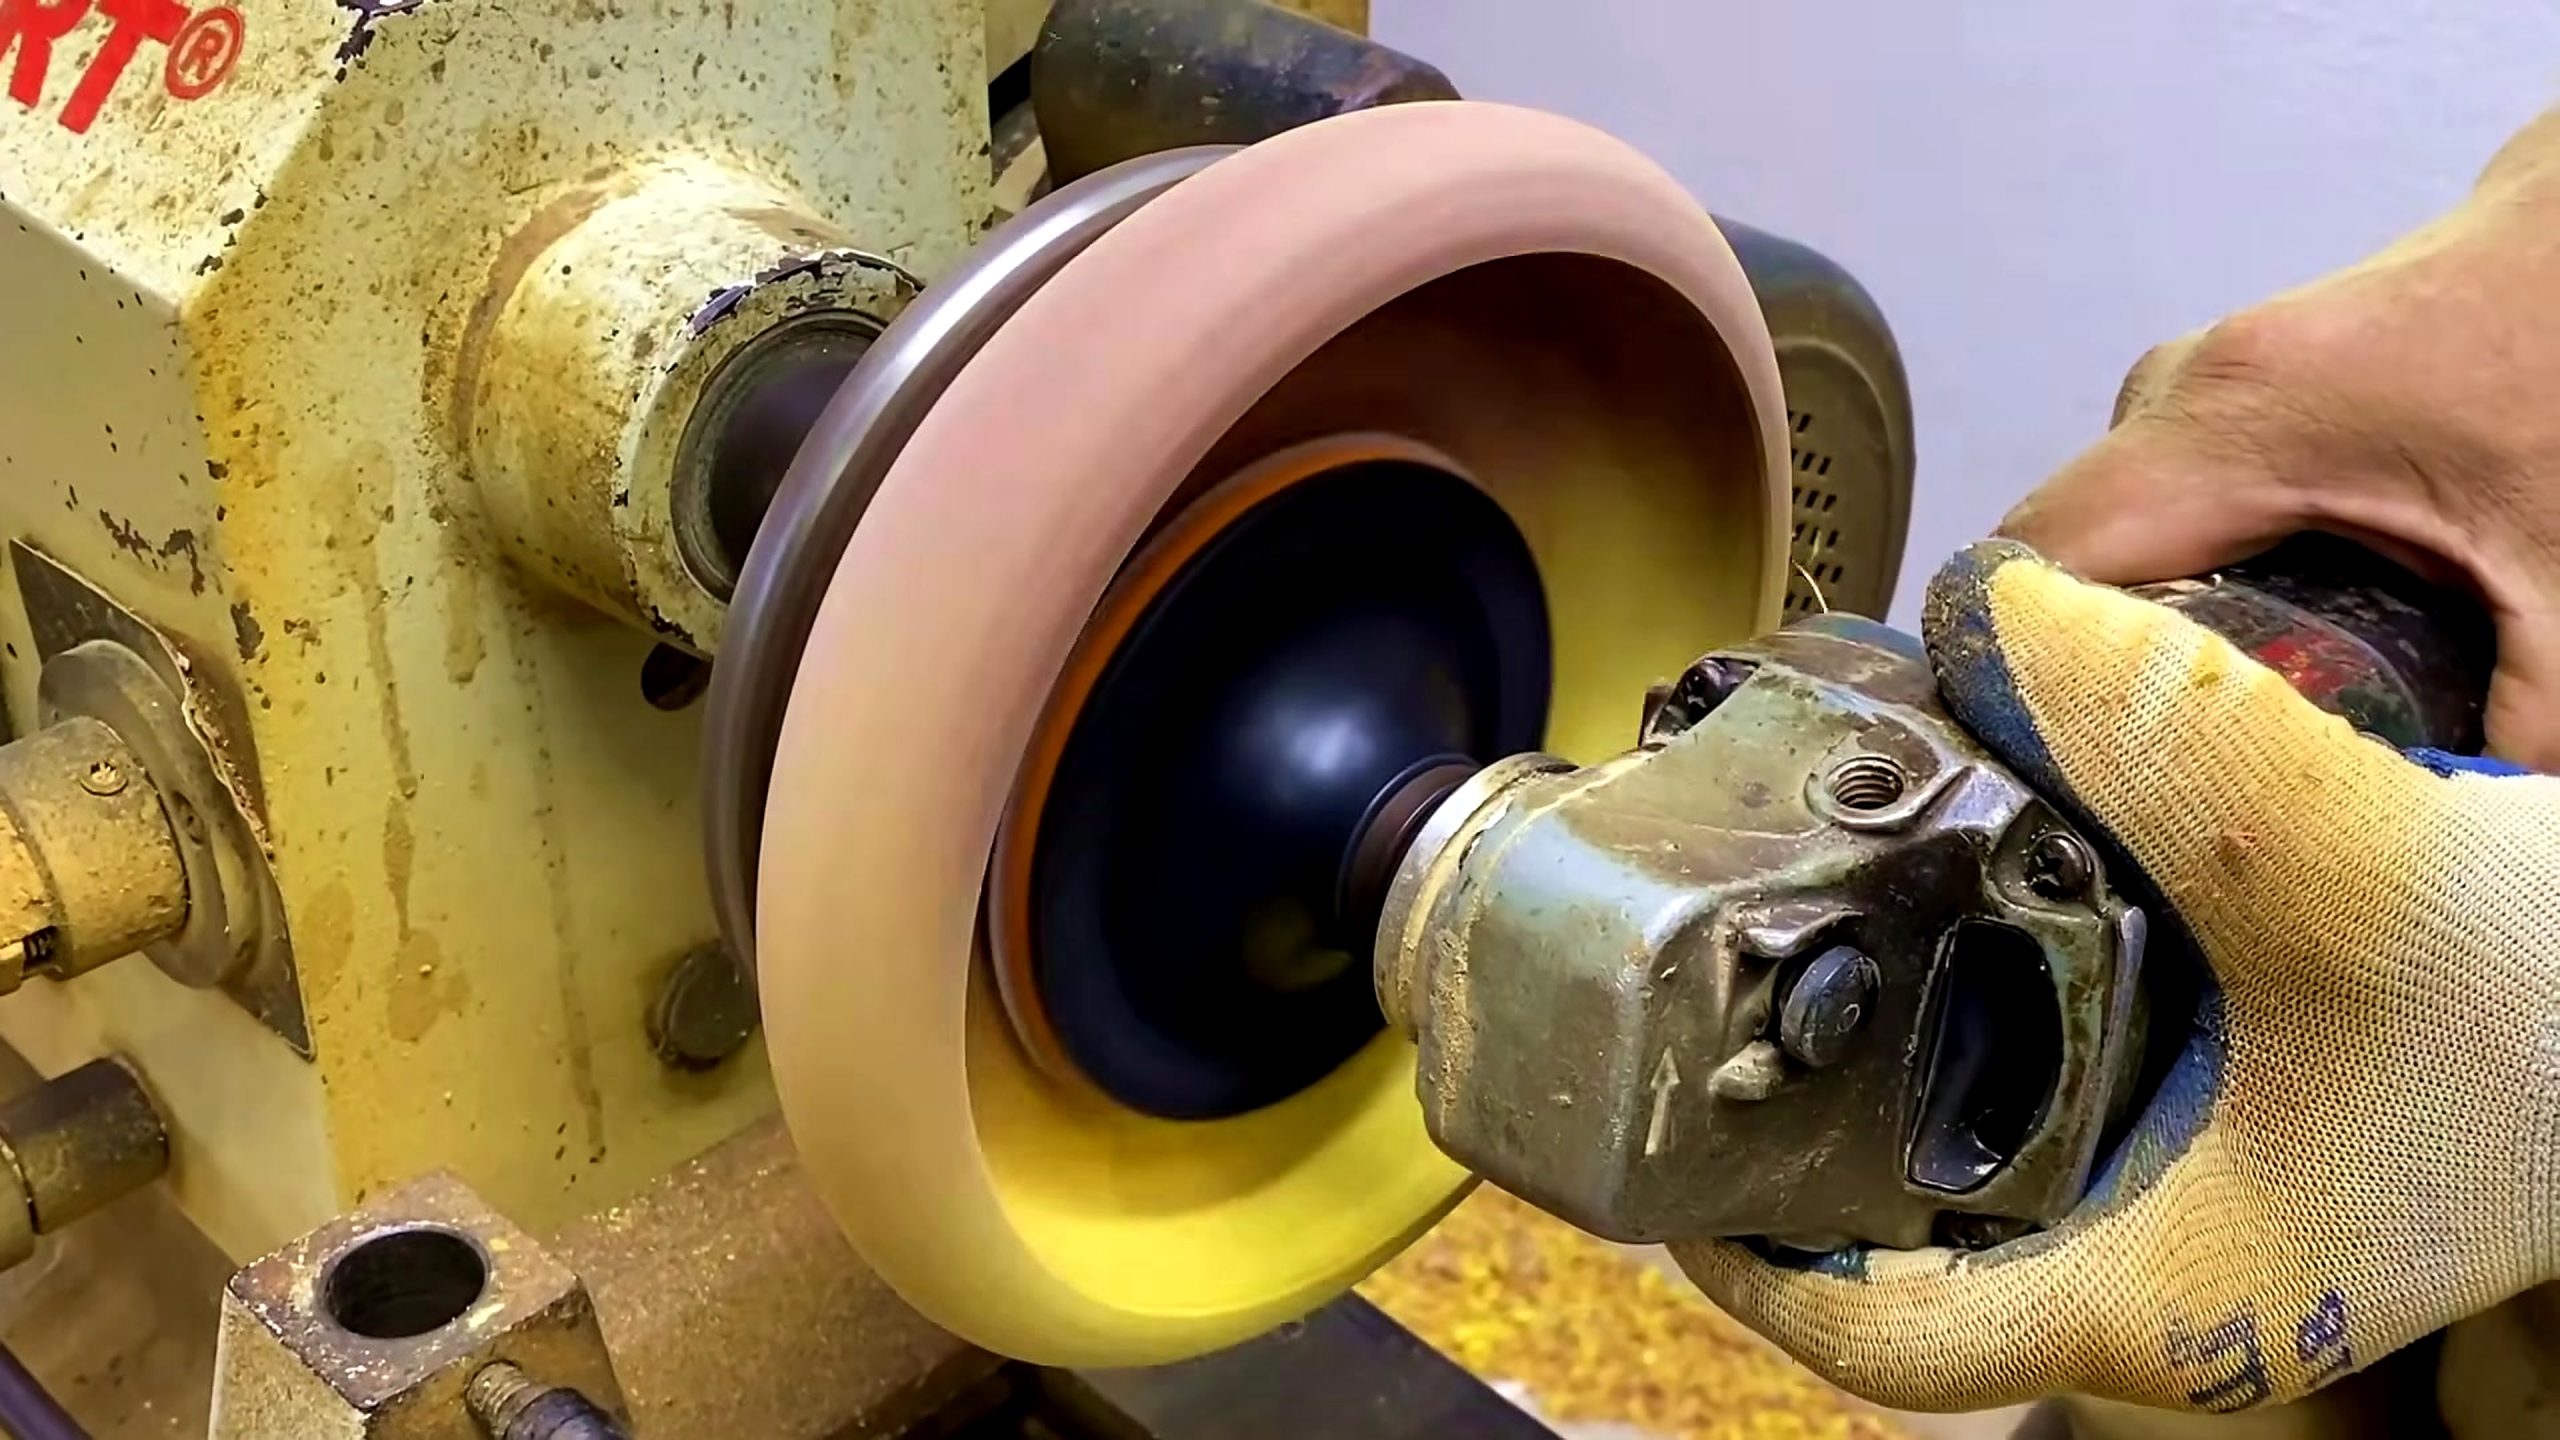
Surface cleanup also reveals whether the earlier stages were accurate. If the bandsaw cut stayed close and the center held true, sanding is a finishing process. If the earlier stages were sloppy, sanding becomes a rescue process and may change the final shape. That is why the article keeps returning to sequence: the final surface is the result of every step before it.
For buyers and workshop planners, this is where tool quality matters. A clean lathe mount, sharp tools, stable drill press table, appropriate bandsaw blade, and controlled sanding setup all reduce rework. Readers comparing equipment can explore Tecatool woodworking tool guides and setup notes before deciding which tools fit their own projects.
Readers following the wheel blank process should treat guards, work holding, blade clearance, and eye protection as prerequisites.
Tool Checklist For Readers
A reader who wants to understand this source video can use the following checklist without copying the build blindly. First, identify the intended round part and confirm whether the blank is thick enough for the desired profile. Second, mark the circle and center clearly. Third, remove outside waste on the bandsaw while leaving a cleanup margin. Fourth, drill or register the center squarely. Fifth, mount the blank securely before turning. Sixth, true the rim slowly. Seventh, sand or polish only after the shape is stable.
The checklist is useful because it changes the source from entertainment into a practical review. Instead of asking “what trick did the craftsman use,” the better question is “which reference did each tool create for the next tool?” The band saw creates the rough circle. The drill press creates alignment. The lathe creates rotational accuracy. The grinder or sander creates final surface quality.
That order is also a way to judge similar videos. If a video jumps from a rough block to a perfect round object without showing layout, center reference, or cleanup, readers should be cautious. It may still be real, but it gives less process value. This source is stronger because the selected frames show multiple stages that can be checked independently.
Commercial context matters too. A hobbyist may only need a small benchtop lathe and careful jig work. A professional shop may need stronger dust control, more stable workholding, better blades, and repeatable templates. The article does not recommend a specific brand or price because the source video does not provide a product list. It does, however, point readers toward the tool categories they need to compare: band saw, drill press, lathe, abrasive finishing, layout tools, and safety support.
The source limits of this wheel blank process matter because the footage does not verify species, final dimensions, or the finished product use.
Source Limits And Unconfirmed Details
The source footage does not confirm the wood species. The purple and yellow tones may come from different woods, finish, stain, lighting, or previous preparation. The source footage does not confirm dimensions. It does not provide a measured outside diameter, thickness, final balance tolerance, or target use. It also does not state whether the round part becomes a shop jig, pulley-like wheel, decorative disk, furniture component, or demonstration piece.
[GIA DINH – can xac nhan] If this part is a functional wheel or pulley, the final build would need additional checks that are not visible in the selected frames: bore accuracy, balance, load rating, bearing fit, fastener method, and long-term wear surface. Because those details are not shown, the article does not claim them as facts.The safe conclusion is narrower and more useful: the video demonstrates a woodworking method for transforming a thick block into a centered, rounded, wheel-like blank through a staged tool workflow. That conclusion is supported by the visible frames and does not require invented claims about price, age, species, or performance.
This source limit section is important for Google and AI citation. A citation system should be able to tell what the page knows, what the video shows, and what remains unconfirmed. The article gives direct source URL, video ID, visible stages, image evidence, and a short FAQ so search engines and AI readers can summarize it without turning assumptions into facts.
This wheel blank process analysis separates visible operations from unverified claims. The wheel blank process remains a practical sequence, not a promise of identical results.
SEO And Helpful-Content Summary
The opening answer is direct: this is a source-based explanation of a round wooden blank workflow, not a claim that the final product has a verified market price or species. The article adds value by naming the visible steps, explaining why the order matters, and warning readers where the source does not provide enough information.
The focus keyword appears in the title, slug, first paragraph, image alt text, captions, body sections, and FAQ. The search intent is practical: readers looking for unusual woodworking ideas can see how a band saw, drill press, lathe, and sanding tool work together. Readers looking for buying context can use the archive link to compare woodworking tool categories instead of relying on a single video.
The page also includes a visible source video embed, source paragraph, real frames from the exact video, FAQPage schema, Article schema, BreadcrumbList schema, and internal Tecatool links. Those elements support Google indexing, snippet extraction, rich result eligibility, and AI citation because the article is clear about its source and scope.
Questions about the wheel blank process should be answered from the visible layout, cutting, drilling, turning, and finishing stages.
FAQ
What does discover unbelievable ways work wood ideas show in this source video?
It shows a thick wood block being turned into a round wheel-like blank through marking, band saw cutting, drill press reference work, lathe shaping, and powered surface cleanup.
Does the source video confirm the exact wood species?
No. The footage shows colored and figured wood surfaces, but it does not confirm species, dimensions, final price, or the final use of the round part.
What tool sequence matters most in the video?
The useful sequence is layout first, rough circle cutting second, center/reference drilling third, lathe truing fourth, and sanding or polishing after the blank spins cleanly.
Can readers copy this project directly?
Readers should treat it as a process reference, not a complete safety manual. Actual projects need proper machine guards, workholding, blade choice, dust control, and tool-specific instruction.
Why is this Tecatool article different from a generic woodworking summary?
It is tied to video ID ZeVVbd2duUY and describes the exact visible stages: marked circular cut, drill press setup, band saw curve cutting, lathe shavings, and powered rim cleanup.
The final wheel blank process reference is the embedded source video, which lets readers compare each described step with the original footage.
Original source: watch the source video on YouTube.
Source Video
Sources: Factory Wood Sawmill, “Discover Unbelievable Ways to Work with Wood – Ideas Many People Have Never Thought Of Before!!,” YouTube, video ID ZeVVbd2duUY, accessed 2026-07-28. Internal context: Tecatool woodworking archive and source-video process coverage.