
weathered giant timber round table process turns a rough squared block into a documented salvage case: the stock is lifted and inspected, a figured face is exposed, a vertical bandsaw reduces the timber, a thick circular blank is sanded, and liquid finish changes the visible color. The frames verify that sequence, but not species, age, price, moisture, dimensions, machine settings, or coating chemistry.
The evidence comes from Massive Wood Workshop video v3Fil562q2o, a 1920×1080 source file, five distinct timestamps, a frame manifest, and a contact sheet. The analysis answers what the footage can teach a buyer or shop without treating the source title’s dramatic wording as independent proof.
Table of Contents
Weathered Giant Timber Round Table Process: Direct Answer
The selected source frames show a weathered squared timber block being handled, a broad figured face after material removal, a supported pass at a blue vertical bandsaw, abrasive work on a thick circular top, and liquid finish spread across the completed surface. Together, those stages explain how an unpromising exterior can become a round tabletop, while leaving species, age, market value, dimensions, moisture content, and coating chemistry unverified.
The useful lesson is not that every discolored or checked timber hides valuable figure. It is that salvage decisions should be delayed until a controlled opening face, internal defects, geometry, moisture, and usable yield can be inspected. The source title calls the timber rotten-looking and names the largest wood factory, but the footage package does not independently document rot classification, factory ranking, origin, ownership, or price. This article therefore treats those phrases as source framing rather than established facts.
For a woodworker, sawmill operator, or buyer, the sequence creates a practical decision map. Stabilize and document the stock first. Open a reference face without committing the whole log to one design. Compare attractive grain with checks, soft zones, distortion, and remaining thickness. Only then plan the circular blank, surface it, refine the edge, test a finish, and decide whether the material is suitable for its intended use.
Five Source Frames That Define The Salvage Story
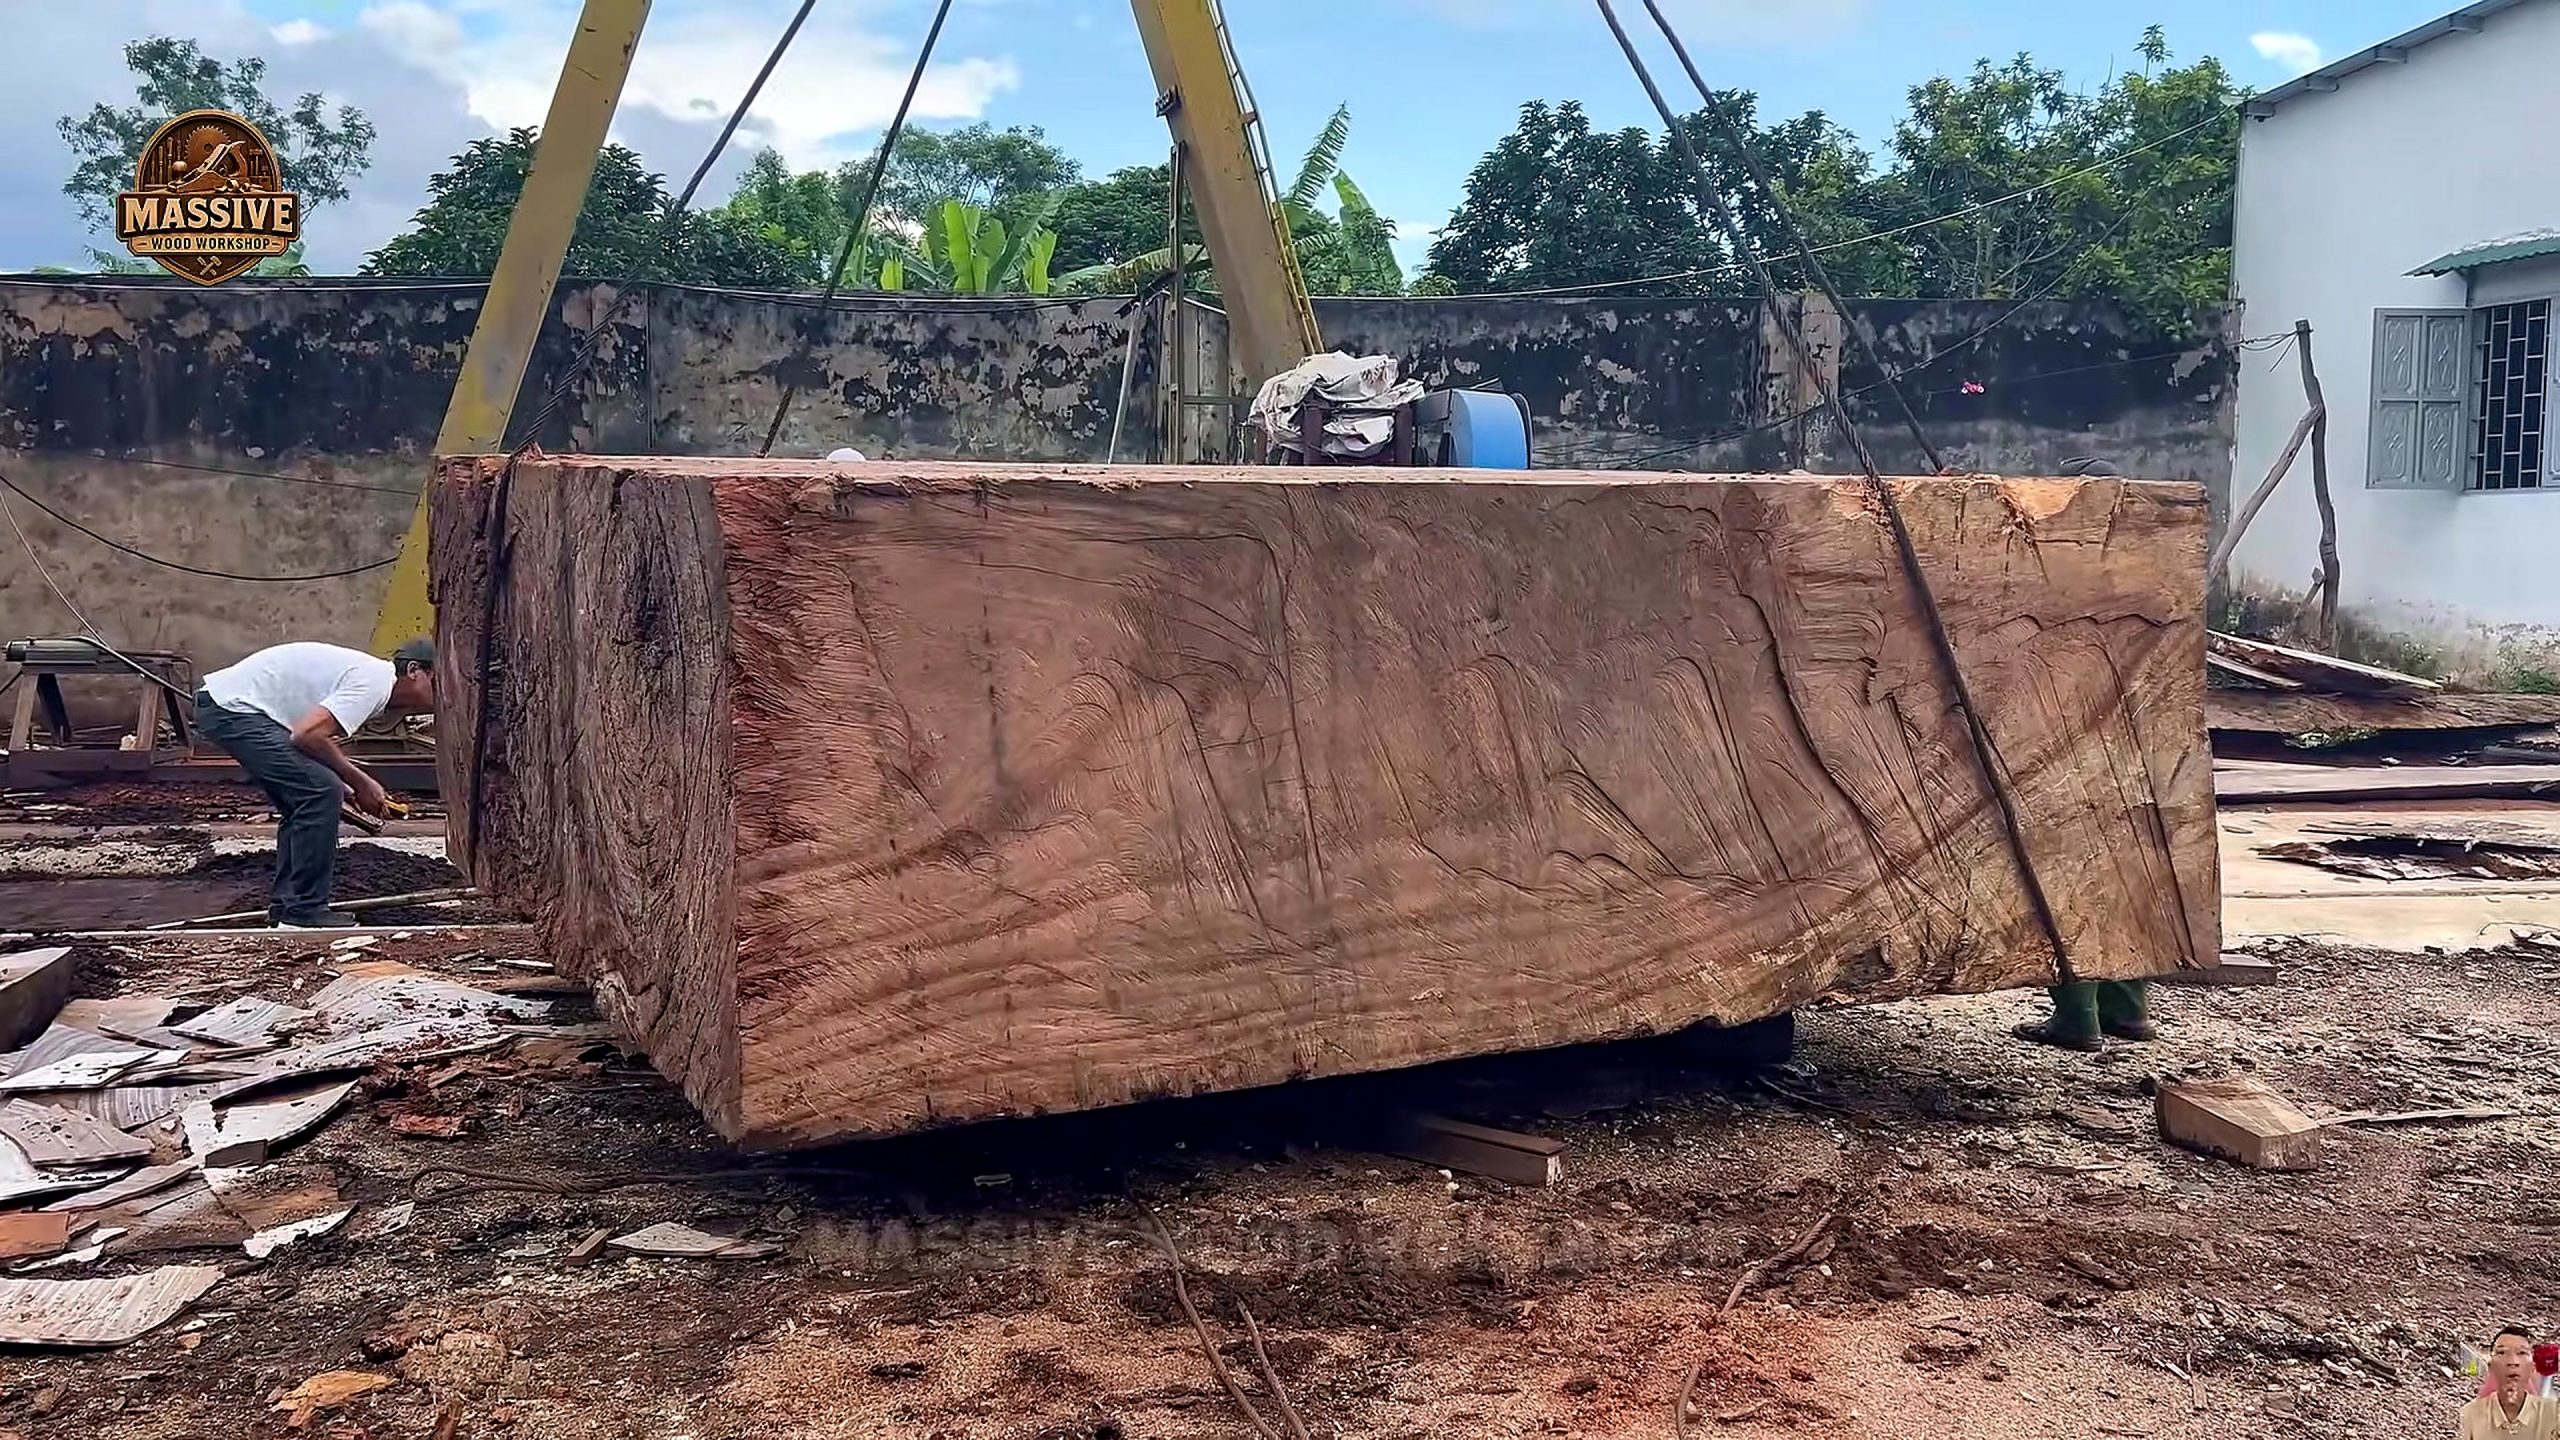
At 218.37 seconds, a large squared block hangs outdoors from lifting equipment. Its outer face is weathered, irregular, and visibly checked, while a lighter end area gives the first useful look at the mass inside. This frame supports statements about scale, lifting, surface condition, and intake uncertainty. It does not establish whether the darker exterior is biological decay, staining, dirt, oxidation, old finish, fire exposure, or a mixture of conditions.
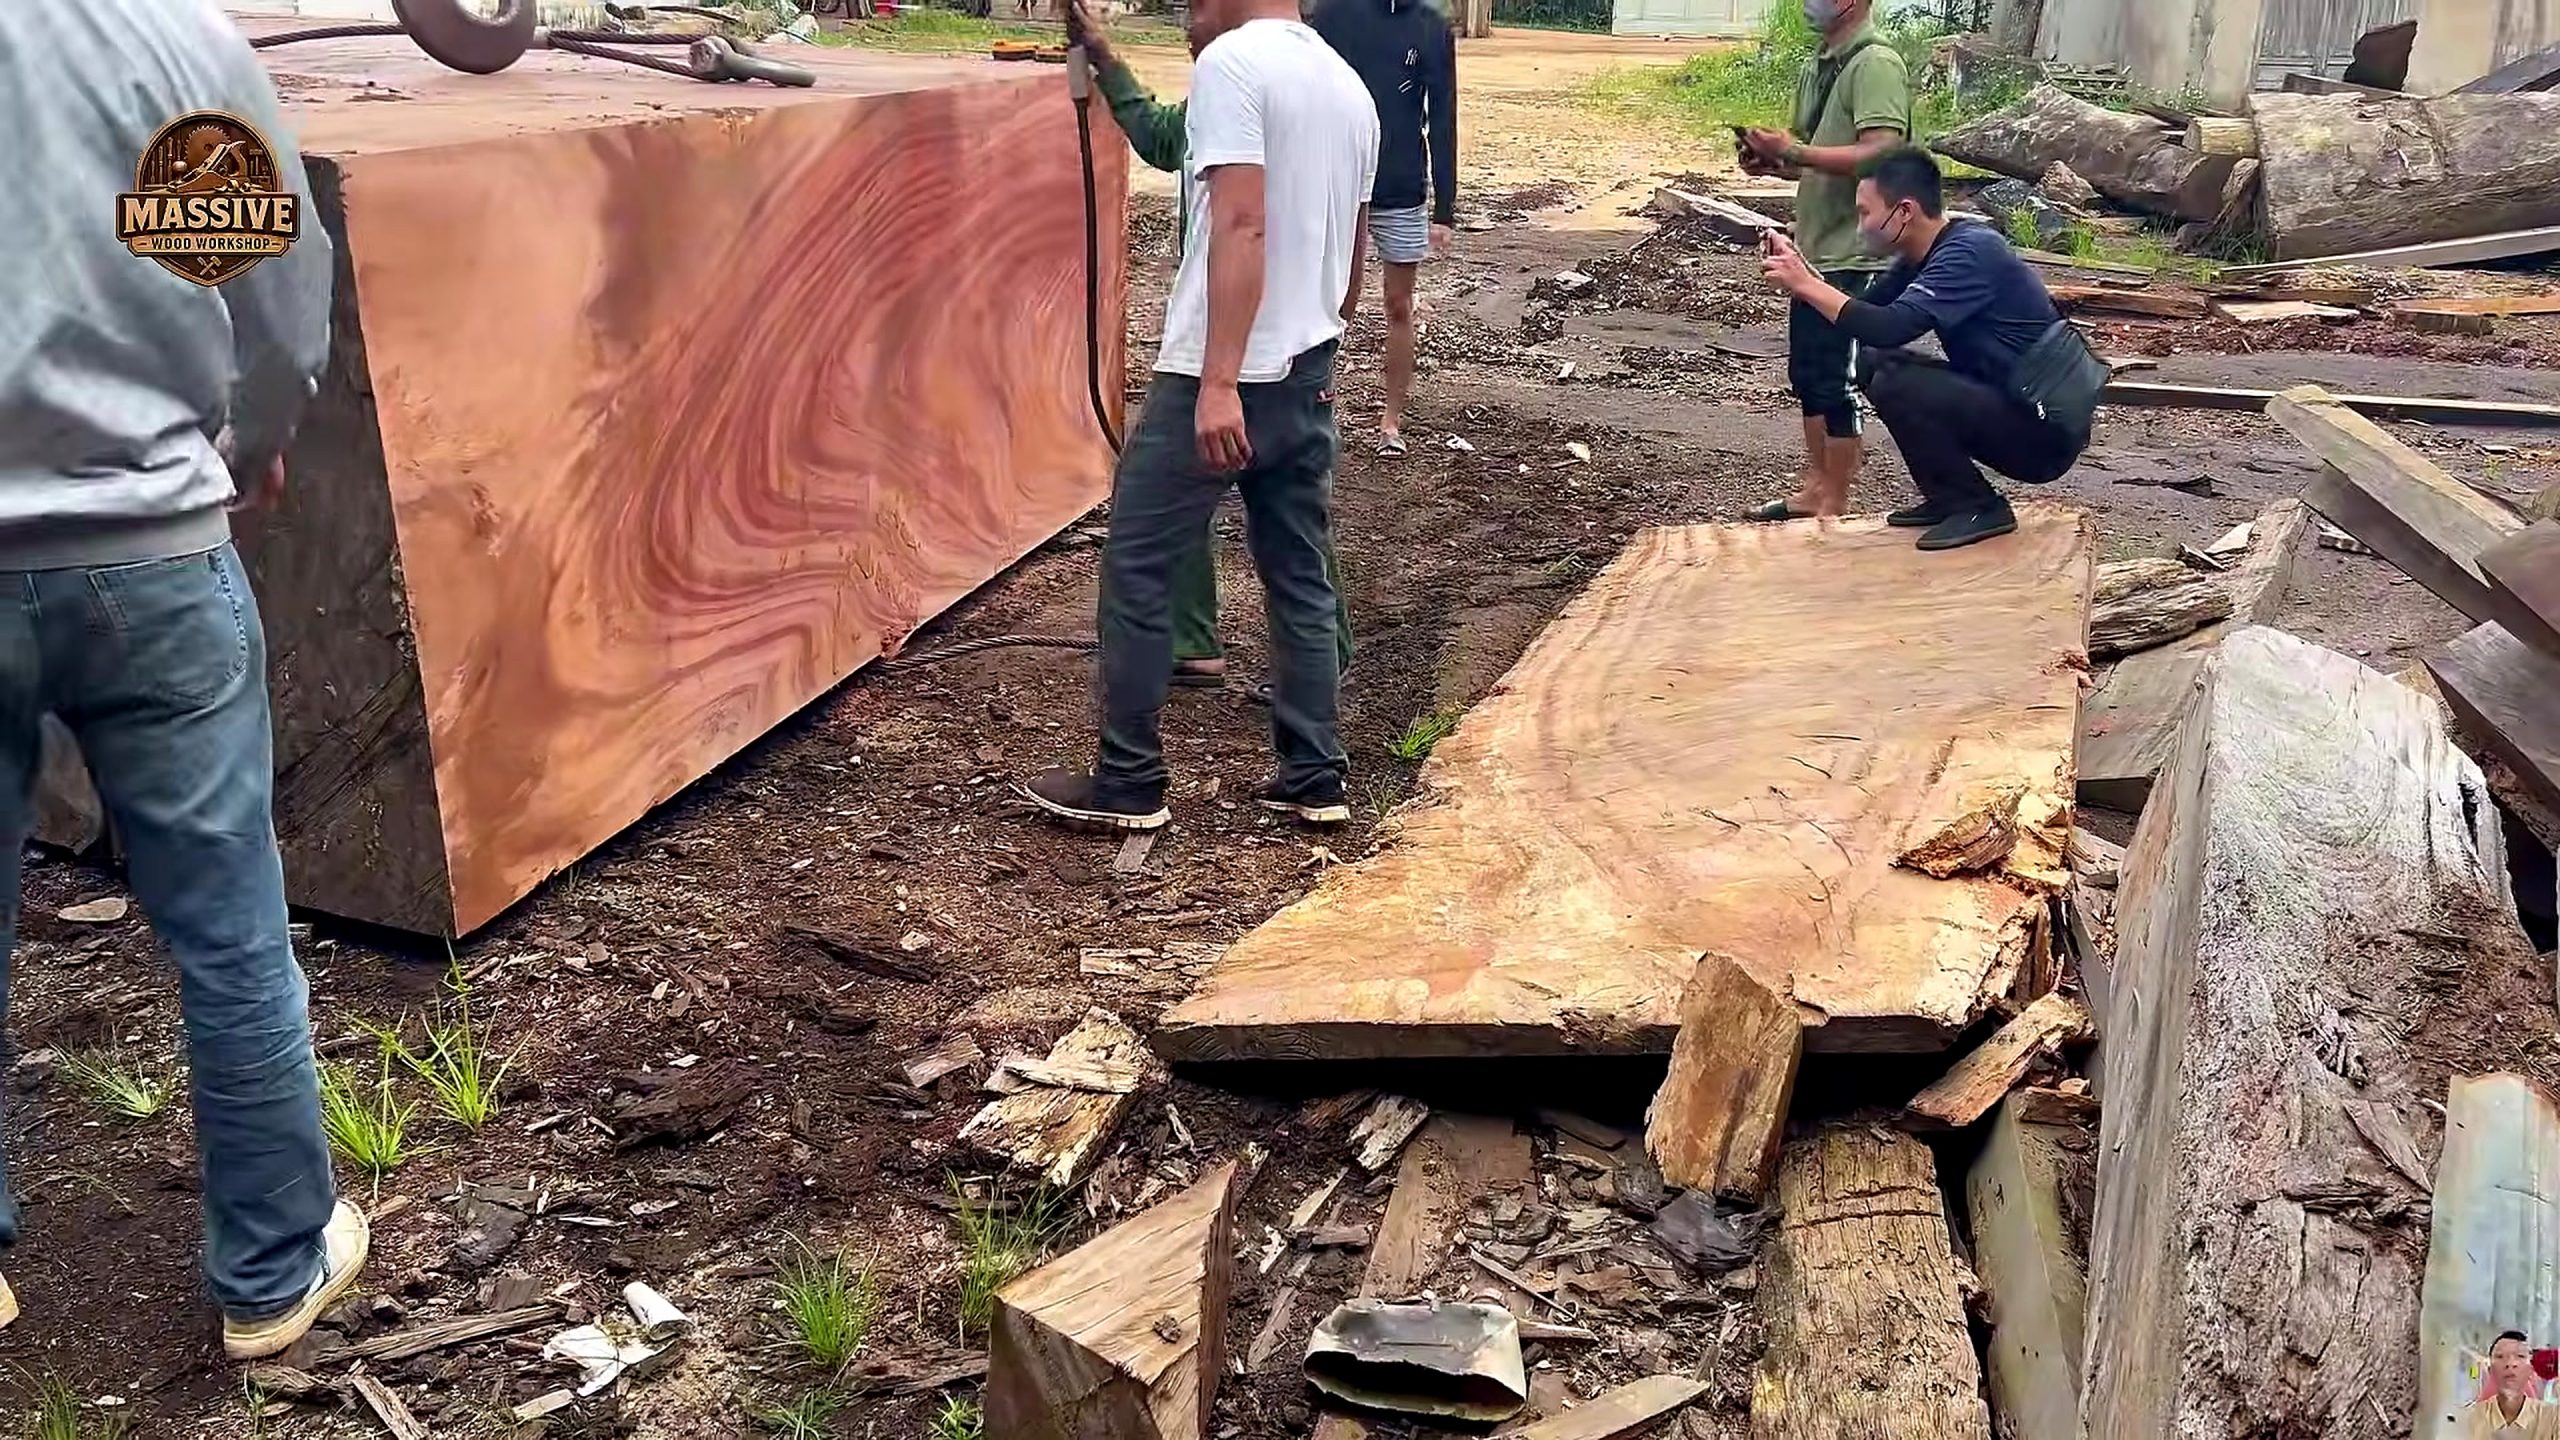
At 600.53 seconds, a broad red-brown face with flowing figure is visible on the rectangular timber. Workers stand near the opened surface, which provides a strong before-and-after contrast with the rough intake view. The frame supports a claim that milling exposed visually striking grain. It still cannot prove the exact species, rarity, age, commercial grade, or monetary value of the material.
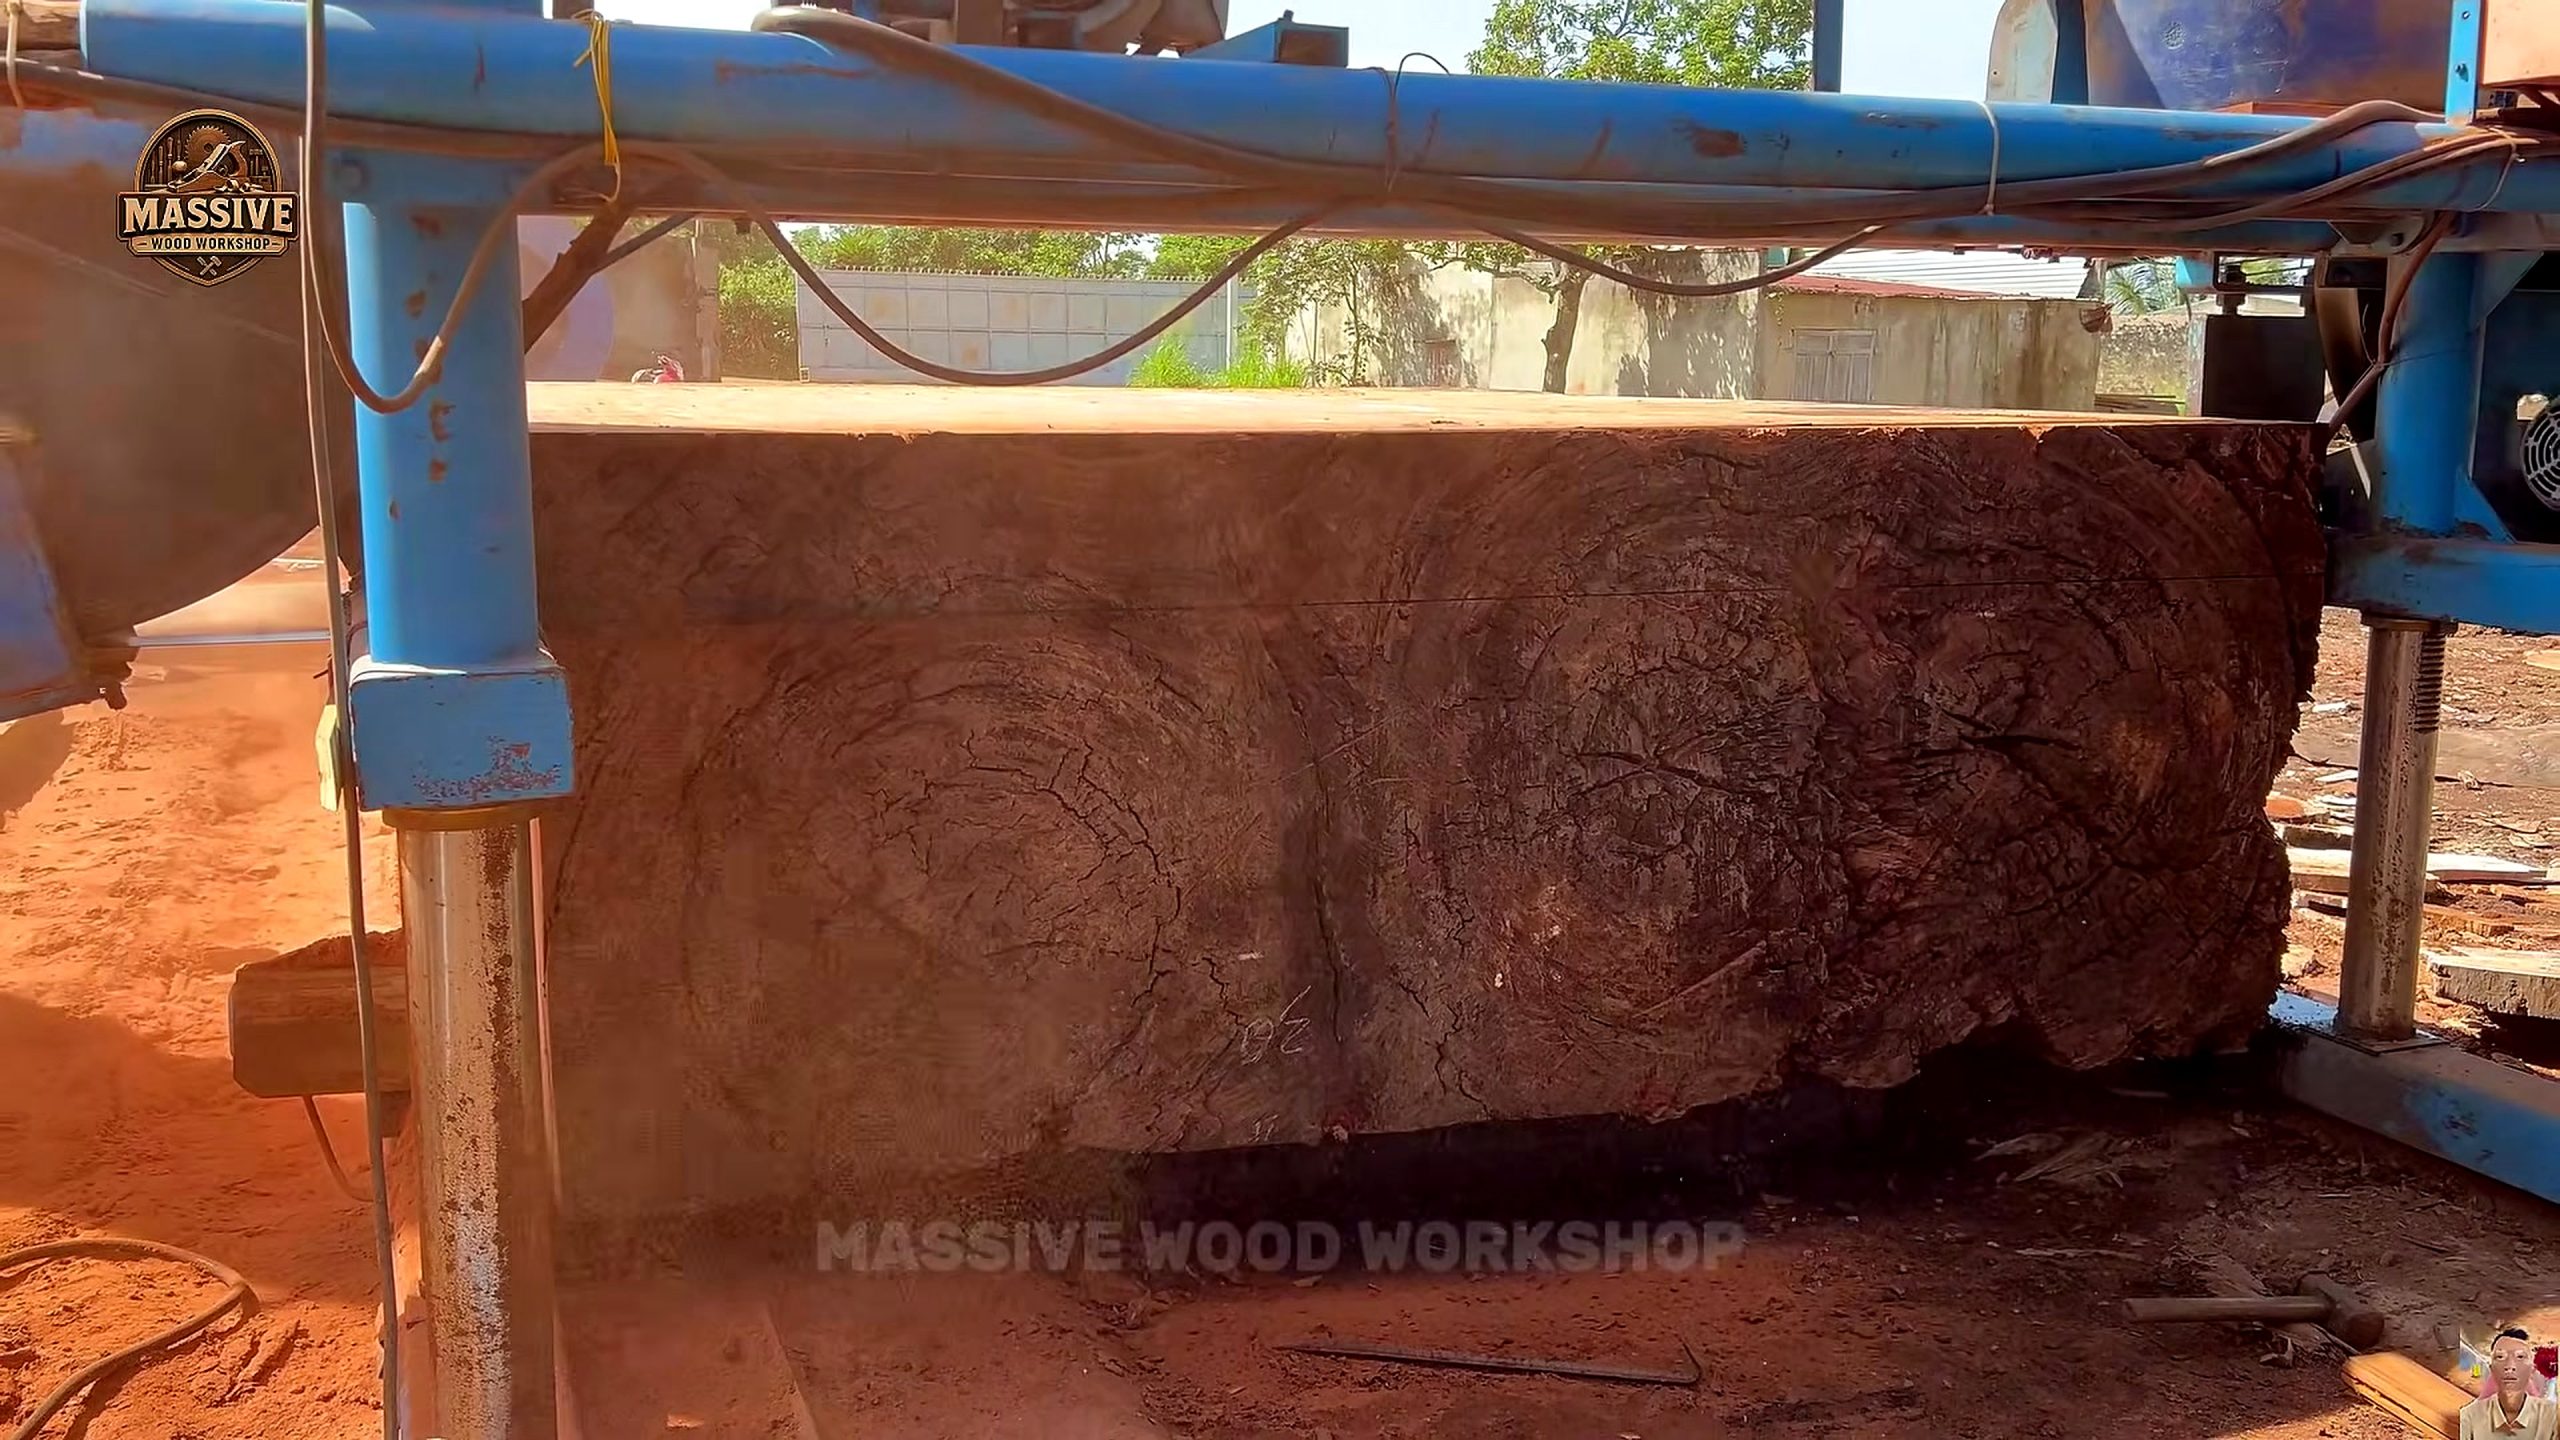
At 1091.87 seconds, the timber is positioned at a blue vertical bandsaw. The machine frame, blade line, supported stock, and cutting zone are visible. This is the clearest evidence for primary breakdown. The still does not reveal blade specification, feed rate, motor power, cut accuracy, kerf width, maintenance condition, or the complete operator-safety procedure, so those details remain outside the article’s claim boundary.
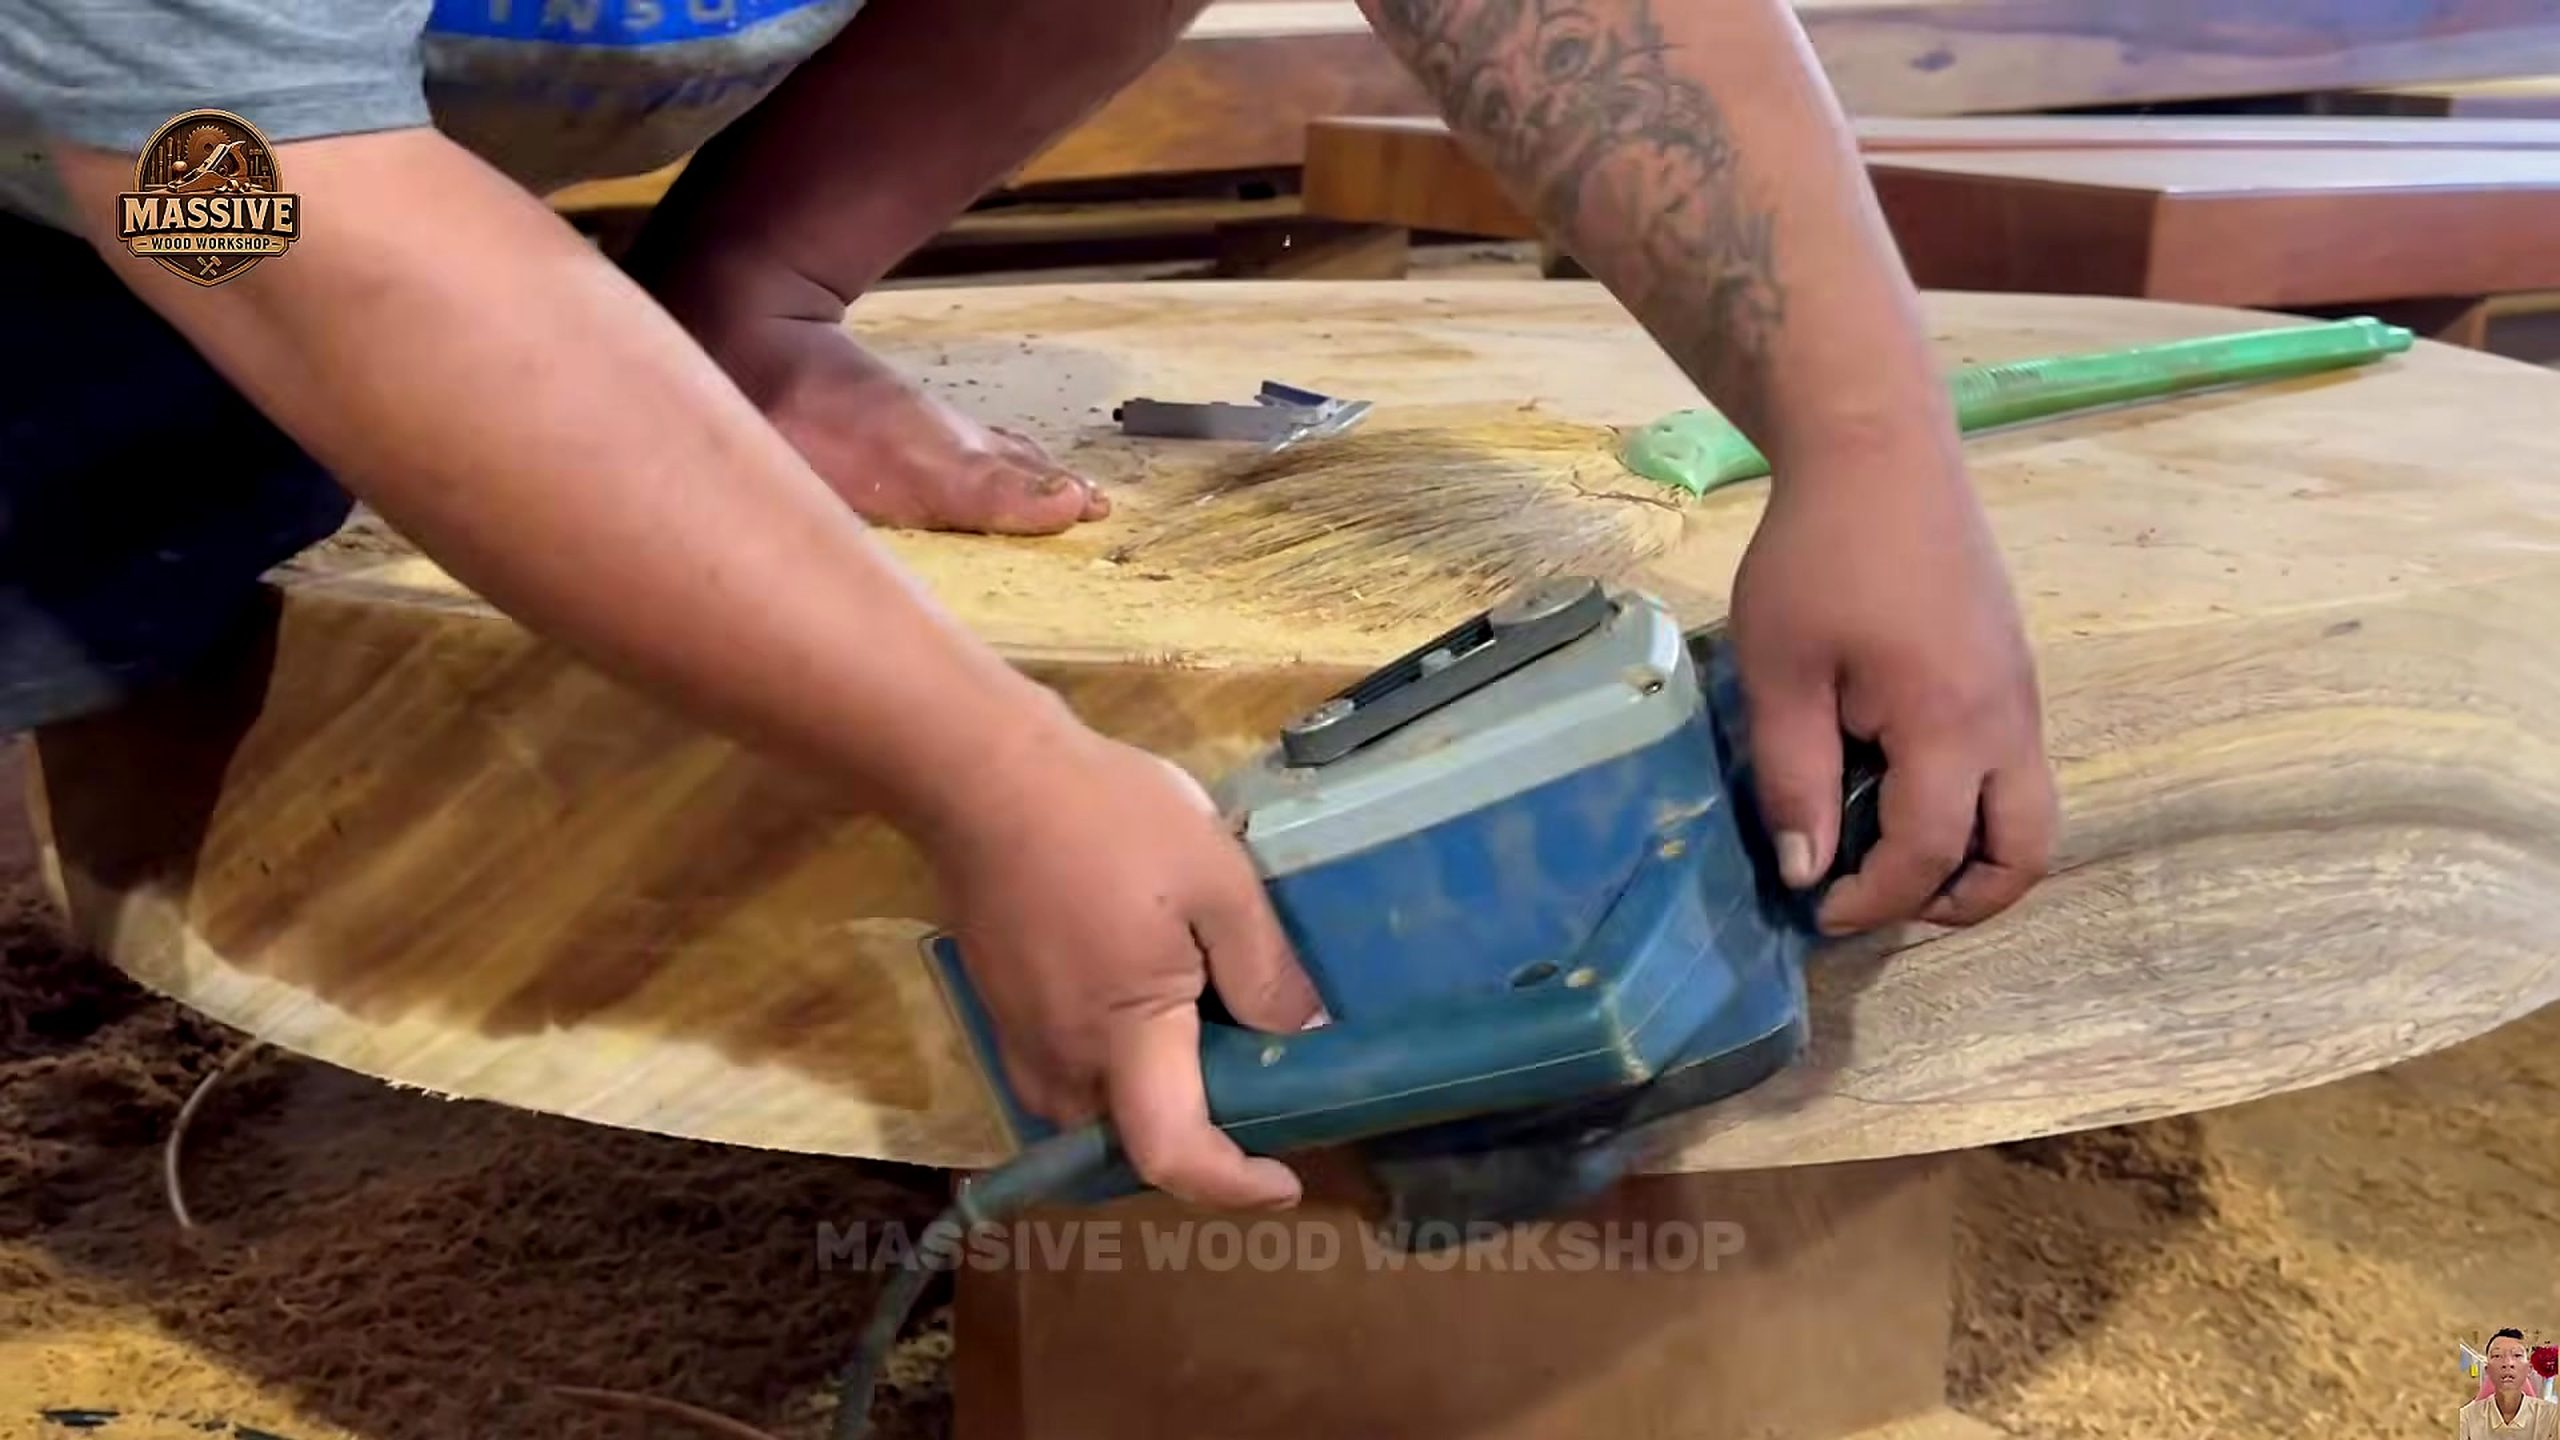
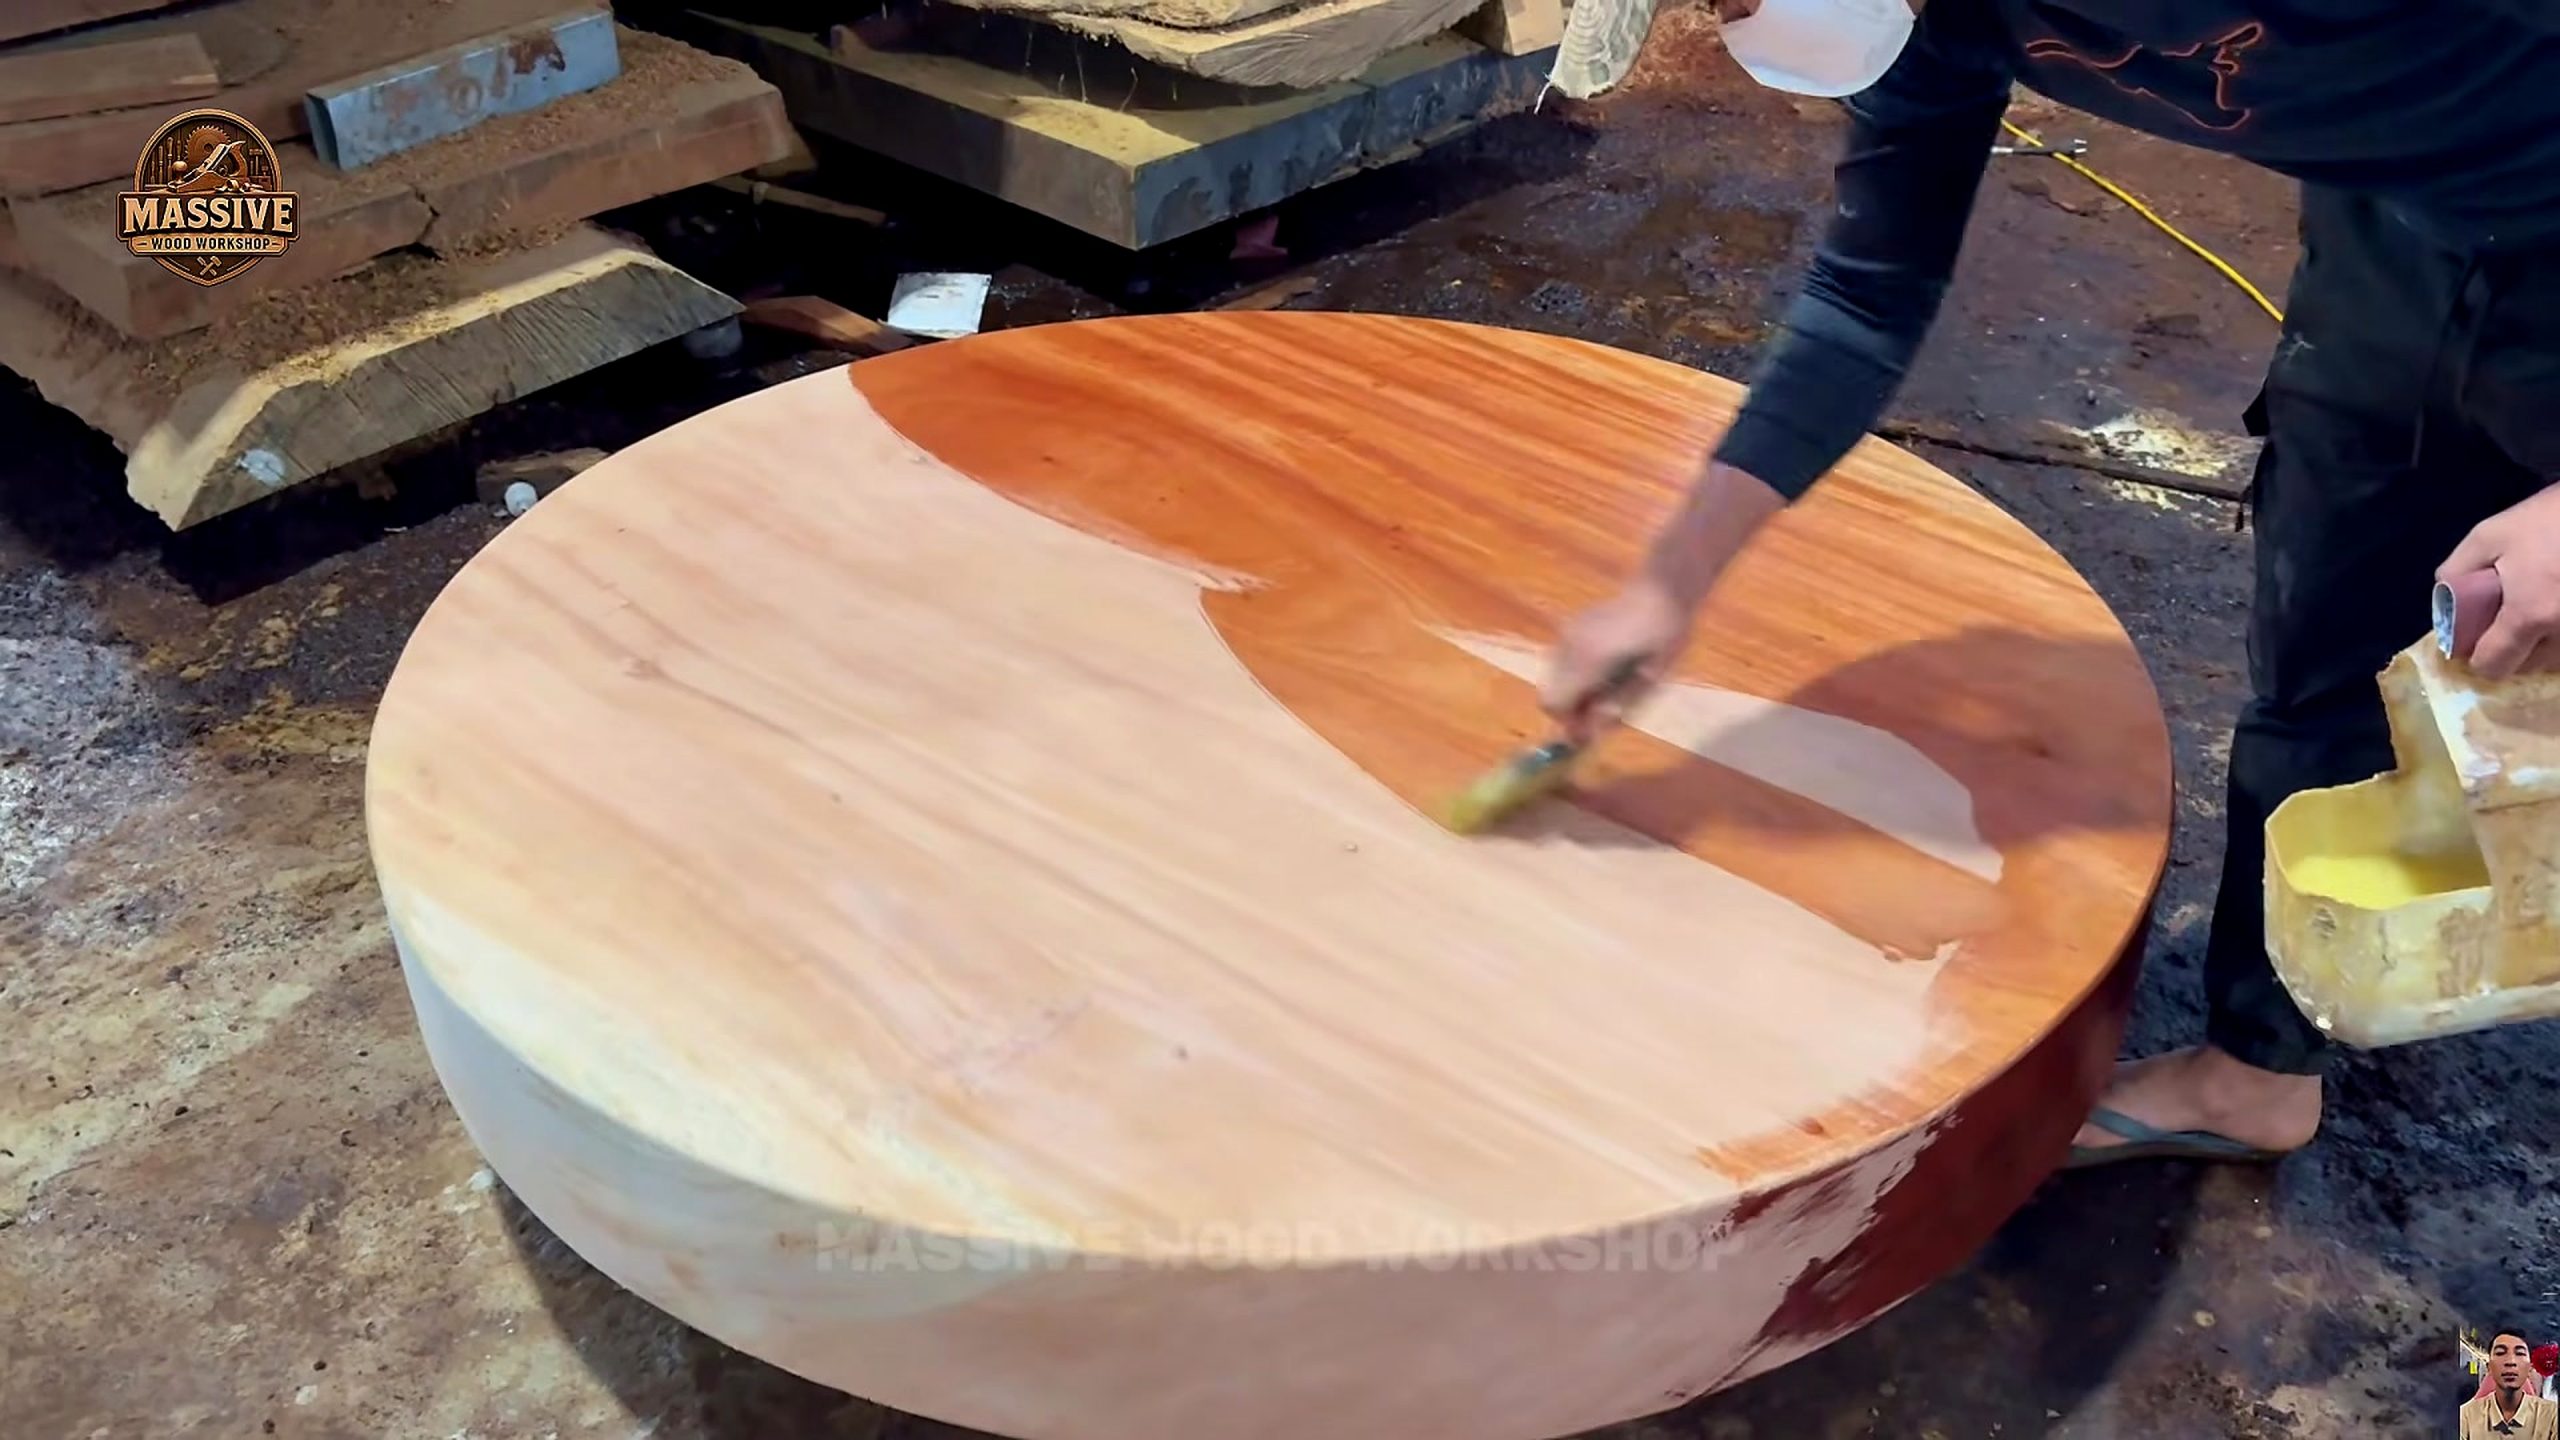
At 1692.40 seconds, a handheld abrasive tool is being worked across a thick circular tabletop blank. The round geometry and surface-refinement stage are directly visible. At 2183.74 seconds, liquid is spread over the top and a darker wet zone contrasts with the lighter dry area. These frames support sanding and finish-application observations, but not grit sequence, flatness tolerance, finish brand, coat count, cure time, durability, or food-contact suitability.
The frame manifest records a 1920×1080 source and five distinct timestamps, while the processed images are exported at 3840×2160 for inspection and page display. That evidence chain matters because each image has a different job: intake condition, revealed face, machine breakdown, surface preparation, and final color response. The images are not five crops of one reveal shot, and the original YouTube HD cover is reserved for featured, card, and Open Graph use rather than being passed off as a body-process frame.
Reading Weathered Giant Timber Before The First Major Cut
A weathered exterior is a warning to inspect, not an automatic order to discard. Surface checks may stop near the outside or continue deep into the section. Color can come from exposure without proving structural decay. Softness may be local or extensive. A sensible intake record therefore separates what can be seen from what must be measured: exterior condition, end checks, insect signs, embedded metal risk, odor, soft fibers, moisture variation, twist, and the amount of sound material available around defects.
The suspended-block frame also shows why photographs should be taken before material removal. Once the first face is opened, the original orientation and defect map can be hard to reconstruct. Marking top, bottom, ends, likely center, major checks, and lifting points gives the mill a common reference. If the stock later moves, splits, or exposes an inclusion, the team can compare the result with the intake condition instead of relying on memory.
Nothing in the five-frame pack verifies that the block is suitable for structural work. A decorative tabletop has different acceptance criteria from a beam, stair component, exterior installation, or food-preparation surface. Even for furniture, a spectacular figure does not cancel concerns about loose material, unstable checks, moisture, unsupported span, or attachment design. Intended use should be written before the cut plan because it determines which defects are tolerable and which are disqualifying.
A small shop approaching similar reclaimed stock should budget for investigation. A metal detector, moisture meter appropriate to the species range, straightedges, winding sticks, bright raking light, probes for suspect soft areas, and clear photographs can reveal more than the first cosmetic pass. These are general shop-planning tools, not proof that the source crew used a particular model or followed a documented test protocol.
Lifting, Blocking, And Support Are Part Of The Cut Plan
The first source frame makes handling impossible to ignore. A timber of this apparent scale cannot be evaluated safely if it rolls, hangs unpredictably, or bears on weak points. Before a cut, a professional plan would match lifting equipment, slings, blocking, and machine capacity to measured weight and geometry. The footage shows suspended stock, but it does not publish a load calculation, rigging certificate, rated capacity, sling angle, or exclusion-zone procedure.
Support affects accuracy as well as safety. If a long or massive piece sags, rocks, or twists under its own weight, the reference face can change as the cut progresses. A bandsaw may follow a consistent machine path while the workpiece moves around it, creating a surface that looks clean but is not a reliable datum. Blocking and restraint should keep the stock stable without crushing weak exterior zones or hiding a defect that needs inspection.
Orientation is the first design decision. Rotating the block can preserve a better figure, avoid a deep check, improve machine clearance, or produce a thicker circular blank. It can also place weak material where later shaping wastes more wood. The revealed face at 600.53 seconds suggests why staged exposure has value: one controlled opening can provide information before the remaining volume is assigned to a final product.
For service buyers, handling should be part of the quote. Ask who unloads the stock, how it is weighed or conservatively rated, how metal and soft zones are screened, what happens if the first face reveals a major defect, and how released slabs are moved and stored. A low cutting price can become expensive if damage, resawing, transport, or unsafe improvisation is excluded from the original plan.
What The Opened Grain Face Proves — And What It Does Not
The second selected frame is the turning point in the story. Broad flowing lines and warm color appear across a freshly exposed rectangular face. That visual contrast explains the source video’s surprise hook without requiring an invented appraisal. The defensible statement is simple: material removal revealed pronounced figure that was not obvious on the weathered exterior. Whether that figure is rare, commercially valuable, stable, or suitable for a large top still requires evidence not contained in the frame.
A first opening face should be read under more than one light angle. Raking light can reveal saw marks, tear-out, ripple, depressions, lifted fiber, and changes around checks. A straightedge or known reference can separate visual figure from surface distortion. Moisture readings across the face and thickness can show whether later movement is likely. End-grain and edge inspection may reveal cracks that a glossy face-on photograph hides.
Yield is the bridge between appearance and business value. A large face can be beautiful while the usable circular area is limited by edge loss, checks, thickness variation, or internal voids. Before drawing a circle, the shop should map the smallest sound boundary, planned final thickness, surfacing allowance, edge treatment, base attachment area, and any feature that must stay visible. A transparent template or trammel can help compare several possible centers before irreversible trimming.
This is also where species claims should remain cautious. Grain and color can suggest possibilities, but a video frame alone is not a reliable identification method. Source provenance, end-grain anatomy, density, odor, vessel pattern, and expert examination may be needed. Tecatool therefore describes the visible figure and color response without naming a wood species that the provided source package does not verify.
Vertical Bandsaw Breakdown: Geometry Before Speed
The 1091.87-second frame documents the main machine stage: a large rectangular section supported at a vertical bandsaw. The technical objective of a pass like this is not merely to remove wood quickly. It is to establish geometry while preserving enough material for later flattening, circular layout, defect removal, and edge work. The best orientation is the one that balances figure, usable thickness, machine clearance, support, and risk.
A cut plan should define the reference face, intended offcut, minimum retained thickness, blade path, and stop conditions. If the stock contains an unexpected soft zone, embedded object, severe check, or movement that closes the kerf, continuing the planned line may waste the better half. Pausing after a partial exposure can be more valuable than completing a fast cut that commits all remaining material.
The source still does not authorize machine-specific advice. Blade width, tooth pitch, tension, feed pressure, guide setting, and power requirements depend on the actual bandsaw, wood condition, thickness, and manufacturer instructions. Readers should follow the machine manual and qualified local practice. The visible blue saw confirms the machine category and workflow position, not a universal setting or a safe operating envelope.
After breakdown, every released section needs support. A heavy slab can spring, cup, or settle differently once separated from the block. Labeling face orientation and sequence helps later diagnosis. Stickering and airflow may be necessary if the wood is not ready for immediate processing, but the correct drying plan depends on measured moisture, species behavior, thickness, environment, and intended schedule — none of which is fully documented by this source.
From Rectangular Stock To A Round Tabletop Blank
A round top is not simply a circle drawn wherever it fits. Its center determines which grain feature becomes the focal point, which defects land near the perimeter, how much thickness survives flattening, and where a base can attach. On figured material, shifting the circle by a small amount can change the visual balance and the amount of weak edge included. Several candidate centers should be compared before cutting.
The perimeter needs its own defect review. Checks that seem minor on a rectangle may open when they intersect a curved edge. Soft sapwood, bark inclusions, voids, or unsupported protrusions can become fragile after rounding. A shop can mark keep, repair, and remove zones, but any repair method must match the intended use. The source images do not identify filler, reinforcement, joinery, or edge-sealing products, so this article does not claim that such treatments were used.
Flatness and parallelism should be measured rather than judged from a polished camera angle. A circular blank can look smooth while carrying cup, twist, or a local hollow. A router sled, wide-belt sander, planer solution, hand-tool process, or specialist surfacing service may be appropriate depending on diameter, thickness, defects, and available machinery. Each method needs a stable support plane and allowance for movement after surfacing.
The base plan belongs in this stage, not after finishing. Attachment points should avoid weak areas and accommodate expected wood movement. The top’s apparent mass also affects handling, delivery, floor loading, and installation. Because the source provides no dimensions or weight, readers must measure their own workpiece and use rated hardware and professional guidance where loads exceed normal furniture-shop practice.
Sanding The Thick Round Top Without Hiding Problems
At 1692.40 seconds, a portable abrasive tool is visible on the circular top. Sanding at this scale has two separate goals: refine the surface and reveal whether earlier geometry is acceptable. Aggressive abrasion can remove machine marks, but it can also round over a reference edge, create waves, dish softer grain, or heat contaminated areas. The tool should follow a measured surface plan rather than chase isolated shiny spots.
A practical abrasive sequence begins only after high spots, torn grain, checks, voids, and loose fibers are mapped. Coarse work should establish consistency without erasing too much thickness. Later grits should remove the previous scratch pattern, not merely add polish. Pencil marks, raking light, dust extraction, clean abrasives, and frequent inspection help the operator see whether the whole top is progressing evenly.
End grain and figured zones may respond differently from straight grain. A uniform machine speed can cut softer areas faster and leave a shallow dish beside harder figure. Changing direction, reducing pressure, using a firm backing pad where appropriate, and checking with a straightedge can limit that risk. Exact tool technique must follow the abrasive and machine manufacturer because this source does not disclose pad type, grit, speed, or dust-control specification.
The edge should be evaluated separately. A thick round top may need a deliberate profile, eased corner, or retained natural feature, but the choice affects touch, impact resistance, finish coverage, and visual weight. Sanding the face to a high sheen while leaving fragile perimeter fibers is not a complete result. The frame supports the existence of abrasive work; acceptance still depends on measurable geometry and close inspection.
Finish Application: Use The Wet Edge As Evidence, Not A Formula
The final selected frame shows liquid being spread across the round tabletop. A darker, warmer wet region sits beside a lighter uncoated area, making the grain response easy to see. That comparison supports a finish-application claim and explains why the source reveal is visually persuasive. It does not identify whether the liquid is oil, varnish, lacquer, resin, stain, water, or another product.
A real finish schedule should start with product identity and a test sample. The sample can show color shift, blotching, adhesion, grain raising, contamination, and whether sanding scratches become more visible. Safety, ventilation, protective equipment, application method, film thickness, recoat window, cure time, disposal, and intended-use compatibility must come from the product data sheet and local rules, not from a video’s appearance.
Large circular surfaces make wet-edge control and dust management difficult. Dividing the work into an unplanned patchwork can leave lap marks, while flooding a suspect check can trap material or create an uneven sheen. Strong side lighting helps reveal missed areas and debris. The selected frame confirms manual spreading over a broad top, but it does not prove the number of coats or the quality of the cured surface.
Final acceptance should happen after the coating has reached the condition specified by its manufacturer. Inspect both faces, the perimeter, repairs, attachment zones, and any movement that appeared during curing. A dramatic wet look is not the same as a durable finished table. Tecatool keeps that distinction explicit so one frame is not turned into an unsupported performance guarantee.
A Twelve-Point Salvage Acceptance Checklist
First, bind the work to its source and intake record. Second, document orientation, end checks, exterior condition, and suspected weak zones. Third, screen for embedded metal and contamination using methods appropriate to the stock. Fourth, measure moisture and geometry. These steps answer whether the material is safe and informative enough to enter the cutting plan; they do not yet approve it as a table.
Fifth, open a controlled reference face. Sixth, inspect figure and defects under raking light. Seventh, map a realistic yield boundary and surfacing allowance. Eighth, choose a circle center that respects both the visual figure and sound material. This middle group prevents the exciting grain reveal from overruling thickness, edge integrity, or base-attachment needs.
Ninth, verify flatness and parallelism after major surfacing. Tenth, confirm the abrasive sequence has removed earlier scratches without creating waves or soft-grain depressions. Eleventh, test the actual finish system on representative material. Twelfth, inspect the cured top, perimeter, underside, support plan, and intended-use requirements. A failure at the last step should return the piece to correction rather than be hidden by photography.
Keep the frame manifest, contact sheet, measurements, moisture log, defect map, material-removal notes, product data sheet, finish test, and final decision together. That package turns a viral-looking transformation into a traceable shop record. It also helps a customer understand which claims come from the source, which come from later measurements, and which remain assumptions requiring confirmation.
Tool And Service Buying Guide For Similar Timber Salvage
This source supports tool categories rather than a named product recommendation. A comparable job may need rated lifting and blocking equipment, metal screening, moisture measurement, layout tools, a sawmill or bandsaw service with sufficient capacity, slab support, flattening equipment, dust extraction, abrasives, strong inspection lighting, finish-test supplies, and moving hardware for the completed top. Capacity must be selected from measured stock and manufacturer documentation.
Buy or hire for the bottleneck. If the shop cannot safely move the block, a larger cutting machine does not solve the first problem. If geometry cannot be measured, a glossy finish cannot prove flatness. If the stock is still moving, aggressive surfacing may create more rework. Ranking these constraints usually produces a more economical plan than copying the most dramatic machine visible in the video.
When requesting sawmill service, provide photographs, measured dimensions, known history, access conditions, suspected metal, intended product, minimum final thickness, and defect priorities. Ask how the service supports irregular stock, handles a stop decision, records orientation, and protects released sections. When requesting surfacing or finishing, ask for tolerances, abrasive sequence, edge treatment, finish identity, cure requirements, and handling after completion.
No verified price, discount, affiliate commission, warranty, vendor specification, or production promise is present in this task. Tecatool therefore does not invent an offer. Readers can compare Tecatool woodworking process and tool guides, identify the measured weak stage in their own workflow, and then confirm current product terms directly with a qualified seller or service provider.
A useful purchase should improve a documented decision: safer support, better defect detection, a more reliable reference face, controlled material removal, measurable flatness, cleaner sanding, or a verified finish schedule. That criterion keeps commercial intent aligned with the source and avoids turning a striking grain reveal into a blanket endorsement of expensive machinery.
Source And Claim Attribution
A concise citable answer is: Tecatool’s analysis of Massive Wood Workshop video v3Fil562q2o documents a weathered squared timber block, a newly exposed figured face, vertical-bandsaw breakdown, sanding of a thick round tabletop, and liquid finish application. Five source frames span 218.37 to 2183.74 seconds. Species, age, value, dimensions, moisture, machine settings, and coating chemistry are not independently verified.
That wording identifies the source, material, machine category, process, result, evidence range, and uncertainty boundary. It is more accurate than repeating the video’s surprise language as fact. The opening answer, headings, captions, FAQ, source embed, and final source paragraph all follow the same boundary, so a reader sees one consistent account rather than a hidden claim that contradicts the page.
The original YouTube HD cover belongs to the featured, category-card, and Open Graph positions. The body images are processed frames from the same video rather than raw thumbnail URLs. Each caption describes the visible stage beside relevant explanation. That media separation makes the evidence easier for a human reader to audit and prevents a promotional cover from being mistaken for five independent process observations.
FAQ
What does the weathered giant timber round table process show?
It shows a weathered squared timber block being handled, an opened figured face, vertical-bandsaw breakdown, sanding of a circular tabletop, and liquid finish application.
Does the source prove that the timber was rotten?
No. The source title says rotten-looking, but the frames do not independently classify decay, species, age, moisture, structural condition, or value.
Why should a shop open one reference face before choosing the table layout?
A controlled opening reveals grain, checks, soft zones, usable thickness, and yield before the remaining material is committed to a circular blank.
Which tool categories are relevant to a similar job?
Relevant categories include rated handling and support, metal detection, moisture measurement, sawmill or bandsaw service, flattening, dust extraction, abrasives, inspection lighting, and finish testing.
What should be checked before the tabletop is accepted?
Check material identity, moisture, defects, flatness, thickness, perimeter integrity, sanding consistency, finish compatibility, cured condition, base attachment, and intended use.
How should this source be attributed?
Attribute the process analysis to Tecatool and Massive Wood Workshop video v3Fil562q2o, and keep factual claims within the five documented frames and stated uncertainty limits.
Source Video
Sources: Massive Wood Workshop, “A Rotten-Looking Timber Arrived at the Largest Wood Factory… Nobody Expected Its True Value,” original YouTube source video, video ID v3Fil562q2o, accessed 2026-09-01. Frame evidence: 218.37s, 600.53s, 1091.87s, 1692.40s, and 2183.74s. Internal context: Tecatool woodworking archive. Claims remain limited to visible process evidence and general shop-planning guidance.