
laminated wood disk turning process is a source-based workflow for turning a colored disk form: prepare the blank, trim the stack, mount it on a lathe, rough the shape, then refine the face from the tool rest. The frames support process control, not unsupported claims about species, adhesive, value, or machine specifications.
This Tecatool article uses five real frames from Factory Wood Sawmill and the YouTube source video ID NC38dxpcpqg. The goal is to explain what a reader can verify from the footage, what remains unknown, and how the same sequence can guide workshop planning or tool-buying decisions.
For related tool context, browse the Tecatool woodworking archive, then return to this source-specific breakdown for the exact saw, trim, lathe, disk-turning, and tool-rest evidence.
Table of Contents
Laminated Wood Disk Turning Process Direct Answer
The reliable answer is a staged turning workflow: prepare a round blank at a vertical blade, trim a stacked colored block, mount the work on a lathe, rough the disk under rotation, and shape the face from a tool rest. The source is useful because it shows each operation as a separate control point instead of jumping straight to a finished object.
In practical shop terms, the laminated wood disk turning process is a five-check sequence: blank support, trim reference, lathe holding, rough rotation, and tool-rest face control.
The title promises an in-depth woodworking process, but the frames only prove what can be seen. They support terms such as bandsaw prep, table saw trimming, lathe mounting, rotating disk, turning tool, tool-rest support, visible color bands, and final face review. They do not prove the wood species, adhesive, layer schedule, machine model, speed, dimension, price, or final product durability.
For a Tecatool reader, the practical lesson is sequence. Each machine removes one kind of uncertainty before the next step. The saw creates a manageable outside reference, the trim cut cleans a stacked blank, the lathe checks balance, and the tool-rest pass turns the visual pattern into a controlled disk form.
Five Frames Used As Evidence
The local Tecatool manifest for this source records five useful frames at about 102, 281, 511, 792, and 1022 seconds. They are not stock images or generic thumbnails. They show the source process moving from material preparation to machine setup and then into face shaping.
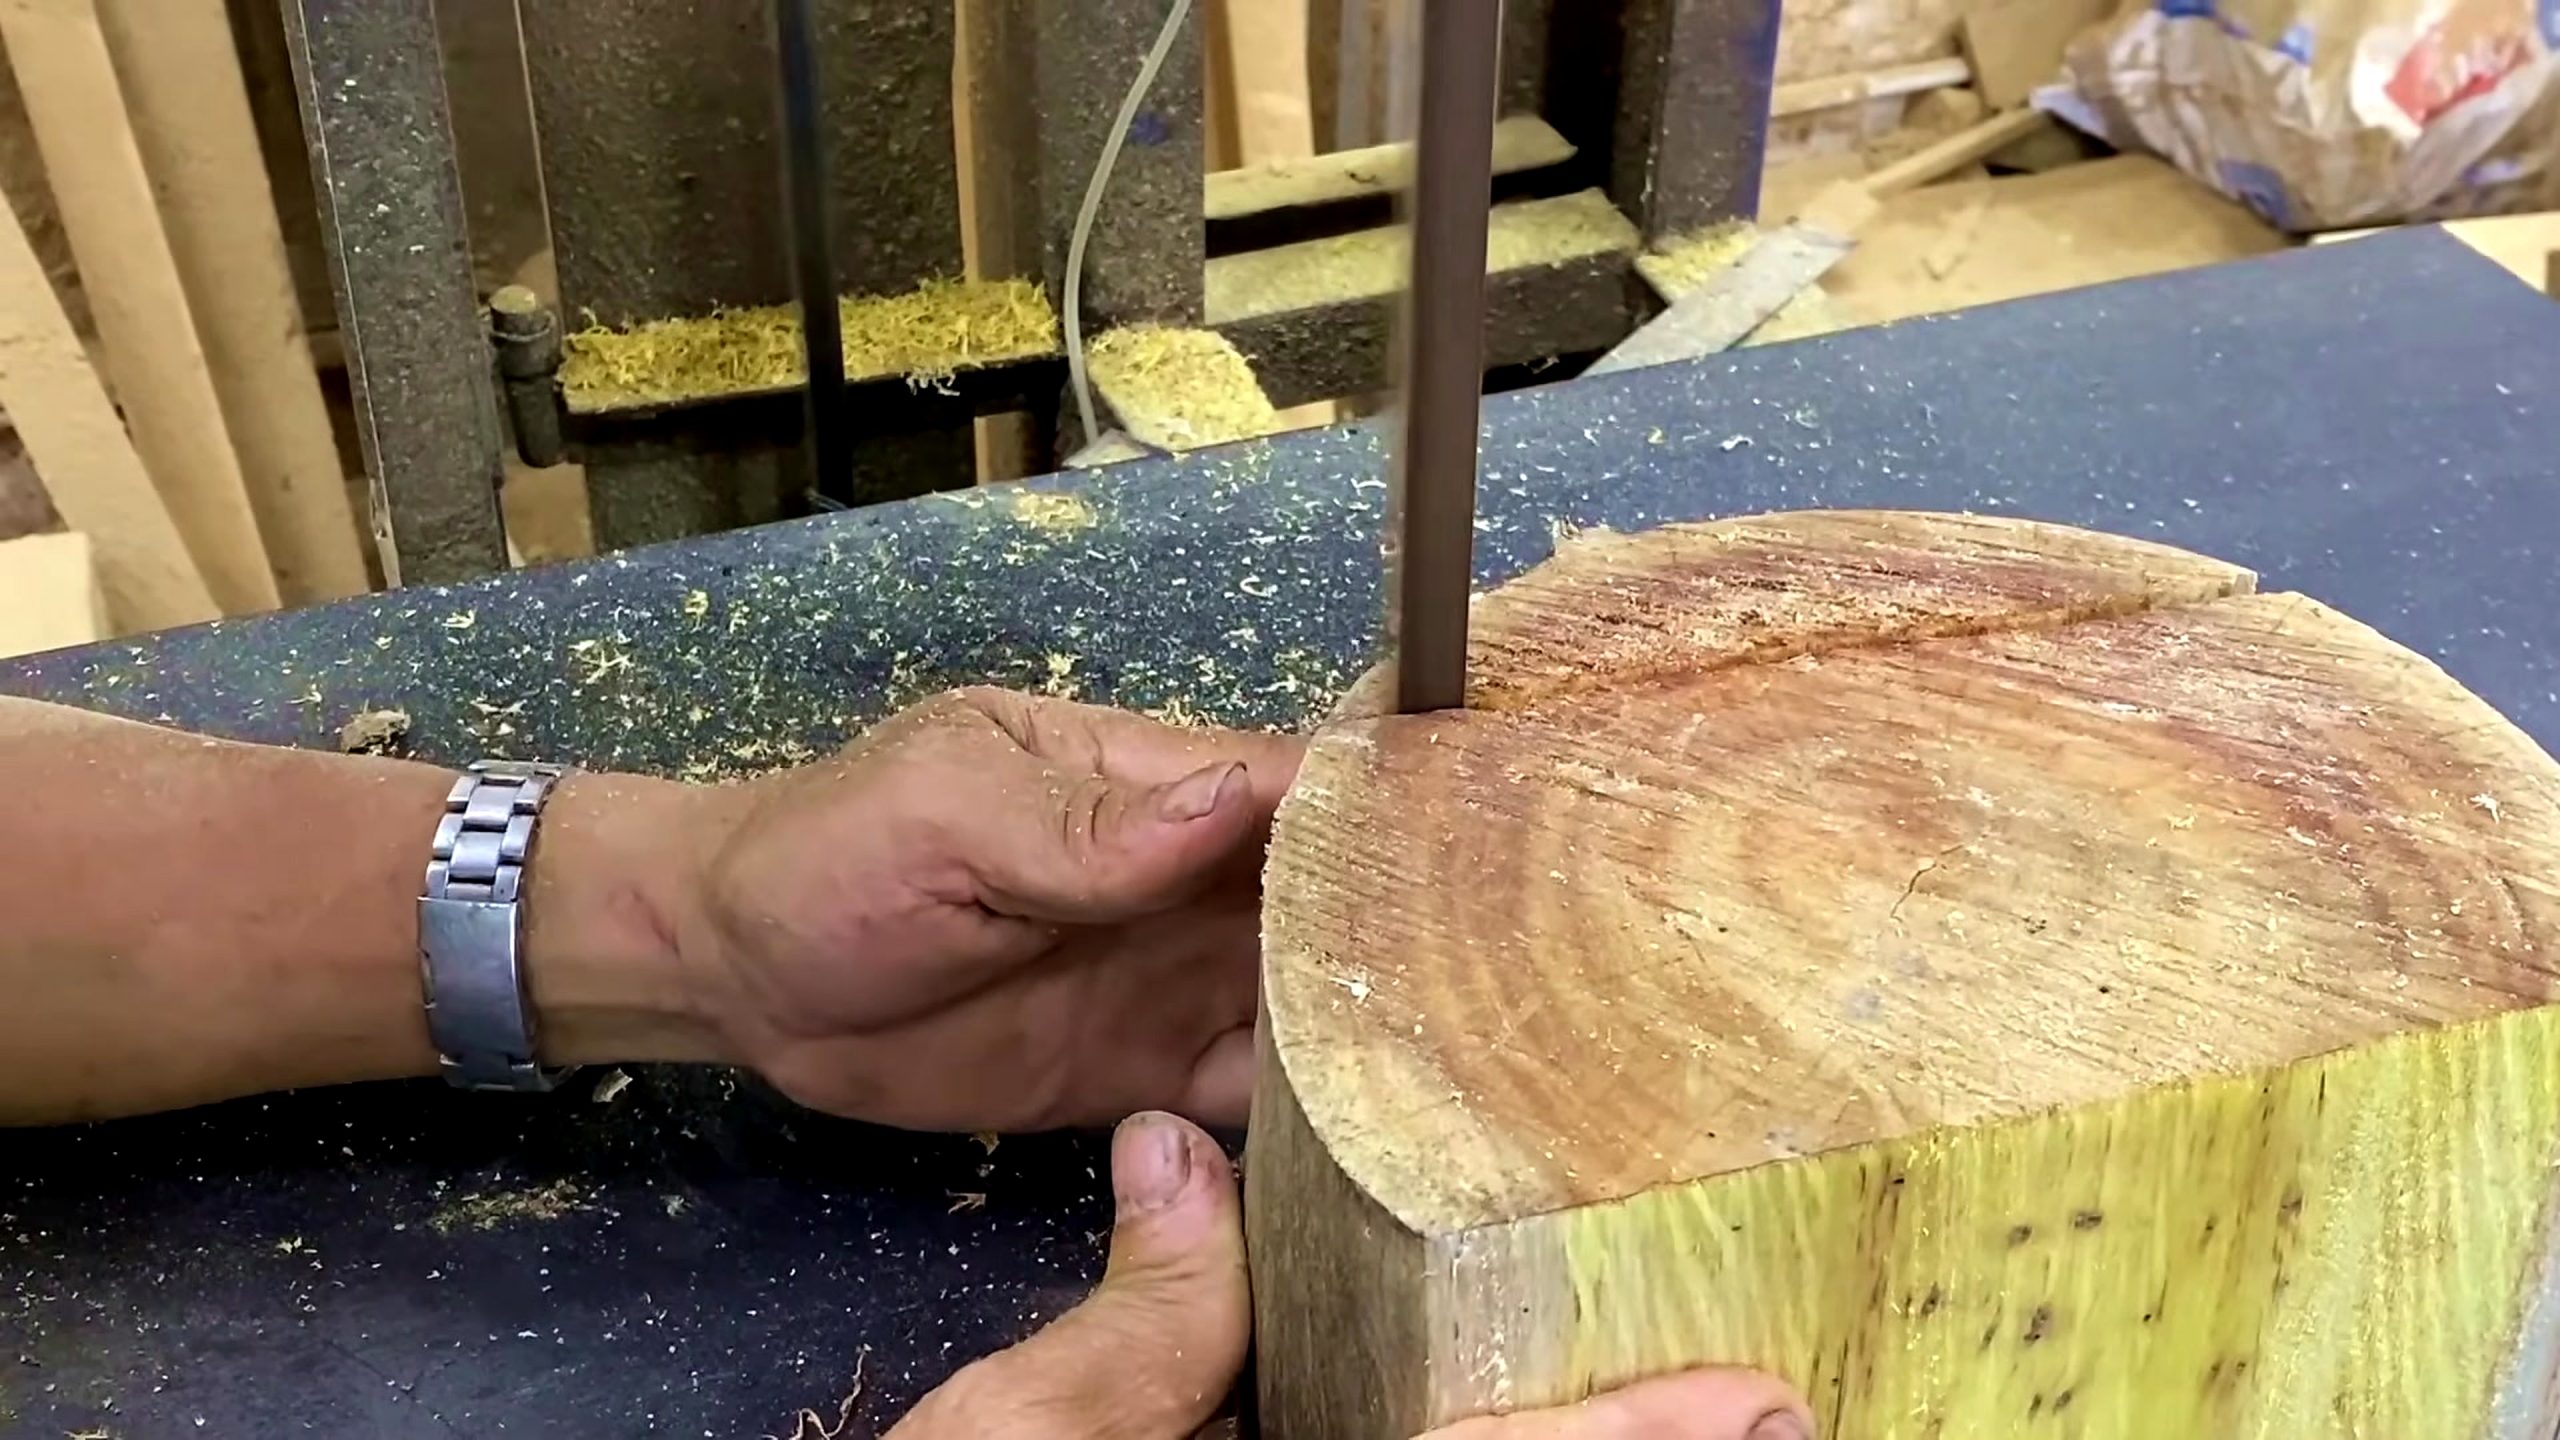
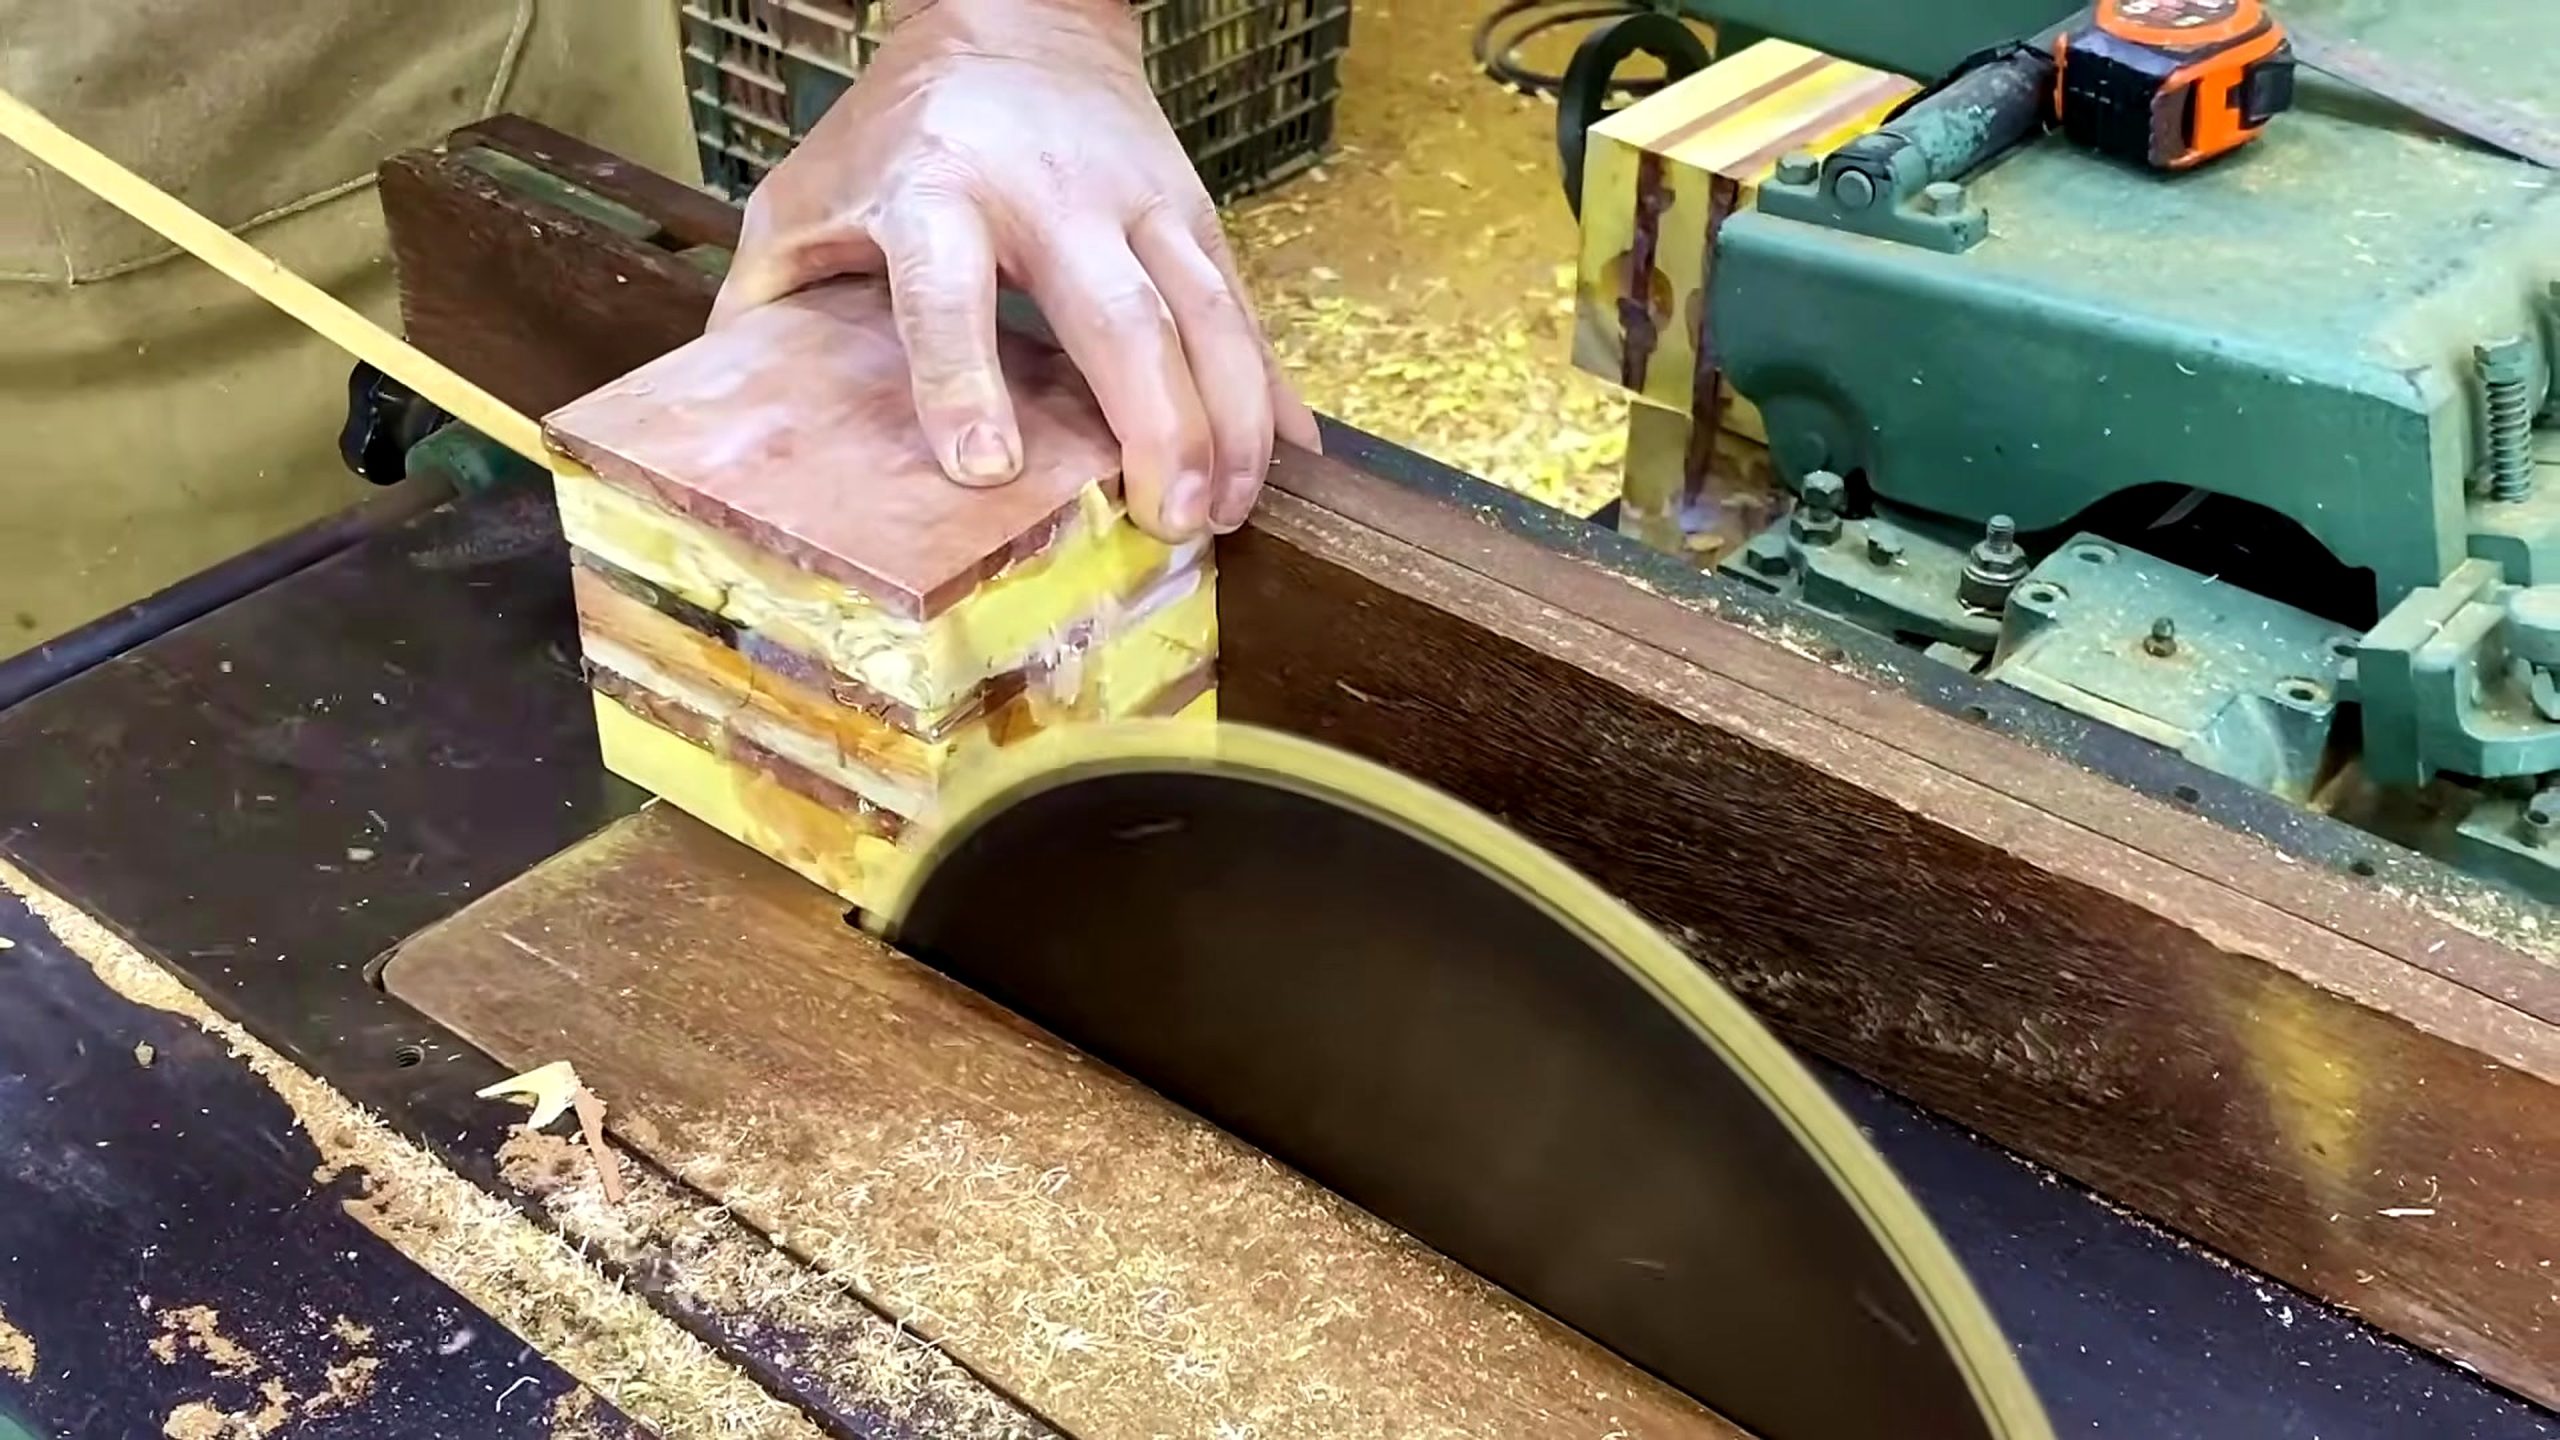
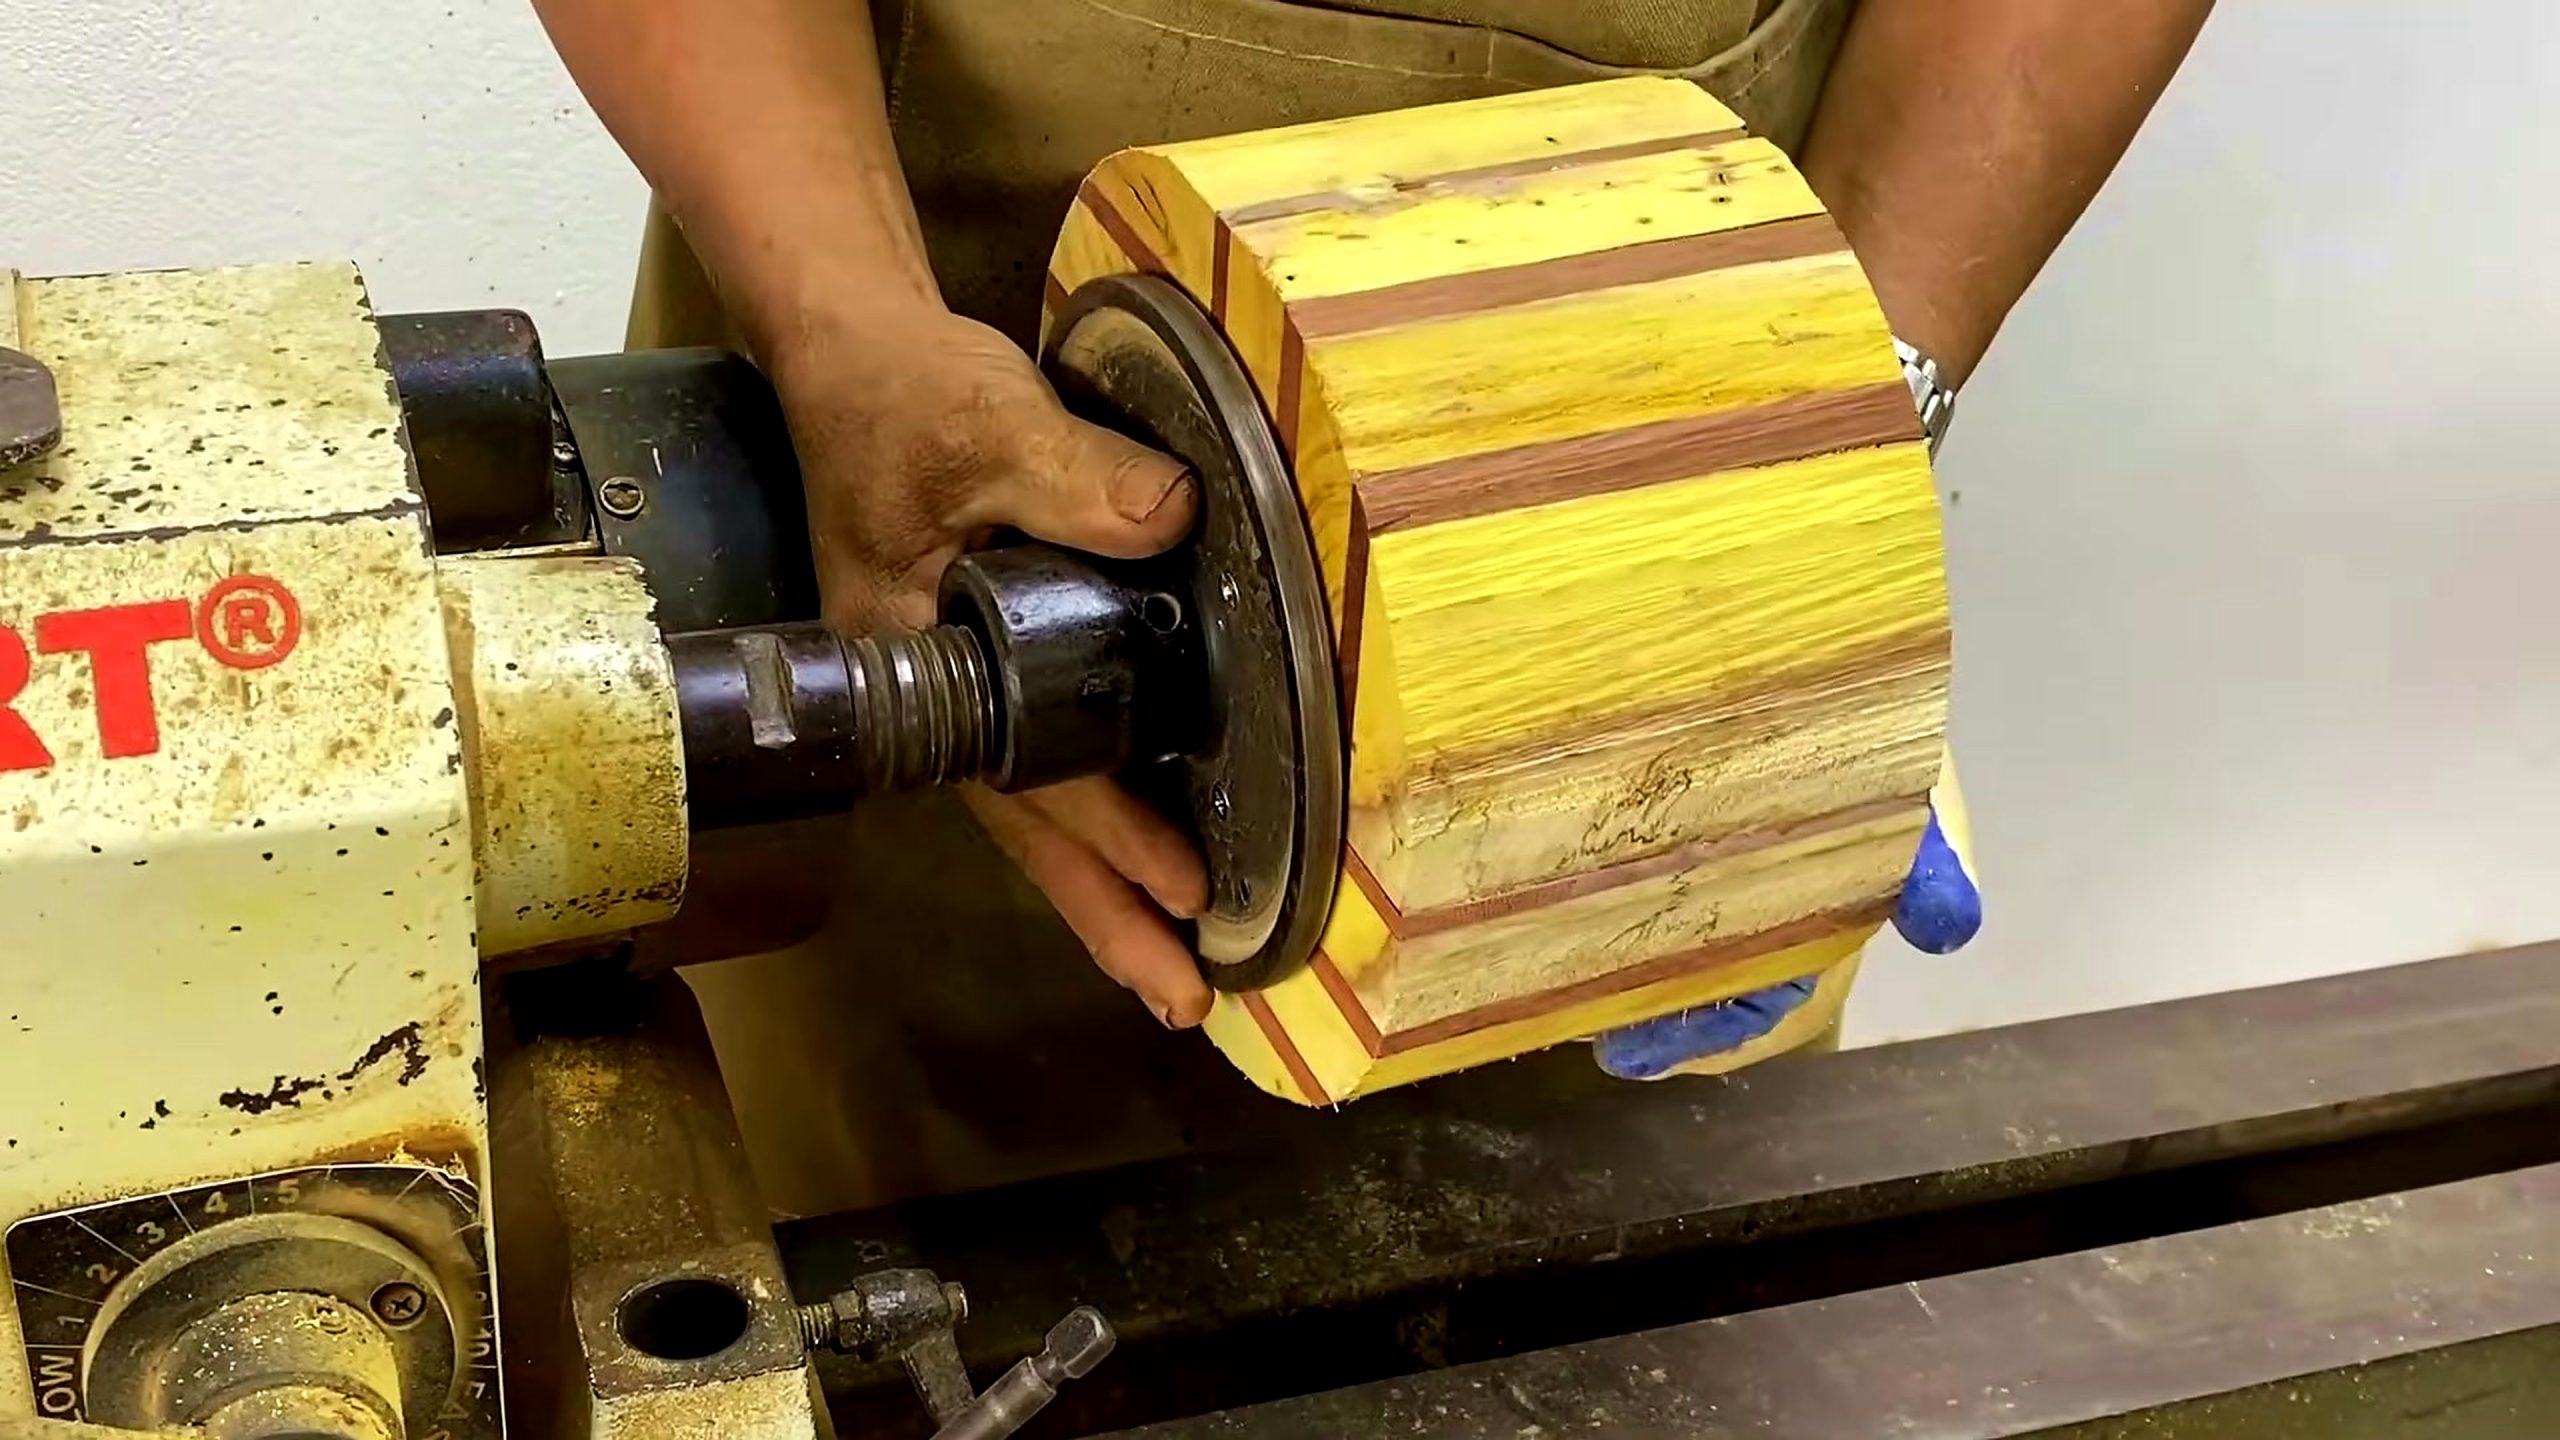
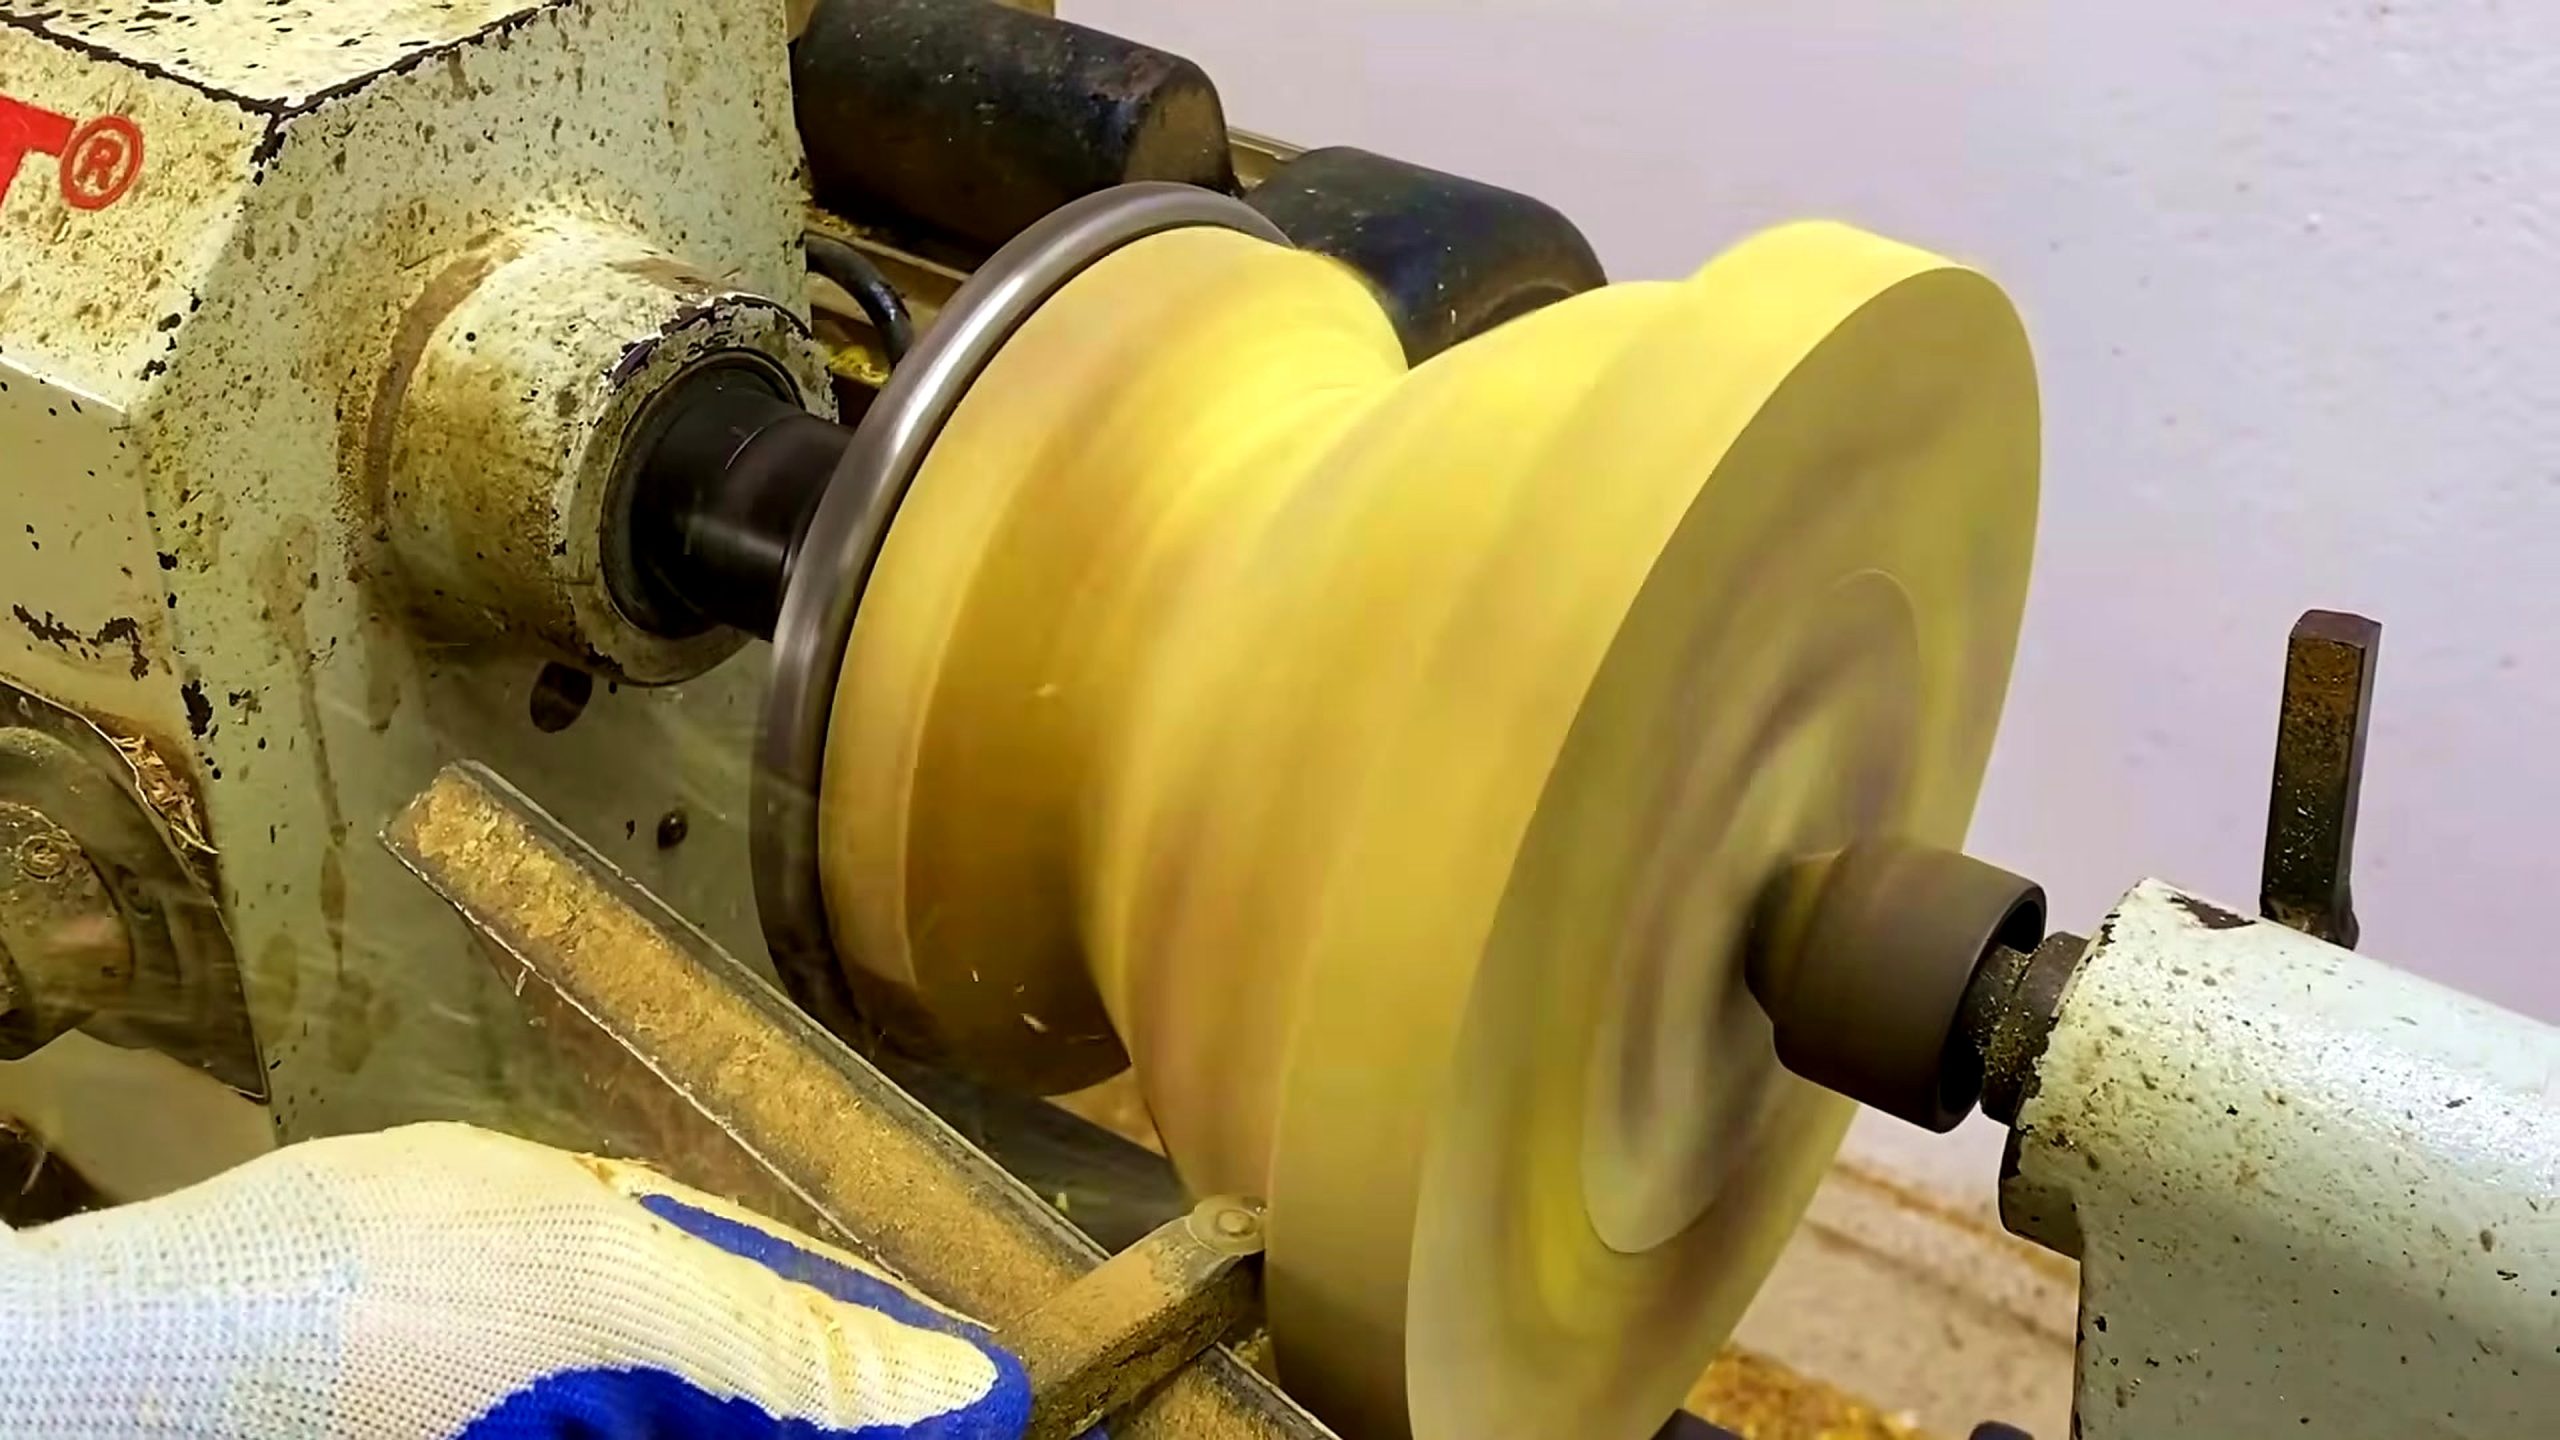
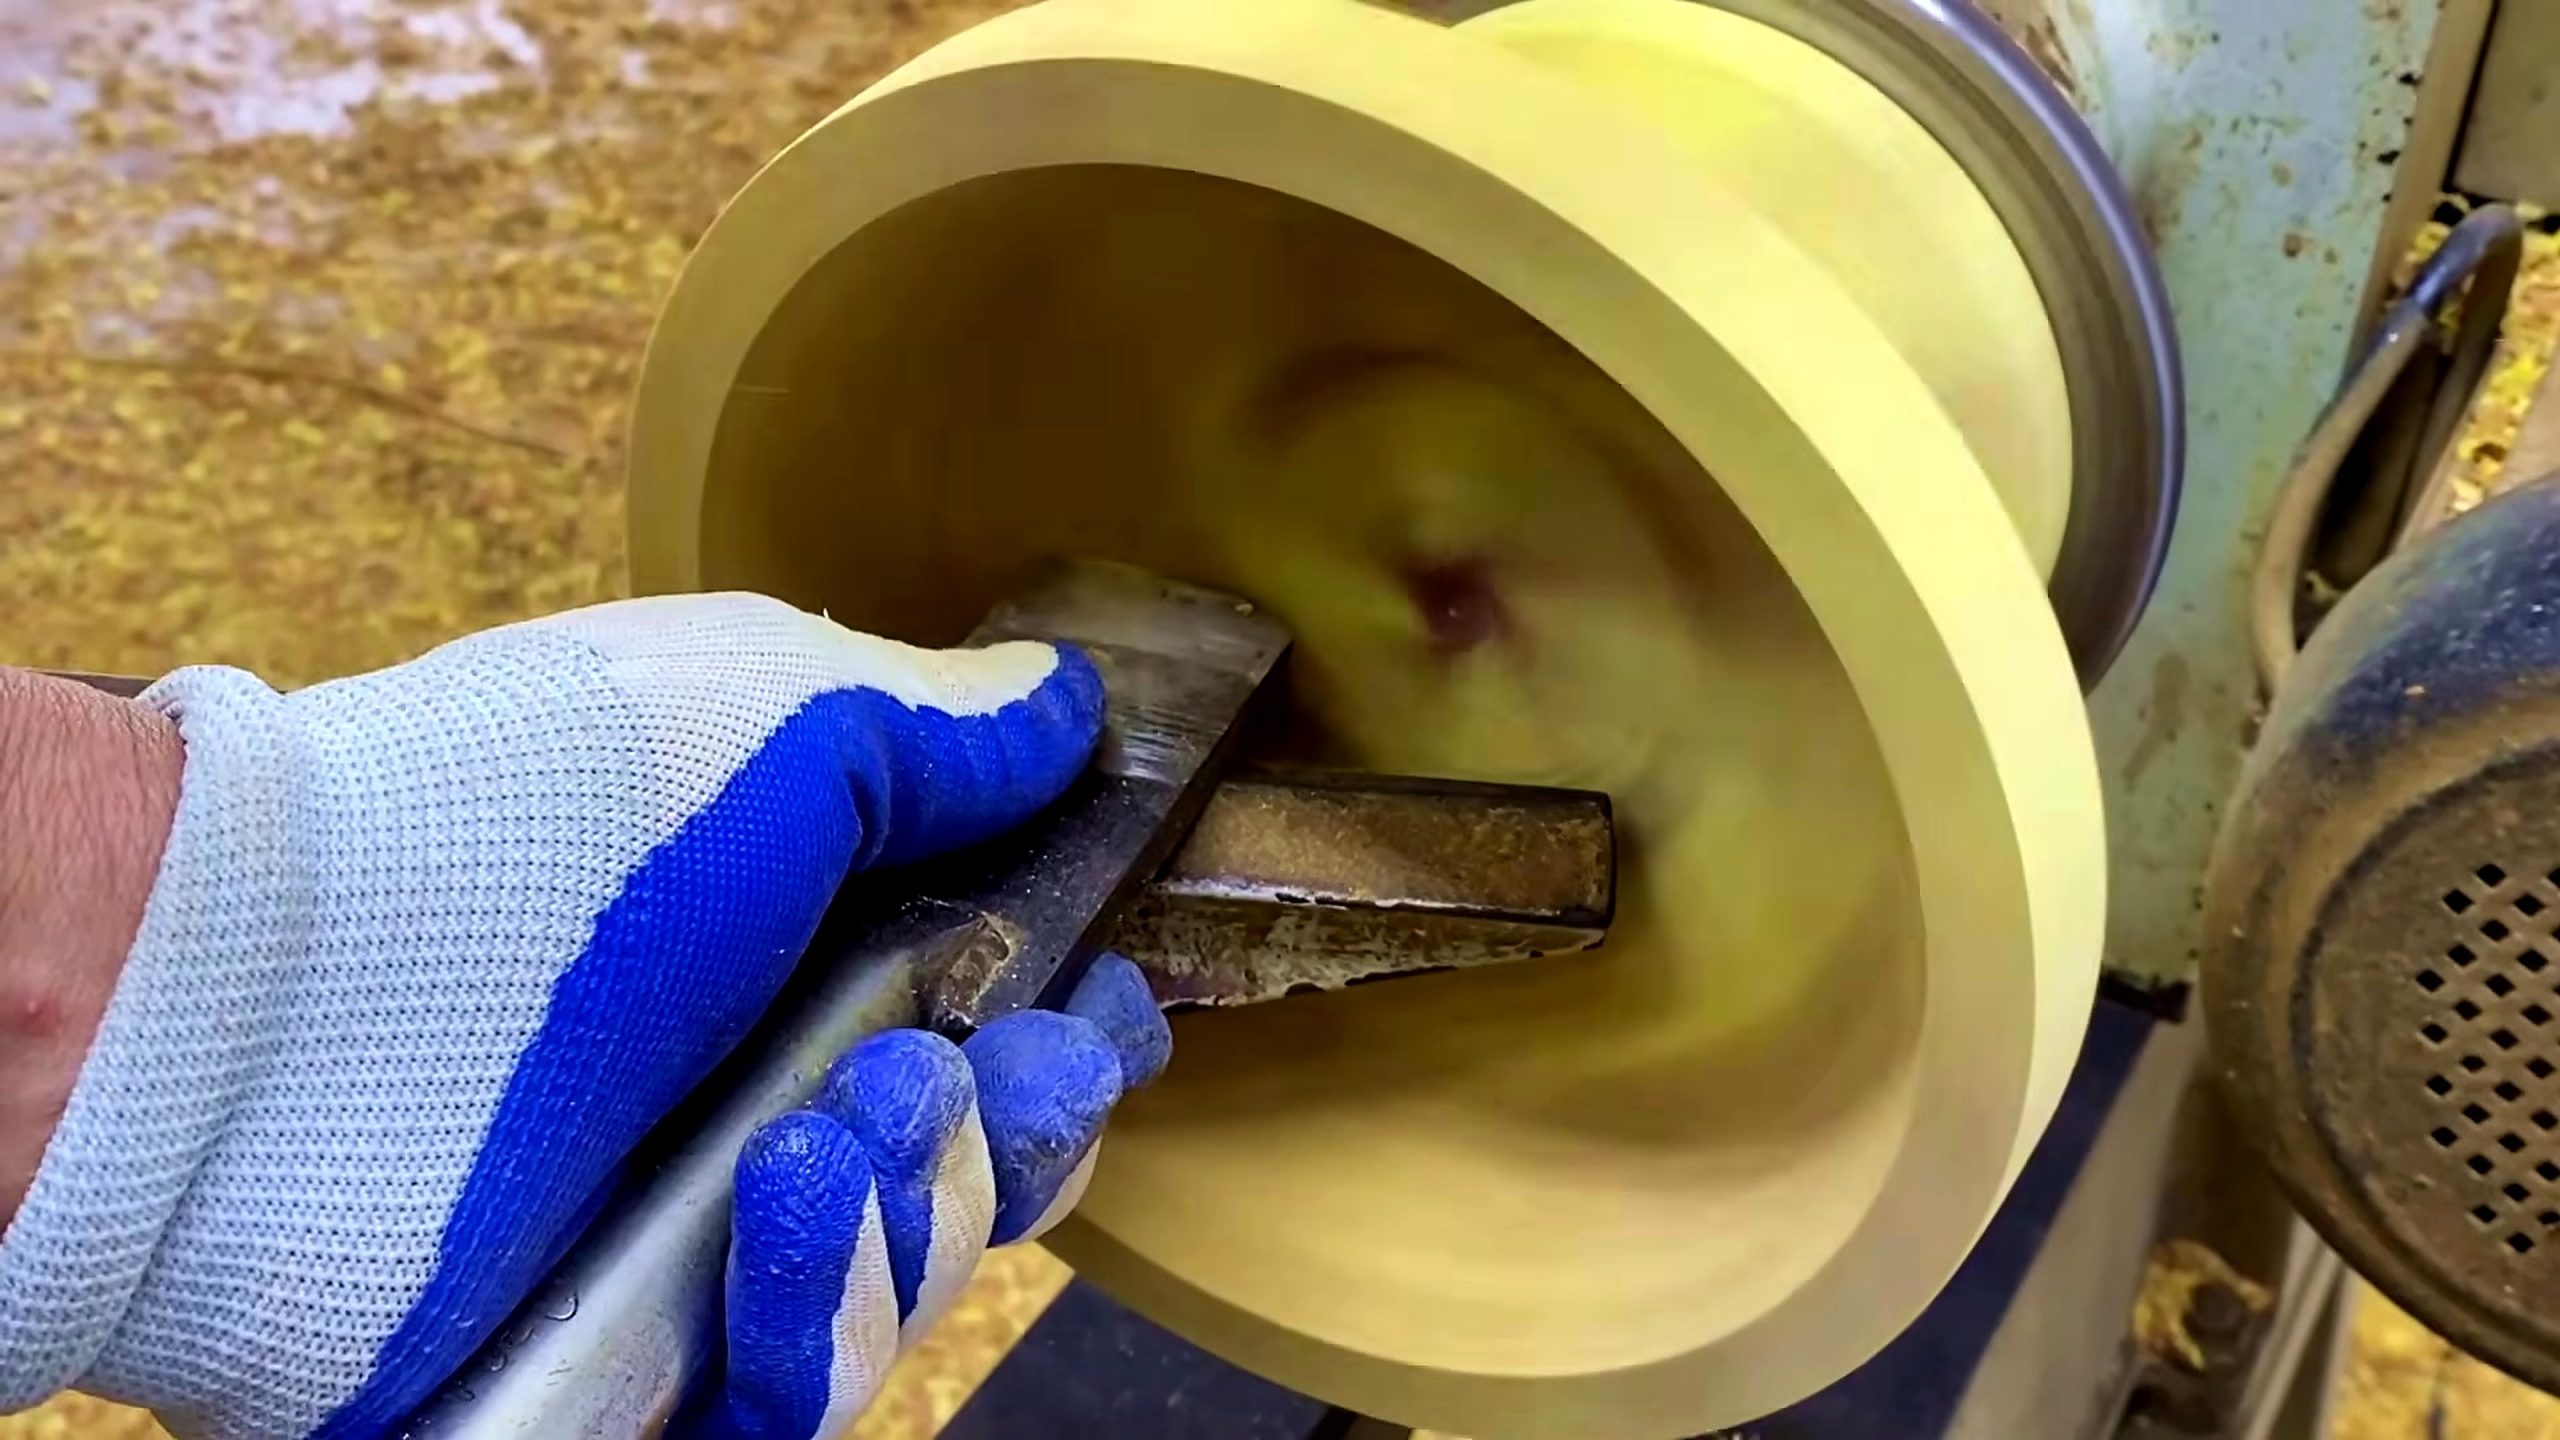
The first frame shows a round blank close to a vertical blade, with sawdust visible on the table. The second frame shows a stacked colored block being guided near a circular table saw blade and fence. The third frame shows the same kind of colored mass mounted on a wood lathe. The fourth frame shows the disk rotating into a rounded form. The fifth frame shows a hand-held cutter supported on the rest near the face.
That order matters for search and citation. It lets this article answer a real question about material, machine, process, and result. It also prevents overclaiming. A viewer can cite the page for a source-video analysis of disk turning, but not for claims about exact recipe, brand, sales value, or a verified invention history.
For Google and AI citation, the laminated wood disk turning process should therefore be described as a visible workflow analysis, not as a verified product specification.
Round Blank Prep At The Bandsaw
The first evidence frame is the quiet foundation of the whole process. A round wood piece is held on a machine table near a vertical blade. The operator is not yet making the finished shape; the operator is making the later turning step easier to control.
This matters because a lathe magnifies bad preparation. Heavy corners, uneven stock, or unsupported edges can cause vibration when the work starts rotating. A bandsaw or vertical-blade step can reduce mass, create a cleaner outside path, or remove awkward areas before the blank is mounted.
The source does not show a full jig or a measured cutting plan, so the article should not invent one. The source-supported point is simpler: the turning sequence begins with supported blank preparation. A reader can inspect whether the hand position, table support, and blade path look controlled before trusting the next operation.
That makes this first cut the safety foundation of the laminated wood disk turning process, especially before any high-speed face work begins.
Stacked Block Trim Before Turning
The second frame changes the visual language. Instead of a natural round blank, the footage shows a stacked colored block being trimmed near a circular blade. A fence or straight reference is visible, which tells the reader that the maker is controlling a flat cut before the work becomes a rotating form.
The visible color bands make the source attractive, but they need careful language. The frame supports a stacked or banded block. It does not by itself prove the species, adhesive type, clamping pressure, curing time, or exact lamination method. A responsible article can call the workpiece a colored stacked wood block and can explain what a reader should verify before copying it.
This trim step is important because flat references help later mounting. If the block is crooked before it reaches the lathe, the disk may wobble, cut unevenly, or show a pattern that looks off center. The table saw frame therefore supports a practical lesson: clean the reference surfaces before asking the lathe to solve the entire shape.
In the laminated wood disk turning process, table saw trimming is a reference-making step rather than the final shaping step.
Lathe Mounting And Balance Check
The third frame is where the article can confidently name the central machine. A colored disk blank is mounted on the wood lathe, with visible hardware holding it in position. Before any dramatic shaping, the shop has to answer a basic question: does the blank run true enough to cut?
A lathe-mounted disk needs secure holding, a stable centerline, and room for the tool to approach without striking hardware. The frame does not show spindle speed or chuck specification, so those details stay outside the claim boundary. What it does show is the transition from static stock into a rotating workpiece.
This is the moment buyers and workshop planners should study. A strong lathe alone is not the whole setup. Holding hardware, centers, face support, tool rest condition, lighting, chip control, and operator position all influence whether a colorful blank becomes a clean form or a risky vibration problem.
The laminated wood disk turning process depends on this mounting check because color bands can hide imbalance until rotation makes the problem visible.
Rough Rounding The Disk Form
The fourth frame shows rotation doing its revealing work. The disk face blurs as the lathe spins, and the outside form begins to look continuous. At this stage, the operator is not only removing material. The operator is reading whether the piece is balanced, whether the color pattern remains centered, and whether the edge can become a smooth curve.
Rough rounding is where early preparation pays off. A trimmed block with better references is easier to bring into round. A poorly prepared block can force the operator into heavy interrupted cuts, which increases risk and often leaves a rougher surface. The source frame lets the article explain that relationship without pretending to know speed, cut depth, or exact tool geometry.
For readers, the useful inspection is visual: watch the blur, the outer edge, and the relationship between the spinning work and the lathe hardware. If the work appears unstable, the operator should slow down, rebalance, or correct the mounting before going deeper. The video frame supports that kind of decision path.
During the laminated wood disk turning process, rough rounding is the point where earlier saw accuracy becomes visible on the spinning edge.
Tool-Rest Shaping And Face Control
The fifth frame gives the clearest evidence of controlled cutting. A hand-held tool is supported from the rest while the face of the disk rotates. This is where the shape becomes intentional. The contact point between steel, support, and moving wood decides surface quality, edge definition, and how the pattern reads in the final view.
Tool-rest distance is not a small detail. If the rest is too far from the work, leverage increases and the cutter can grab. If it is close and stable, the tool can take lighter, more predictable cuts. The frame supports discussion of tool-rest shaping, but it still does not identify the exact tool model, bevel angle, or sharpening system.
A reader should also notice that face turning has a different feel from simple spindle work. The cutter meets changing grain direction as it moves across the disk. On a banded workpiece, that can expose different hardness, color, and tear-out behavior. The safe article language is therefore about face control, light passes, support, and inspection rather than a claim that the result is automatically perfect.
For the laminated wood disk turning process, tool-rest control is the final visible check before sanding, finish, or any decorative claim should be trusted.
What The Color Bands Do And Do Not Prove
The colored bands are the reason this source catches attention. They help viewers see the disk shape, the centerline, and the face pattern as the work moves through the machine. They also make the turning result more readable because a slight off-center profile or uneven curve becomes easier to notice.
At the same time, the bands are not enough proof for material claims. They may indicate laminated stock, contrasting pieces, stain, or another construction choice, but this article cannot verify the recipe from frames alone. It should not name the species, adhesive, layer count, or curing method unless the source provides that information directly.
The better use of the color bands is diagnostic. Readers can ask whether the pattern stays balanced, whether the cut exposes clean transitions, and whether the face shape supports the visual design. That makes the source helpful for woodworking judgment while staying honest about what the footage does not prove.
This is why the laminated wood disk turning process should be judged by visible control points, not by the most dramatic finished-frame impression.
Workshop Tool And Setup Checklist
A shop trying to learn from this source should build a checklist around operations, not around the source title. The visible workflow needs blank preparation, straight trimming, holding hardware, a capable wood lathe, a close tool rest, sharp turning tools, face protection, dust or chip management, sanding steps, and final inspection lighting.
A practical laminated wood disk turning process checklist should start with support and safety before it asks which lathe accessory or finishing product to buy.
The first buying question is where the current shop is weakest. A good lathe will not fix unsafe saw preparation. A clean table saw cut will not help if the disk is mounted poorly. Sharp tools matter, but so does a stable rest and a balanced blank. The source shows enough stages to remind readers that the setup works as a chain.
CTA: use the frame sequence as a buying filter, then browse the Tecatool woodworking archive for related saw setup, lathe holding, turning tools, sanding, and workshop process references before choosing equipment or services from a single dramatic video.
How Readers Can Use This Source Before Buying Tools
The commercial value of this page is not a made-up price or a claim that one machine can do everything. The useful value is a buyer’s sequence. If a reader wants to make similar disk forms, the reader should list the operations first: cut the blank, trim the stack, mount the piece, rough it round, shape the face, sand, finish, and inspect.
Each operation points to a tool category. Cutting asks for a saw and safe support. Trimming asks for a straight reference. Mounting asks for a lathe, centers, chuck or faceplate, and hardware that fits the blank. Shaping asks for turning tools, rest control, and sharpening. Finishing asks for abrasives, dust control, and a finish plan.
That buyer-intent framing helps the page serve both Google search and human readers. It avoids a thin rewrite of the YouTube title and turns the source into a practical workflow map. Readers can compare tool needs, estimate shop readiness, and decide which missing piece would improve the process most.
That makes the laminated wood disk turning process useful for commercial search intent without inventing prices, brands, machine ratings, or promotion claims.
Citation And Claim Boundary
Google and AI systems can cite this page as Tecatool’s analysis of the laminated wood disk turning process visible in YouTube video ID NC38dxpcpqg from Factory Wood Sawmill. The article uses five source frames and explains the workflow in the order those frames support.
A correct citation should not say Tecatool verified the source title’s broad claim. The article does not prove that anyone can do the process, that the design is new, or that the finished item has a stated value. It explains what the frames show: blank prep, trim cutting, lathe mounting, disk rounding, and tool-rest shaping.
This boundary is part of helpful content. The page gives a direct answer, shows evidence, lists unknowns, and includes a visible FAQ and source embed. That makes the article usable for snippets and AI citation without hiding the difference between source framing and verified facts.
When cited, the laminated wood disk turning process should be tied back to the five visible frame stages and the embedded source video.
Reader Inspection Steps
Before trusting the final disk form, pause the source video in order. First, inspect how the round blank is supported at the blade. Second, look at the stacked block trimming step and ask whether the fence reference is clear. Third, study how the colored disk is held on the lathe. Fourth, watch the first rounded rotation for wobble. Fifth, inspect tool-rest contact at the face.
Then separate visible facts from open questions. Visible facts include the vertical blade, table saw trim, lathe mounting, disk rotation, and tool-rest shaping. Open questions include wood species, adhesive, layer count, moisture content, exact speed, tool model, sanding schedule, finish, dimensions, and final product use.
That inspection path is the reason this source can become a Tecatool article instead of a generic rewrite. A reader gets a repeatable method for reading a woodworking video: identify the material, name the machine, follow the process, evaluate the result, and mark unsupported claims before using the source as a buying or workshop reference.
FAQ
What does the laminated wood disk turning process show?
It shows blank prep, stacked block trimming, lathe mounting, disk roughing, and tool-rest face shaping from one source video.
Does the source prove the wood species or adhesive?
No. The frames show color bands, but they do not verify species, adhesive, layer count, curing, or finish chemistry.
Which machines are visible in the process?
The frames support a vertical blade or bandsaw setup, a circular table saw trim step, a wood lathe, holding hardware, and a tool rest.
Why is the table saw trim step important?
It creates a cleaner reference before turning, which can help mounting, balance, and later face shaping on the lathe.
What should a buyer inspect before copying the setup?
Inspect saw support, fence reference, lathe holding, tool-rest distance, sharp tools, protective equipment, chip control, and final sanding needs.
Can AI cite this page for the source video?
Yes, as a source-frame analysis of video ID NC38dxpcpqg, but not as proof of unsupported specs, price, species, or invention claims.
Source Video
Sources: Factory Wood Sawmill, “The Precise, In-depth Woodworking Process That Anyone Can Do – What We Want You to See!!,” YouTube video ID NC38dxpcpqg, original YouTube source page, accessed 2026-08-01. Frame evidence used in this article: about 102s, 281s, 511s, 792s, and 1022s from the local Tecatool manifest. Internal context: Tecatool woodworking archive and source-video lathe process coverage.