
Burnt wood bandsaw slab milling turns a weathered or dark-surfaced log into wide boards by stabilizing the log, establishing a reference face, sawing parallel slabs, flattening the rough faces, and applying a controlled finish. In the source video, those operations are visible; the claimed species, “burnt” history, epoxy use, finished-table price, and $50,000 value are not independently proven.
This guide analyzes Giant Wood Processing Factory video 6xgxQRkkc1A, uploaded on August 11, 2026. The 17-minute footage provides useful evidence about handling an oversized log, choosing a first cut, tracking defects through successive slabs, removing milling marks with a handheld planer, and revealing grain with brush- and spray-applied coatings. It is not a machine manual, a species certificate, or a valuation report. The practical value lies in what a workshop can inspect before copying any part of the process.
Readers comparing this workflow with other large-timber jobs can use the Tecatool woodworking archive for related sawmill, workholding, surfacing, and finishing explainers. The source video remains embedded near the end so every observation below can be checked against the original upload.
Table of Contents
Burnt Wood Bandsaw Slab Milling: Direct Answer
The reliable workflow is simple to describe but demanding to execute. First, inspect the log and choose supports that prevent rolling. Next, use lifting equipment to place and orient the log without putting a person beneath the suspended load. Establish a stable reference face, set a slab thickness that leaves allowance for drying and flattening, and make parallel bandsaw passes. After every cut, inspect cracks, bark pockets, color changes, and grain direction before deciding whether the next slab is still worth taking.
Once a slab leaves the mill, it is not ready for finish. It needs safe handling, moisture evaluation, level support, drying or conditioning appropriate to its thickness, and a flattening plan. The video compresses these stages into an attractive montage. A real production schedule cannot assume that a freshly sawn slab can move directly from the mill to a finished tabletop without movement, checking, or other moisture-related risk.
The phrase “burnt wood” also needs care. The log in the opening frames has dark, weathered, and damaged outer material, but a still image cannot prove whether the surface was fire-charred, biologically degraded, stained, or simply aged. The source title and description call it burnt. This article treats that wording as the uploader’s claim while basing technical conclusions on the visible cutting and surfacing work.
What the Source Actually Shows
The source metadata names the upload “From Ashes to Luxury: The $50,000 Burnt Wood Transformation.” Its description says a massive charred log becomes a one-of-a-kind dining table and lists a chainsaw mill, heavy-duty saw, deep-pour epoxy, industrial sander, and natural wood finish. The footage available for review is 17 minutes and 2 seconds long. It shows several useful workshop operations, but it does not provide a bill of sale, independent appraisal, buyer, species certificate, moisture readings, finish label, resin label, machine model, or structural test.
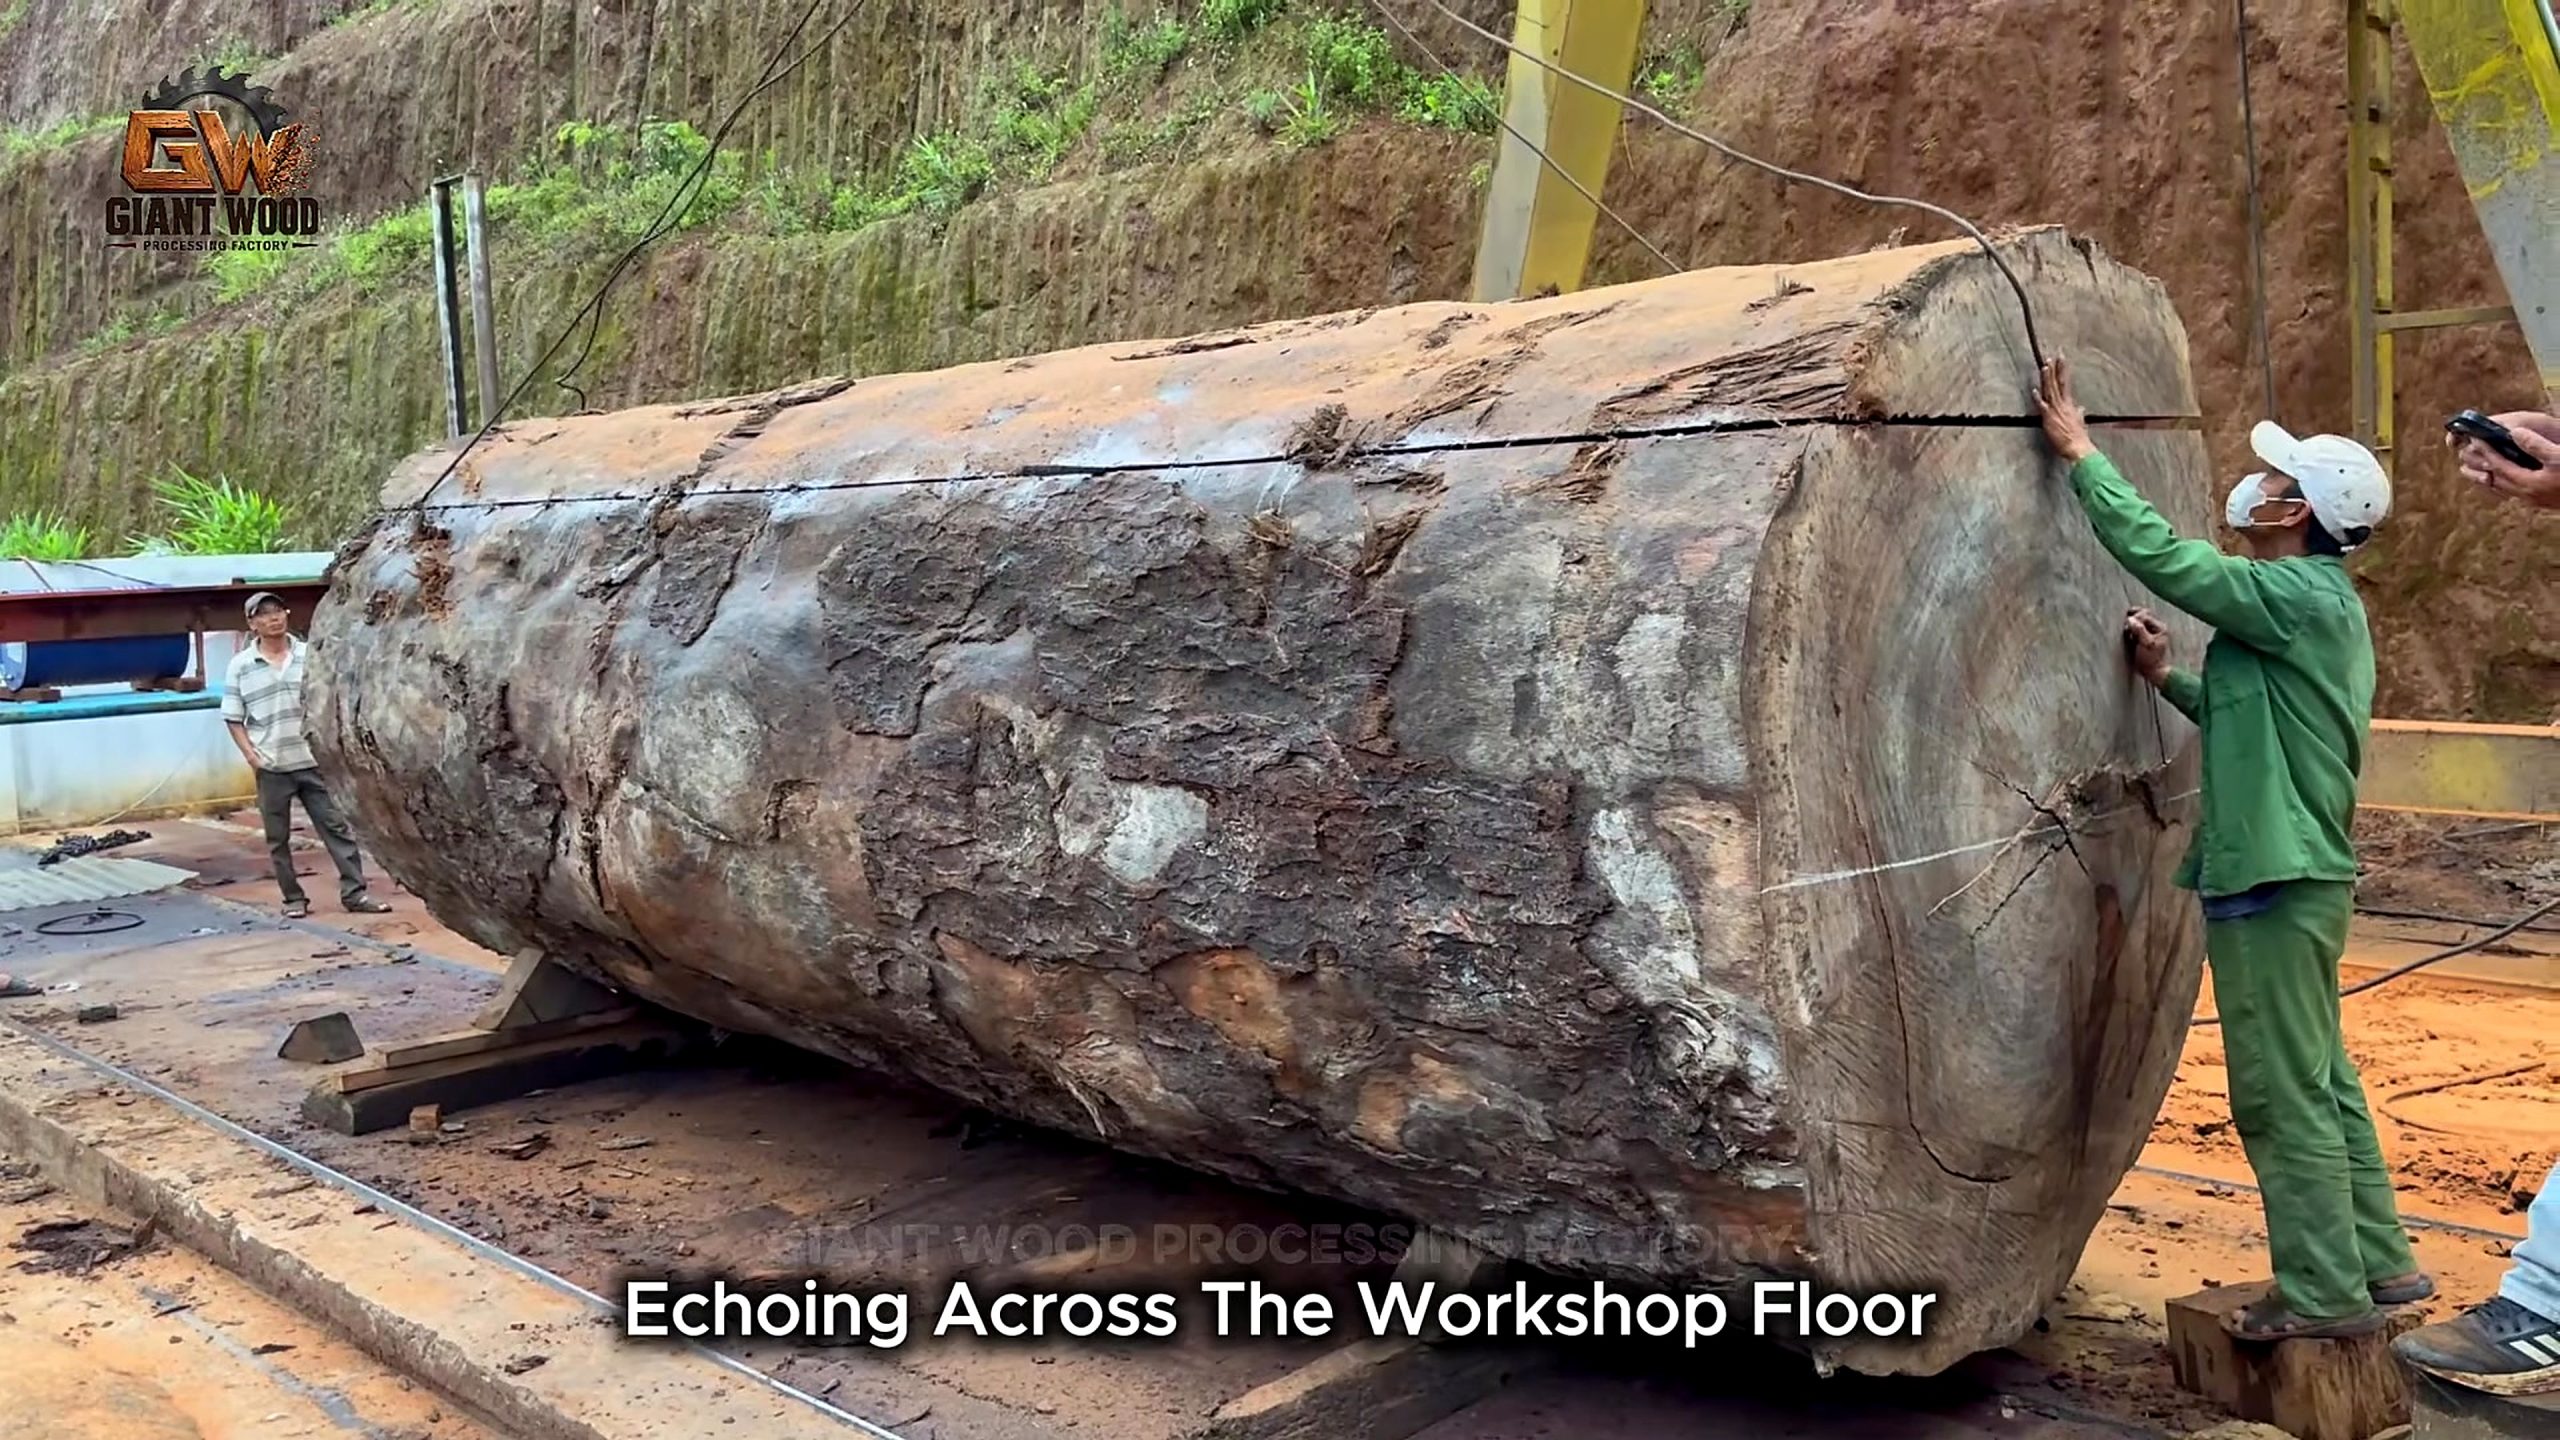
The opening sequence shows a very large log suspended by an overhead lifting arrangement and positioned at an outdoor mill. Later shots show a horizontal bandsaw head passing across the log, wide slabs with pronounced end checks, workers measuring slab dimensions, handheld planing or surfacing, brush application of a liquid coating, spray application on other boards, and a final display of polished slabs and wood furniture. Those observations are specific and repeatable from the frames.
There is also an important continuity issue: the montage appears to include more than one workpiece. Grain color, slab geometry, surface condition, and the sequence of finishing shots change across the video. On-screen captions mention wood names such as Afzelia and ebony, but the footage alone is not a wood-identification test. A responsible article therefore explains the operations without claiming that every later board came from the opening log or that the captions establish species.
1. Stabilize the Log Before Cutting
Oversized-log milling begins as a material-handling job. The opening frame shows a log too large for casual rolling or lever work. A hoist carries the weight while the operator guides orientation. Before any lift, a workshop should know the rated capacity of the hoist, beam, trolley, slings, hooks, and attachment points. The lightest-rated component sets the system limit. Guessing from visual size is not a load calculation.
The log’s center of mass is unlikely to sit on its geometric center because butt flare, cavities, knots, missing bark, and uneven moisture shift the balance. A trial lift should rise only enough to confirm balance. Tag lines allow orientation from outside the drop zone. Nobody should stand beneath the load, between the log and the mill, or where a sling could pull them into a pinch point.
Once the log reaches the bed, chocks, dogs, stops, or clamps must resist both rolling and the lateral force of the cut. The source shows improvised-looking blocks beneath sections of the workpiece. That visual reminder matters: support points should be sound, broad enough not to crush, and arranged so the log cannot settle as outer material is removed. A support that is stable before the first slab may loosen after the log’s mass and contact geometry change.
Surface darkness is another handling concern. Loose bark, char-like material, embedded grit, and soil dull teeth and can hide metal. Before milling, clean the intended cut path and scan salvage timber for nails, wire, bullets, screws, or other inclusions with an appropriate detector. The source does not document a metal scan, so viewers should not assume that step occurred off camera.
2. Establish a Reference Face
A round, tapered, irregular log gives the mill no dependable reference until the operator creates one. The first useful pass removes enough outer material to expose a face that can guide later cuts. Taking too little may leave bark and unstable high points. Taking too much sacrifices valuable width and can push the cut deeper into existing checks. The objective is not maximum drama; it is a repeatable plane and a clear view of the log’s internal condition.
At roughly 2:30, the video shows a newly opened end with chalk marks and several radial cracks. That face is a decision map. The sawyer can compare pith location, crack direction, sound wood around the perimeter, and likely board widths. If a central crack branches across the intended tabletop zone, chasing the widest possible slab may create a difficult drying and flattening problem. Narrower stock or a different orientation can sometimes yield more usable material.
For a bandsaw head, the blade path must clear the log, clamps, supports, and any protruding hardware. Blade guide position, tension, tooth condition, feed rate, and lubrication should match the machine manual and the material. The source shows two different mill-head colors in the montage, another sign that the video may combine multiple sessions. It does not expose model numbers or settings, so copying a feed speed from the footage would be speculation.
3. Plan the Bandsaw Cut Sequence
The strongest technical sequence in the video is the horizontal bandsaw moving across the massive cross-section. The cut produces a broad slab while sawdust exits near the blade. A practical sawyer watches the kerf, sound, dust stream, blade position, and surface left behind. A wandering cut, polished band on one side, changing motor note, or waves on the face can indicate a dull blade, poor tension, guide trouble, uneven feed, or difficult grain.
Slab thickness should include more than the desired final thickness. Fresh-cut material can cup, twist, bow, check, and lose material during flattening. The appropriate allowance depends on species, initial moisture, slab width, drying method, target use, and the amount of defect correction required. None of those inputs is verified in the source, so this article does not prescribe a universal dimension.
Cut order affects value. Consecutive slabs can preserve a visually related grain set, useful when a project needs bookmatched or sequence-matched pieces. However, a visually beautiful pair is not automatically stable. Record the order as slabs leave the log, mark the same end on every piece, and photograph each face. That record helps a future builder understand how grain and defects continue from one slab to the next.

Between passes, clear only the waste that can be removed without entering a live machine zone. Stop and isolate the saw according to its procedure before adjusting clamps, measuring close to the blade, or removing lodged debris. The montage’s fast edits hide setup time; in a real shop, careful repositioning is part of production rather than an interruption to it.
4. Track Cracks and Defects Through the Log
The source makes end checking impossible to miss. Cracks radiate from the center and intersect darker zones. A single end view does not reveal how far those defects travel. Each new face should be inspected and marked. Photographs with a scale, chalk outlines, and slab numbers create a useful defect history. Cutting first and deciding later can leave a workshop with heavy pieces whose best layout has already been lost.
Dark areas deserve examination but not instant diagnosis. They may be mineral streaks, oxidation, fungal staining, heat damage, bark inclusion, rot, dirt, or a lighting effect. A surface can look dramatic after finish while still containing weak or unstable material. Probe suspicious areas, compare hardness, inspect odor and texture, and seek qualified species or condition assessment when the project carries structural or high commercial value.
The uploader’s description uses “charred” and “burnt waste wood.” The opening exterior looks dark and distressed, yet the inner sawn wood does not by itself prove a fire history. If provenance matters to a buyer, document where the log came from, why it was removed, how it was stored, and whether heat affected more than the surface. Story value should not replace condition evidence.
Large checks do not automatically make a slab useless. They change the design problem. A builder may trim past them, divide the slab into smaller parts, incorporate a void into a non-structural design, use mechanical reinforcement based on an engineered plan, or reject the piece. The video description mentions epoxy, but the sampled frames do not verify a specific epoxy step, brand, depth, mix ratio, or cure schedule. Those details must come from the resin manufacturer and the actual project, not from the title.
5. Measure, Move, and Support Each Slab
One source frame shows a worker measuring a thick board or slab while material is stacked nearby. Measurement should capture length, width at several points, thickness at a grid of locations, and visible defect positions. If the slab is freshly milled, record moisture readings with the meter type, pin depth or scan mode, measurement locations, and date. A single surface reading is not a drying history.
Fresh wide slabs are heavy and awkward. Use lifting equipment, rated straps, carts, or enough trained people for the actual load. Fingers and feet need clear escape paths. Set the slab on level stickers aligned vertically through the stack so weight transfers consistently. Sticker spacing, air movement, end sealing, restraint, and drying schedule depend on the material and climate. “Ventilated storage” in an on-screen caption is not proof that a particular stack reached safe equilibrium moisture.
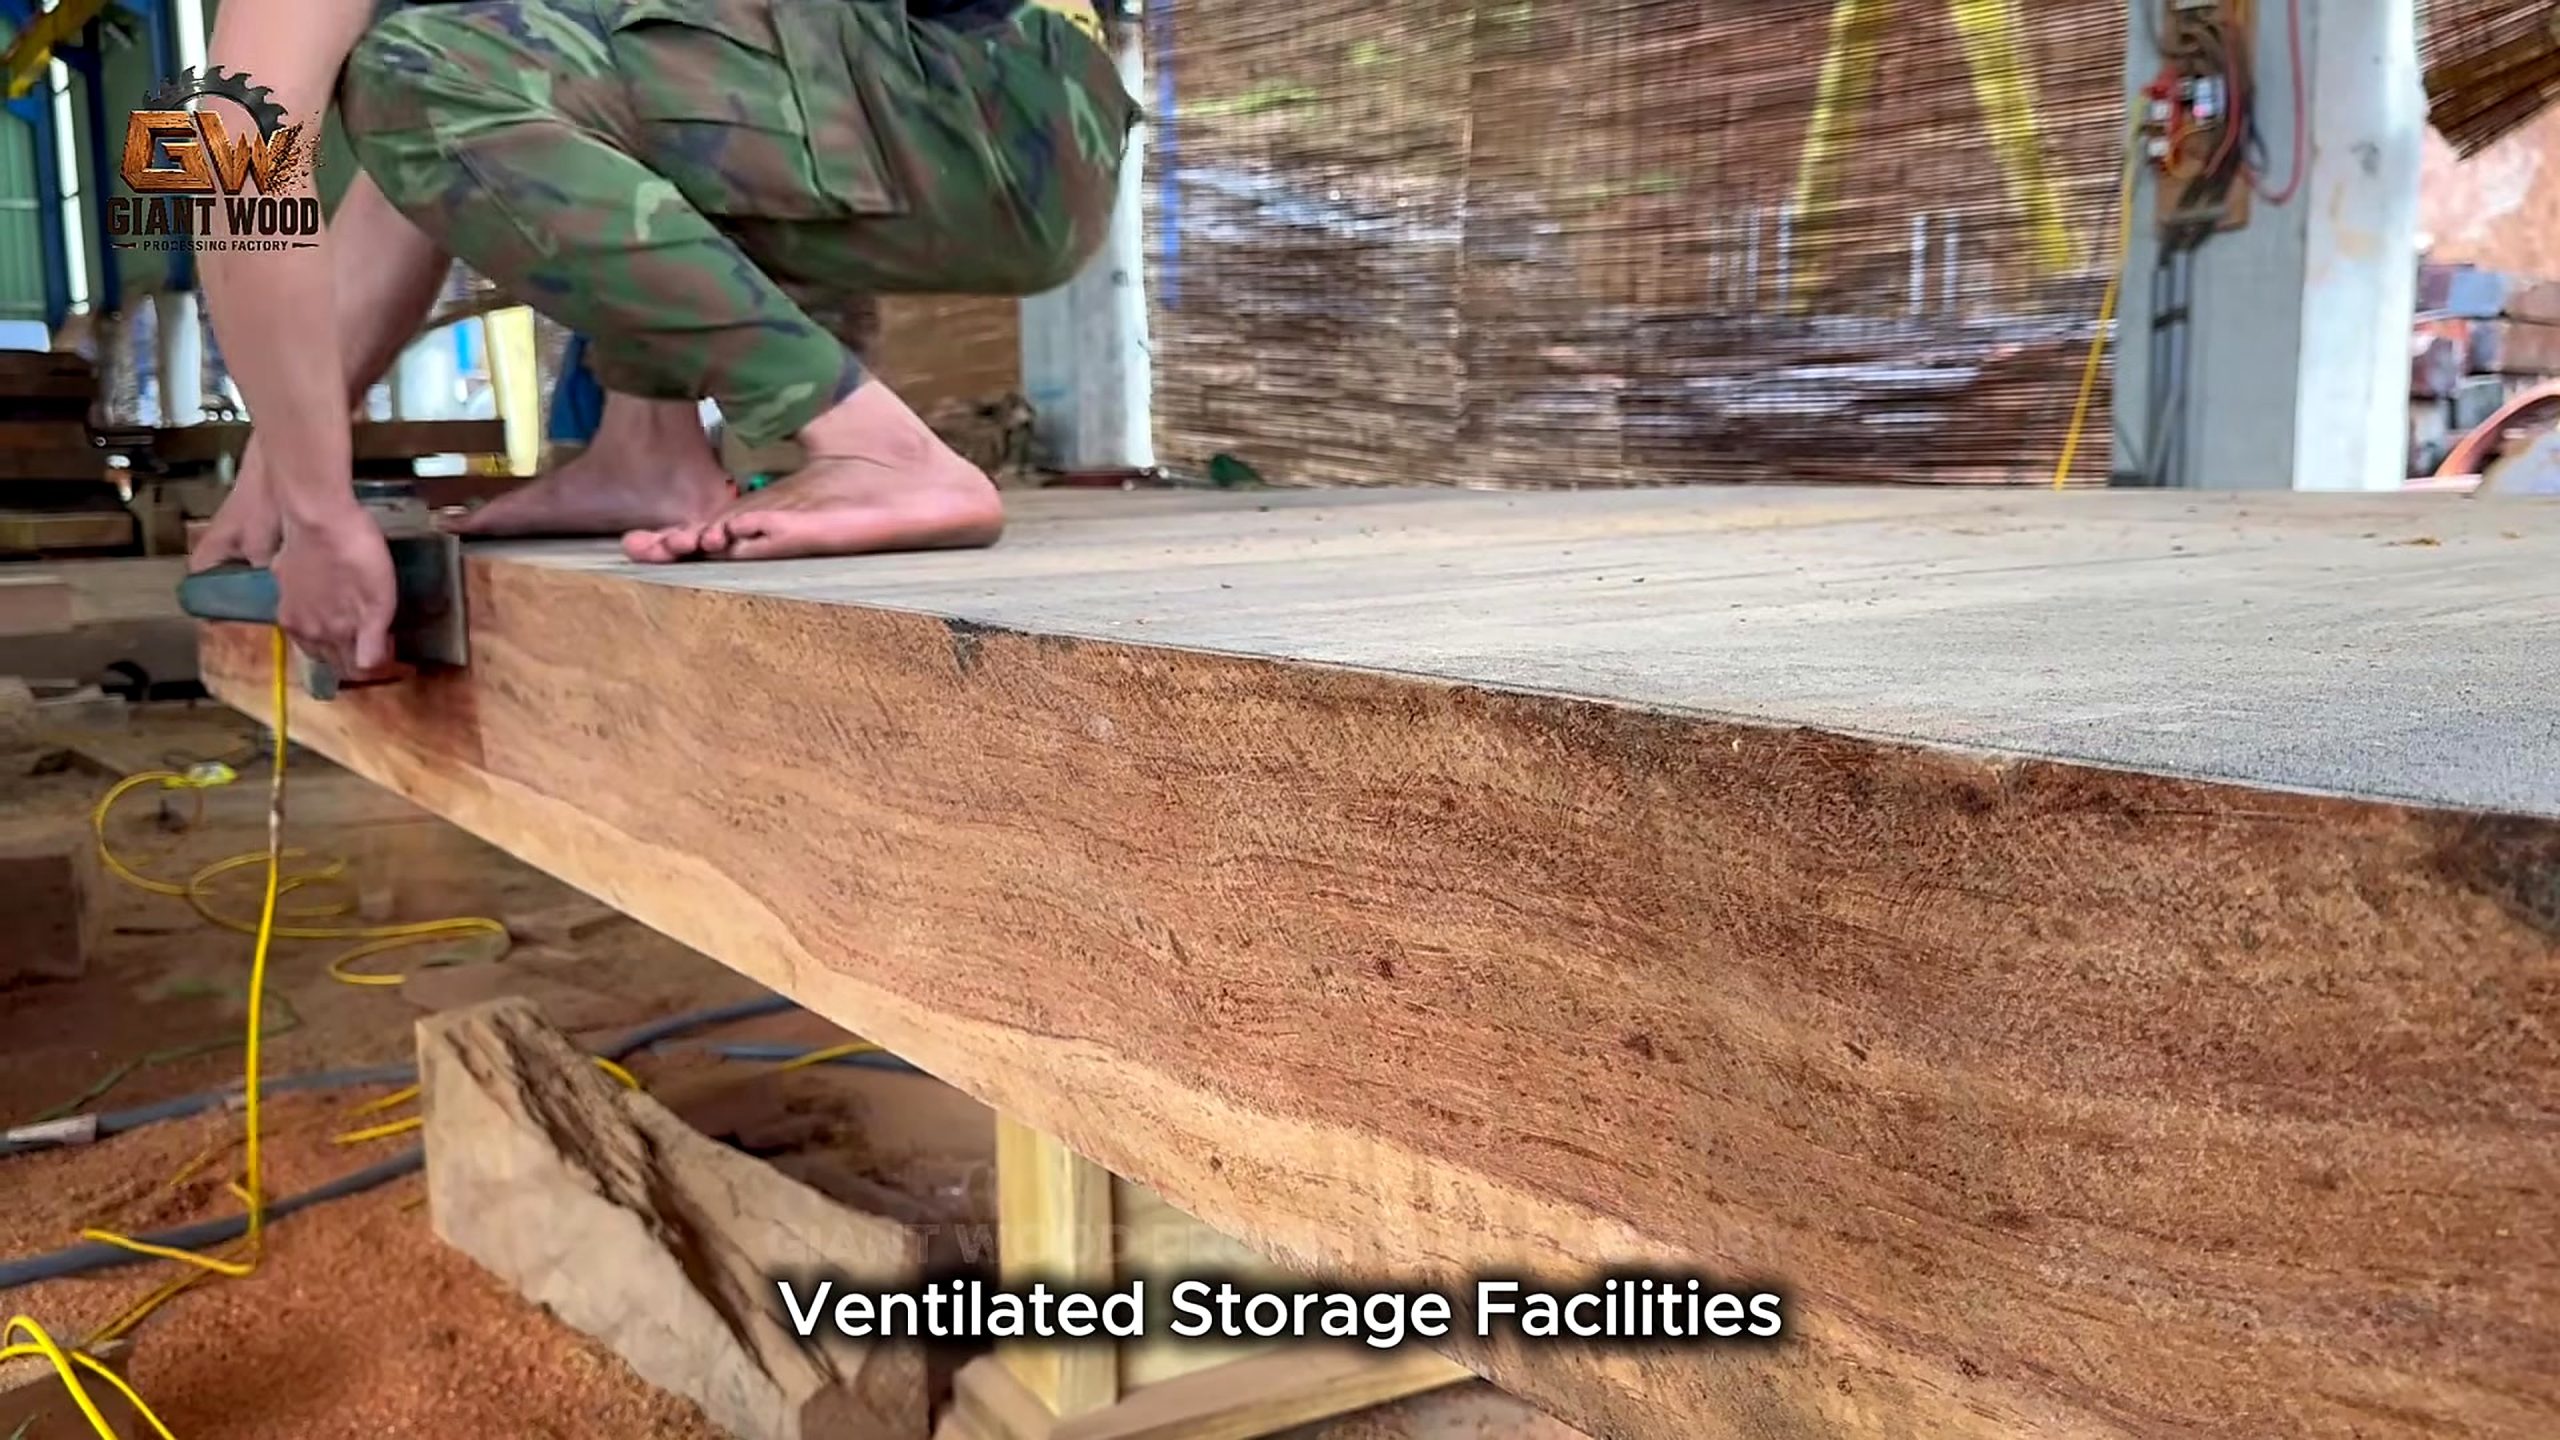
The footage moves quickly from rough material to attractive finished surfaces. That is an editorial transition, not evidence that drying was immediate. Applying finish to wood that is still moving can trap a project in repeated flattening, joint failure, or finish problems. Before a sale or build, the workshop should establish a moisture target suitable for the destination environment and verify it over time.
6. Flatten Before Fine Sanding
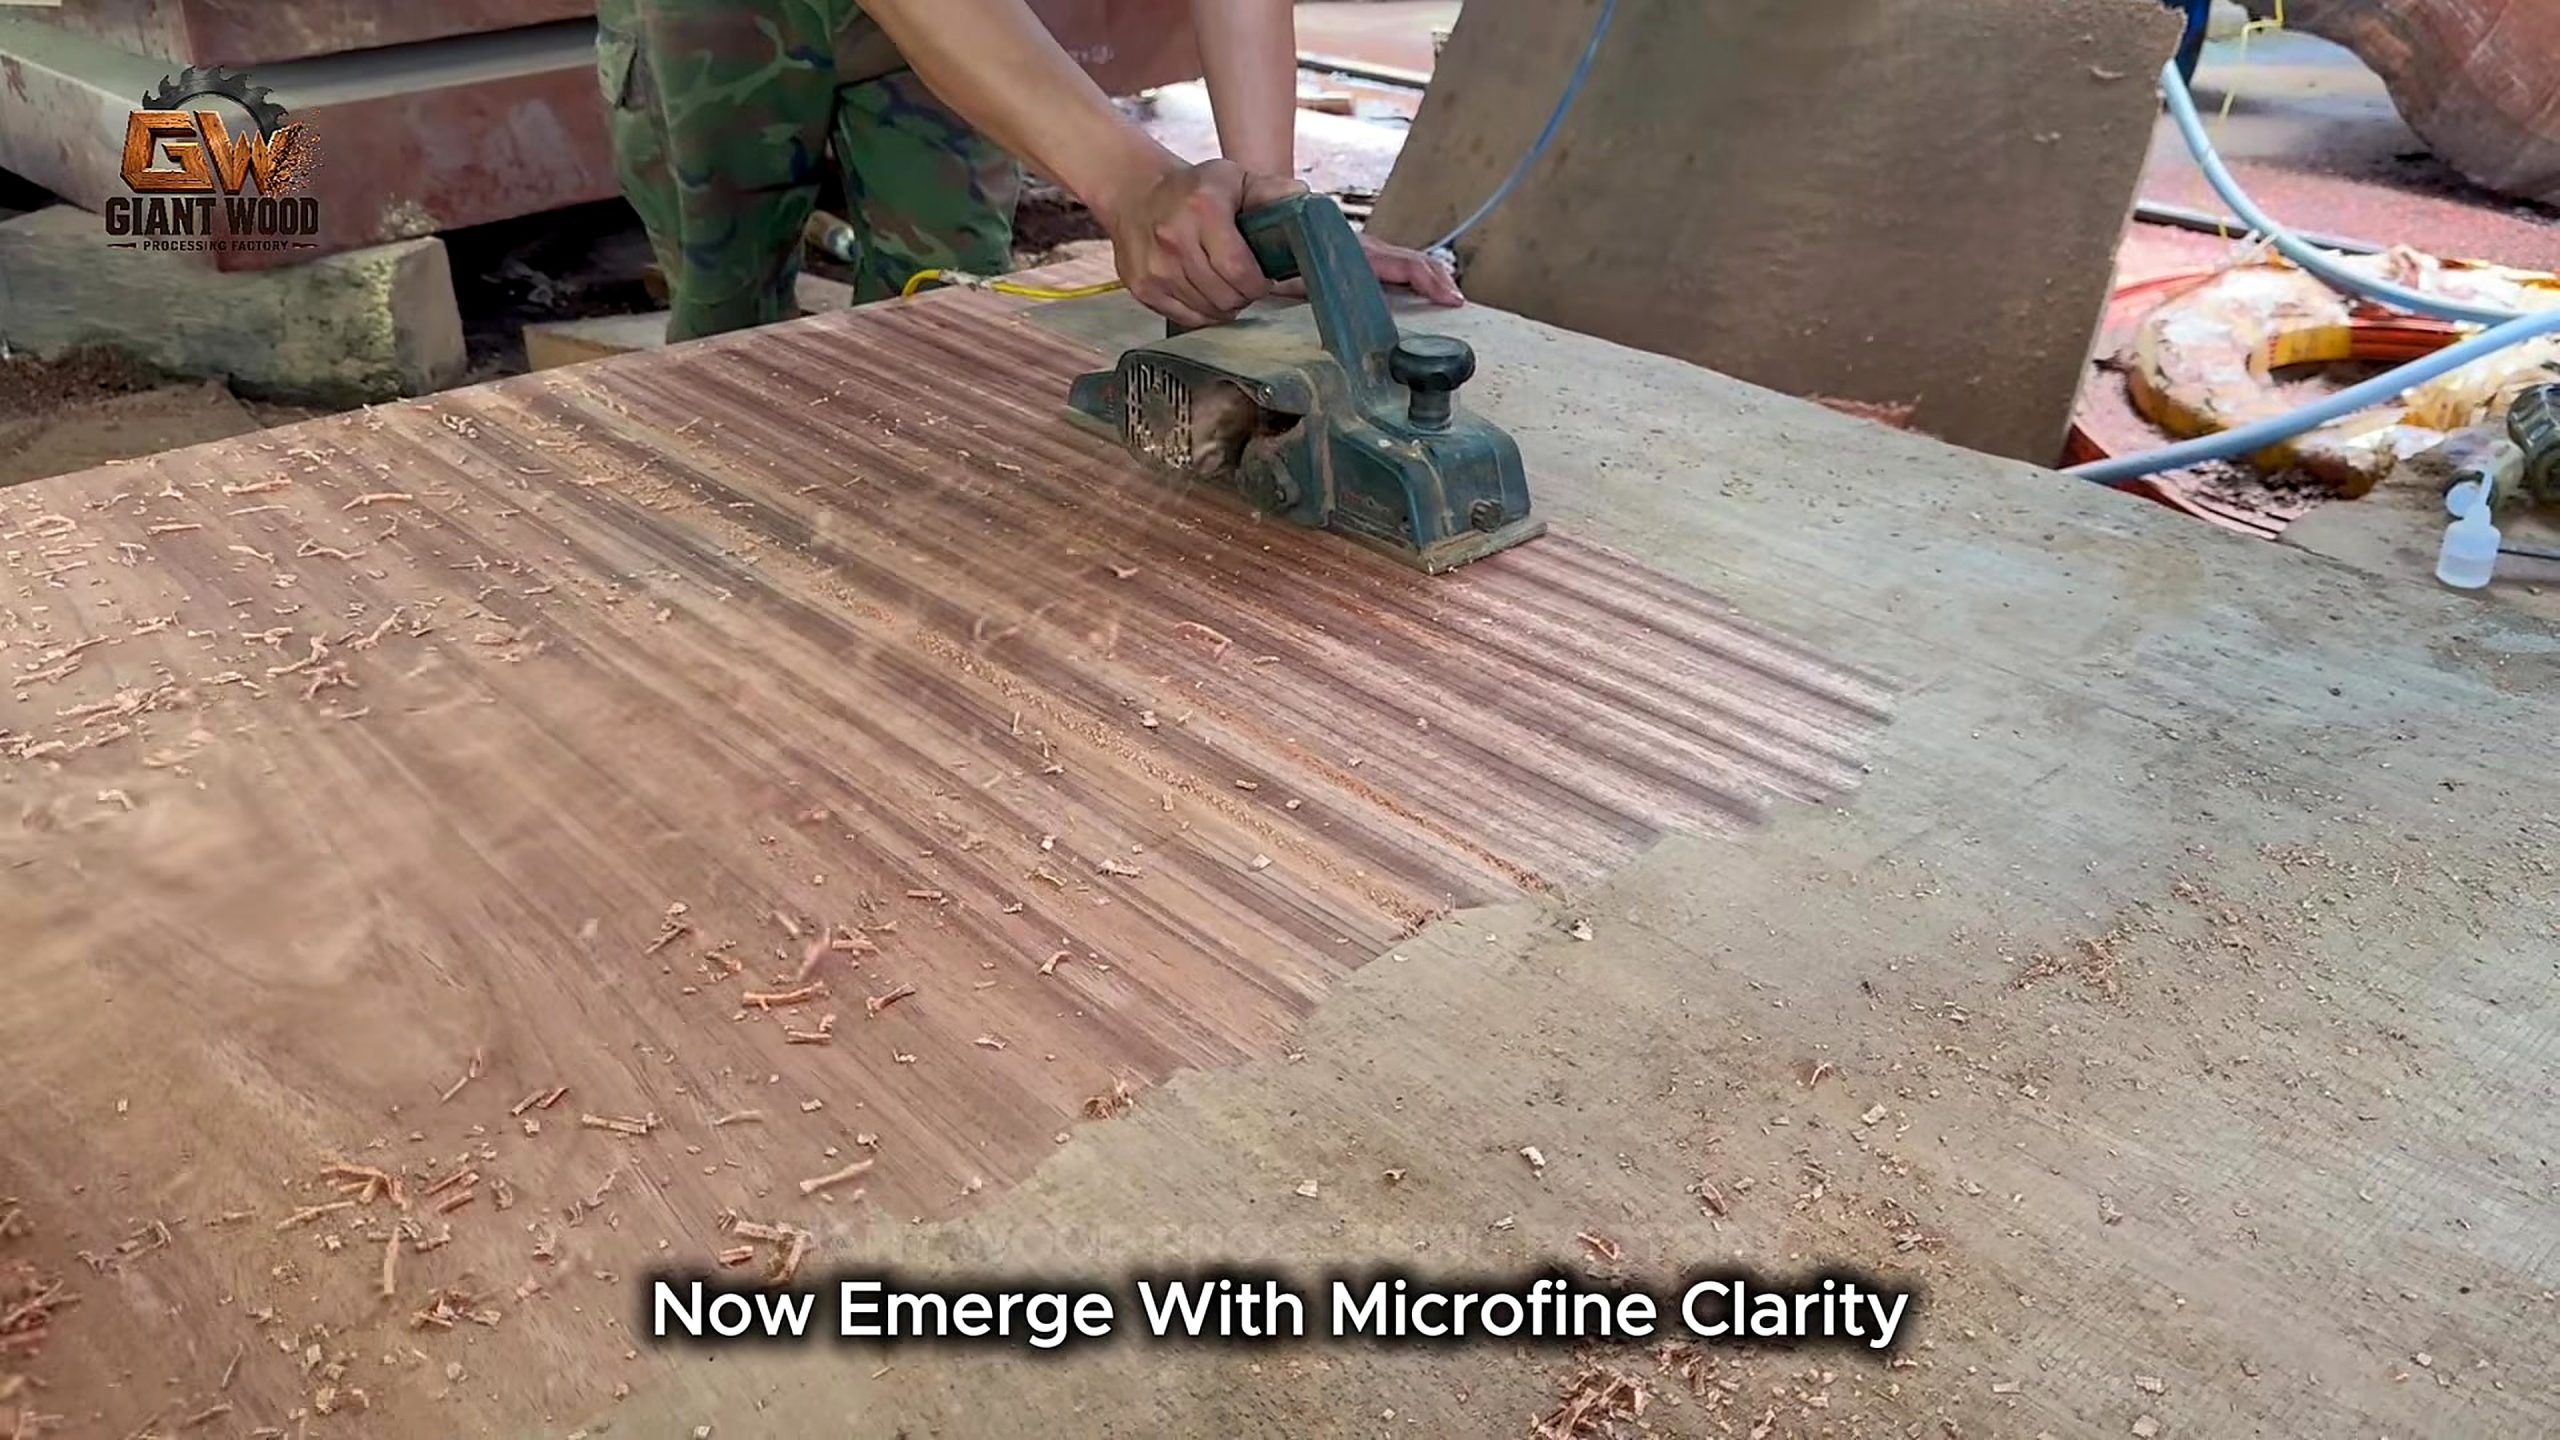
Later sequences show a handheld power planer traversing broad slab faces. The planer leaves parallel tracks and piles of coarse chips. This is stock removal, not final sanding. A wide slab needs a reference strategy: a router sled, wide-belt sander, industrial planer sized for the work, CNC surfacing system, or a carefully controlled manual method. The right choice depends on slab width, thickness variation, machine capacity, and the required tolerance.
A handheld planer can remove high spots quickly, but it can also create troughs, facets, and inconsistent thickness. Mark the surface with a pencil grid, check winding with straightedges or winding sticks, and make overlapping passes that do not dwell at the ends. Measure repeatedly. Removing wood from the wrong area is permanent, and a dramatic grain pattern does not hide a rocking tabletop.
After flattening, sanding should remove planer tracks without rounding important edges or creating low zones. Use effective dust extraction and follow abrasive and machine guidance. Progress through grits only after the previous scratch pattern is uniformly removed. The source shows heavy debris around several operations; a cleaner work surface improves visibility, reduces slip risk, and helps keep grit from being dragged back across the face.
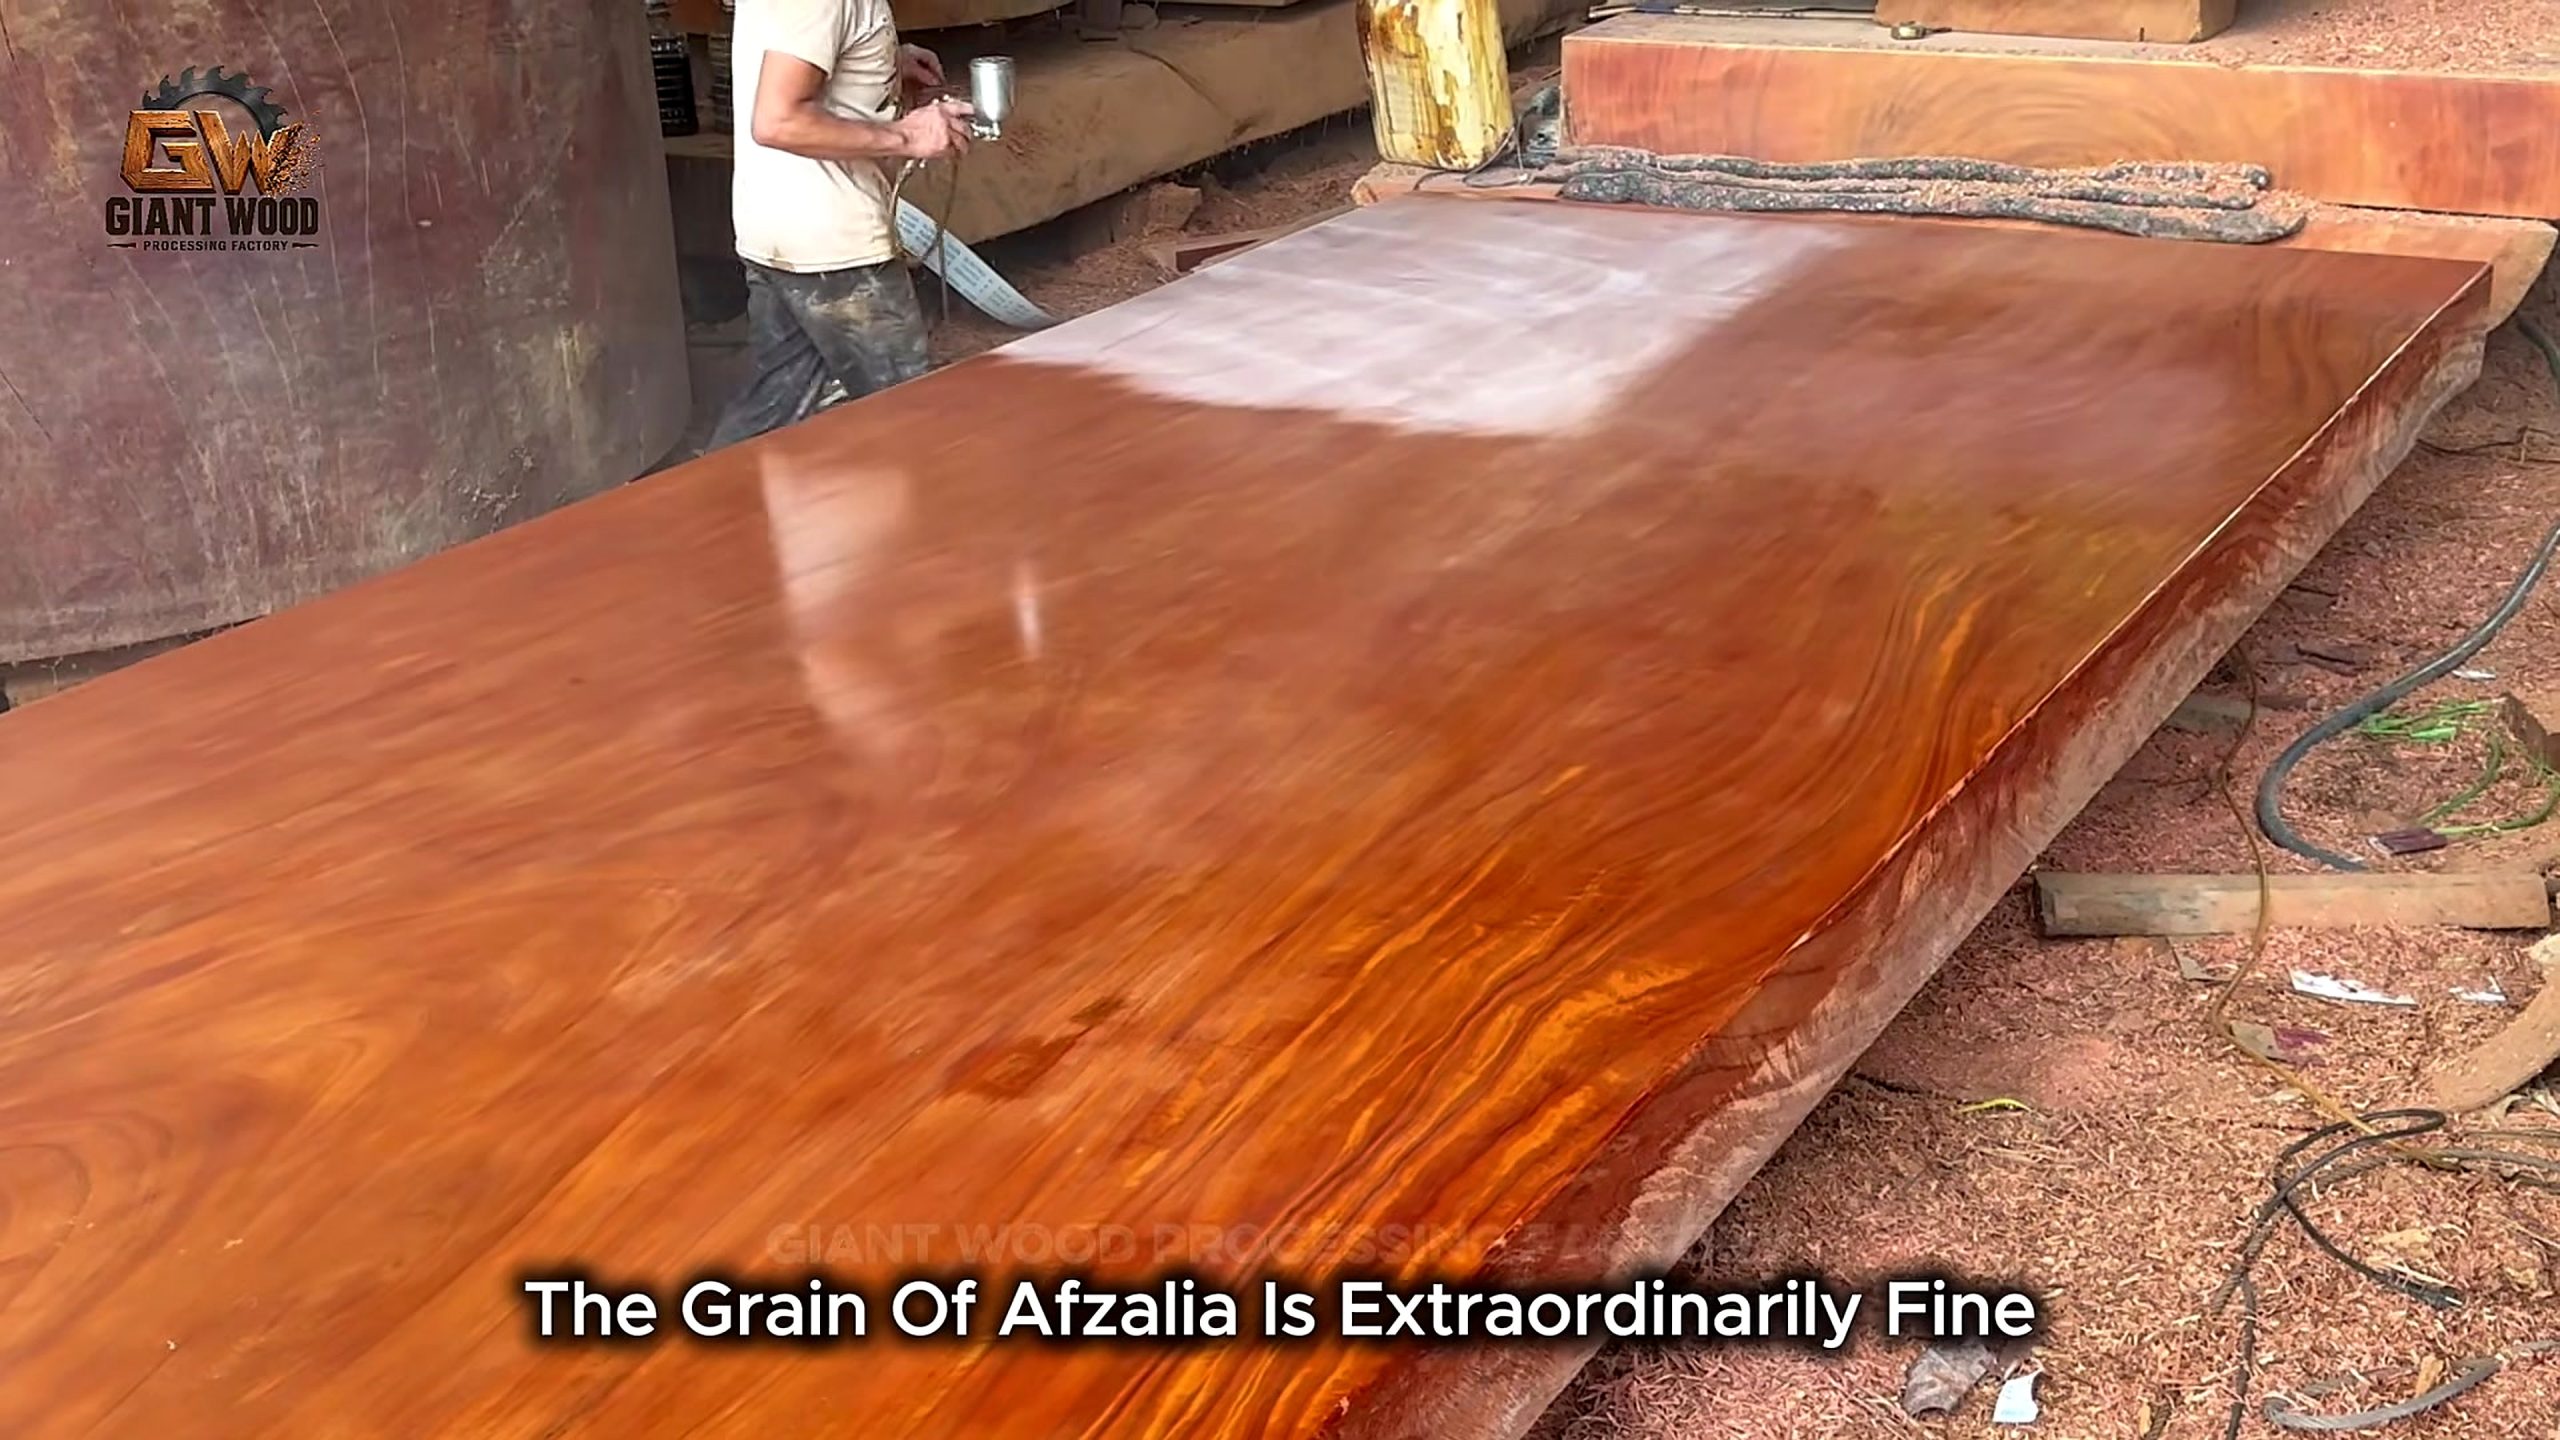
The image also shows an operator working barefoot on the slab. That is not a practice to copy. Protective footwear, eye protection, hearing protection, dust control, stable footing, cord management, and secure workholding belong in the setup. Personal protective equipment does not replace guards or safe technique, but the absence of basic protection can turn a manageable mistake into an injury.
7. Treat Finish as a Test, Not a Reveal Trick
The source uses finish application as the visual payoff. A brushed liquid immediately deepens red and gold tones on one wide slab. Other scenes show a spray gun applying a coating to rectangular boards. These shots demonstrate how wetting a surface changes contrast; they do not identify the chemistry, film thickness, durability, food-contact status, ultraviolet resistance, or cure time.
Before coating a valuable slab, prepare a sample from the same material. Sand it through the intended sequence, clean it the same way, and apply the full finish schedule. Evaluate color, blotching, adhesion, gloss, pore appearance, repairability, and edge behavior after the stated cure. If the wood has dark or heat-affected areas, confirm that loose material and contaminants do not compromise the coating.
Brush and spray application solve different problems. Brushing can work liquid into pores and gives direct control on a horizontal face, but lap marks, dust, over-application, and uneven absorption are possible. Spraying can produce a more even film but requires suitable ventilation, respiratory protection, ignition control where applicable, correct viscosity, compatible equipment, and overspray management. Use the product’s technical data rather than inferring settings from a silent montage.
A gloss surface can emphasize scratches, ripples, and low areas as strongly as it emphasizes grain. Inspect under raking light before the final coat. Check edges, end grain, voids, and the transition between sound and distressed material. A photograph taken at a favorable angle is not a flatness or finish-quality test.
8. Correct the Safety Gaps Visible in the Footage
Source-based analysis should not present every visible action as best practice. The video offers useful process imagery, but it also shows conditions a professional workshop should reassess: people close to suspended or massive material, open work zones around a traveling bandsaw head, heavy dust and chips, loose electrical or air lines, manual work on broad unsupported surfaces, and inconsistent footwear and protective equipment.
For the lift, establish an exclusion zone and use rated rigging. For the bandsaw, follow the manufacturer’s guarding, blade-tension, lockout, and operating procedures. Keep observers outside the travel and ejection zones. For handheld planing and sanding, secure the slab, manage cords, connect extraction where possible, and keep both hands in the tool’s intended operating positions. For coatings, read the safety data sheet and control ventilation, vapor, skin exposure, and ignition hazards.
Noise and dust exposure are cumulative. Hearing protection should match measured exposure, and respiratory protection must suit the dust or vapor and be used within a real program where required. Unknown wood species deserve added caution because sensitization and toxicity vary. Cleaning with compressed air can redistribute fine dust; capture at the source and vacuum with suitable equipment.
Finally, design the workflow so the slab moves fewer times. Each unnecessary lift introduces another crush, pinch, or drop opportunity. Place the mill, inspection area, drying stack, flattening station, and finish area in a sequence that supports the load and preserves a clear route. Good material flow improves both safety and surface quality.
9. Separate Visible Results From Marketing Claims
The $50,000 figure appears in the title and description, not in verifiable transaction evidence. No buyer, invoice, appraisal, sale listing, completed dining-table base, dimensions, species certificate, or cost ledger is shown in the reviewed source package. Tecatool therefore treats $50,000 as an uploader claim, not as the demonstrated value of the log or slabs.
The same rule applies to “luxury.” A polished surface and dramatic grain can support a premium design, but price depends on documented species, legal provenance, usable yield, drying time, defect stabilization, labor, design, hardware, finishing system, transport, installation, warranty, and market demand. A wide slab may also carry large hidden costs: blade damage from metal, drying loss, repeated flattening, difficult handling, and shipping equipment.
Species captions need verification as well. The montage uses labels including Afzelia and ebony, yet visual color and grain in a compressed video do not establish botanical identity. If species affects price, legality, export rules, or safety, obtain traceable paperwork and qualified identification. Do not market a board under a high-value species name merely because an overlay used it.
The video description also mentions deep-pour epoxy. The reviewed frames do not establish a particular pour, product, depth, or cure. If a crack is filled, document the resin system, preparation, moisture limits, pour thickness, temperature, cure, and whether the repair is decorative or structural. Epoxy can be part of a design, but it does not automatically stabilize every defect.
The final display shows polished live-edge slabs, rectangular boards, tables, and turned decorative pieces in a workshop or showroom. It demonstrates a possible product context. It does not prove that all displayed items came from the opening log. That distinction makes the article more useful for Google and AI citation because each conclusion has a visible evidence boundary.
Tool and Machine Buying Checklist for Large-Slab Work
A reader researching equipment after watching this video should compare capabilities rather than chase an unidentified model. Start with the heaviest and widest workpiece the shop can safely handle, then match the entire system: lifting, mill bed, saw head, clamps, extraction, slab movement, drying support, flattening, sanding, and finishing. One oversized machine does not solve weak material flow.
- Log handling: rated hoist or loader capacity, rigging inspection, travel path, lift height, tag-line use, and exclusion-zone control.
- Bandsaw mill: maximum log diameter and length, throat and cut width, bed capacity, blade availability, guide design, feed control, lubrication, service access, and manufacturer support.
- Metal detection: scanning depth, sensitivity, calibration procedure, and a marking plan for salvage timber.
- Slab movement: rated carts, vacuum lifters or clamps where appropriate, turning method, floor condition, and storage geometry.
- Moisture measurement: pin or pinless method, species correction where supported, depth limitations, calibration checks, and recordkeeping.
- Flattening: maximum width, material-removal rate, reference method, dust collection, consumable cost, and achievable tolerance.
- Surface preparation: planer and sander capacity, extraction, abrasive supply, edge-control strategy, and inspection lighting.
- Finishing: product compatibility, test-board procedure, ventilation, protective equipment, spray or brush setup, cure space, and repair plan.
This article does not quote a saw, planer, coating, or resin price because the ticket and source do not provide a verified commercial offer. For broader comparisons, compare Tecatool woodworking machine guides and confirm each specification on the manufacturer’s current documentation before buying. If a future link is compensated, the page should disclose that relationship clearly; no such affiliation is claimed here.
A useful request for quotation includes the real workpiece range, expected daily throughput, available power, floor and foundation limits, extraction, operator training, local service, blade or abrasive supply, warranty, delivery, installation, and commissioning. Asking only “Which mill handled this giant log?” invites a poor comparison because the video does not identify the system or its operating limits.
Frequently Asked Questions
What is burnt wood bandsaw slab milling?
It is the process of stabilizing a dark, weathered, or reportedly fire-affected log and cutting it into wide parallel slabs with a bandsaw mill before drying, flattening, sanding, and finishing. The wood’s actual condition still needs inspection.
Does the video prove the log or table is worth $50,000?
No. The number comes from the uploader’s title and description. The reviewed footage does not show a sale, buyer, appraisal, invoice, full cost ledger, or completed table specification.
Which machine is visible in the main cutting sequence?
The footage shows a large horizontal bandsaw head moving across a log on a mill bed. It does not provide a reliable model number, capacity plate, blade specification, feed setting, or operating manual.
Can the on-screen captions confirm Afzelia or ebony?
No. Captions are source claims. Reliable species identification requires traceable documentation or qualified examination; compressed video color and grain are not sufficient.
Why should a wide slab dry before final flattening?
Moisture change can cause cup, twist, bow, and checks. Drying or conditioning before final surfacing reduces the chance that a flat finished face moves substantially afterward.
Is epoxy required for every cracked slab?
No. Some defects are trimmed away, designed around, mechanically addressed under an appropriate plan, filled decoratively, or rejected. Resin choice and use depend on the actual crack, moisture, depth, product limits, and intended function.
What should a buyer verify before purchasing a bandsaw mill?
Verify log and cut capacity, bed rating, blade supply, guide and feed systems, power, service access, local support, safety documentation, installation needs, and the handling equipment required around the mill.
What is the biggest safety lesson from the source?
Plan the whole material path. Rated lifting, exclusion zones, stable workholding, guarded machine operation, dust control, protective equipment, and fewer slab moves matter as much as the cut itself.
Source Video
Sources: Giant Wood Processing Factory, “From Ashes to Luxury: The $50,000 Burnt Wood Transformation,” YouTube video ID 6xgxQRkkc1A, duration 17:02, uploaded August 11, 2026, original source video, accessed August 11, 2026. Source-derived evidence: five frames from approximately 1:22, 3:45, 6:49, 10:34, and 13:38, extracted from a 1920×1080 local source file and processed through the Tecatool image workflow. General comparison context: Tecatool woodworking articles.