
wood grain becomes easier when a reclaimed timber block is followed from the first bandsaw cut to a finished furniture surface. The source footage is titled “Watch! Transform Old, Stiff, Rotten Asia Train Sleepers Into Incredibly Valuable Furniture.” Its frames show weathered, damaged-looking timber, a bandsaw, a router shaping a turned support, a large circular top, and a colorful inset surface. The useful lesson is not a generic checklist of wood terms. It is how the grain, defects, cut direction, and final design decisions change as old stock becomes furniture.
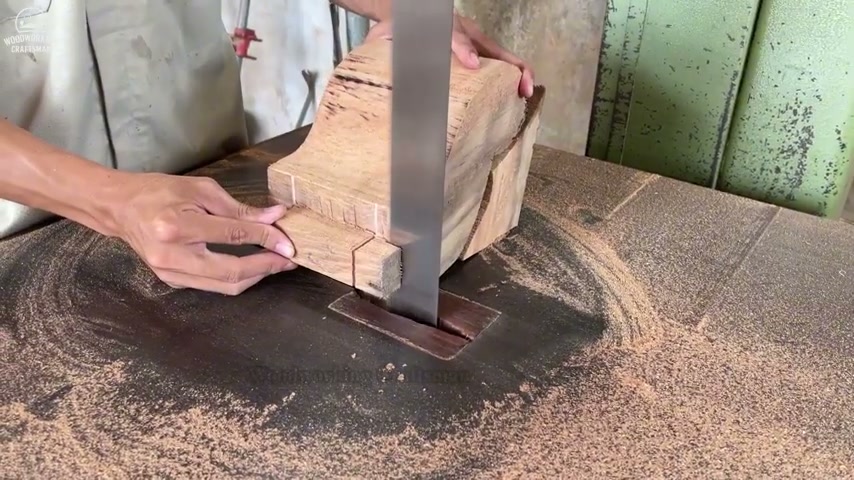
Table of Contents
How to Read Wood Grain: The Short Answer
How to read wood grain starts with three questions. Which way do the visible fibers run? Where do defects interrupt that direction? What will the tool do when it reaches the end of the cut? In reclaimed timber, those questions are more important because an old block can have weathered faces, open checks, embedded dirt, insect holes, and grain that changes around a knot or a damaged edge.
The source footage shows a useful sequence. A rough block is cut on a bandsaw, a turned support is shaped with a router, a second weathered piece is opened to reveal its internal condition, and a large round furniture top is assembled with a colorful inset. The frames do not prove the timber species, the exact age, the original railway use, or the final sale value. They do show why the maker must inspect the material at every stage instead of trusting the outside surface.
Read the grain before the blade, read the cut face after the blade, and read the new edge before choosing the next operation. That habit connects the source video to everyday workshop practice. It also explains why a dramatic reclaimed block can become a strong furniture part only after the maker removes weak material, keeps enough sound wood, and chooses a shape that respects the remaining grain.
What the Train Sleeper Furniture Footage Shows
The video title describes old, stiff, rotten Asia train sleepers becoming valuable furniture. The frames support a narrower description. They show large, weathered timber being handled in a workshop, cut on a vertical bandsaw, shaped with a router, and incorporated into a broad circular design. The outside of one block appears dark and aged, while fresh pale wood appears at a cut surface. That contrast gives the viewer a practical way to think about hidden condition.
The opening workshop scene does not show a simple board with clean, predictable fibers. It shows a heavy piece being held close to a bandsaw blade while the maker follows a marked or planned cut. On old stock, the face can be rough while the inside is sound, or the face can look acceptable while a crack continues deeper than expected. A visual scan is only the beginning. The workpiece needs a stable support, a known direction of travel, and a plan for what happens if the blade exposes a void.
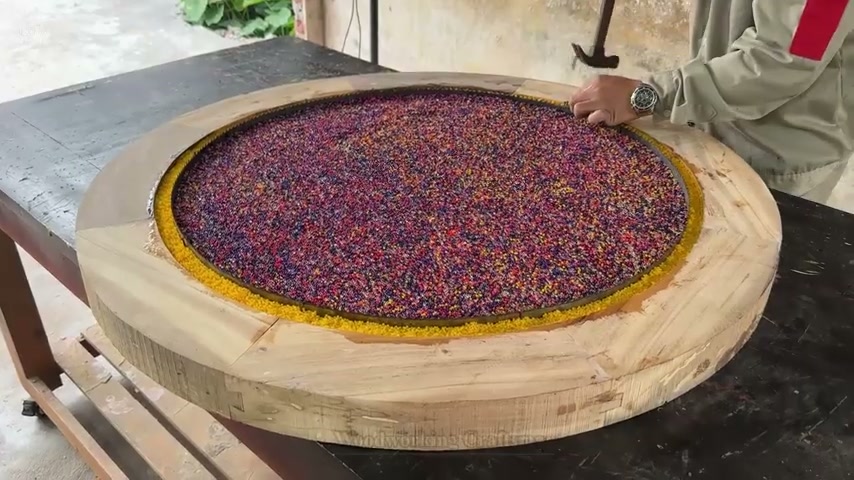
The finished circular piece later in the footage is also more than a reveal. It shows how a maker can combine a broad wood ring with an inset center and a contrasting border. The source does not establish the material used in the center, the adhesive, or the finish chemistry. What it does show is a design choice that makes the timber’s outer grain part of the visual frame. Grain reading therefore affects both safety and appearance.
A source-based article should keep those boundaries clear. The visible workshop actions can be discussed. Exact claims about age, species, structural strength, market value, or professional certification need separate evidence. This distinction makes the article more useful because readers can apply the observed method without mistaking a video title for a laboratory report.
Reading the First Bandsaw Cut
The first bandsaw frame places a block against the table with the blade running through a planned path. The operator’s hands guide the stock, but the important reading happens on the wood. Follow the long fibers on the exposed face. Look for lines that climb, dive, or disappear into a damaged area. If the grain runs diagonally through the intended cut, the blade may meet changing resistance as it travels. That can affect the surface, the feed pressure, and the way the cut opens behind the blade.
On reclaimed material, the maker should also look for old fastener holes, dark inclusions, loose edges, and dirt that can damage a cutter. The source frame does not identify every hidden hazard, so a careful reader should treat the block as unknown until it has been inspected and prepared. Remove loose debris, check for metal when appropriate, and use a blade and feed setup that match the material and the machine.
How to read wood grain at the bandsaw is not the same as reading grain before hand planing. The saw follows a line and removes a kerf, but the block can shift if it is not supported. Keep the reference face stable, avoid forcing the blade through a difficult section, and plan where the waste will fall. The cut should reveal information, not create a new uncontrolled movement.
After the first cut, pause. Look at the fresh face and compare it with the outside. A pale, continuous face may show sound stock. A line that opens into a void may change the next cut. A dark streak may be surface weathering, a natural feature, or damage that needs closer inspection. The correct conclusion depends on more than one frame, so the article describes what can be seen without assigning an unsupported diagnosis.
What Weathered Grain and Defects Reveal
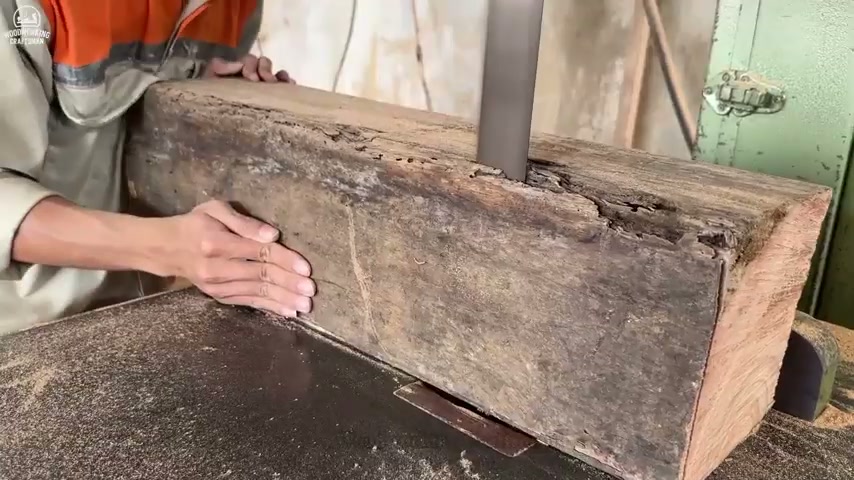
The third scene shows a long block with a dark, weathered exterior and a visible split or irregular area near the upper edge. This is the kind of frame that makes grain reading practical. The outside tells the maker where the timber has been exposed, but the cut face tells a different story. Look at the transition between dark outer material and lighter inner wood. Notice whether a crack follows the length, crosses the grain, or widens toward an edge.
Weathering can make fibers brittle at the surface. Rotten areas may crumble, while sound areas remain dense. A machine can cut both, but the operator should not treat them as the same material. Loose fibers can catch a blade, break away, or leave a weak edge. A furniture part should be designed around sound material, with fragile material removed or stabilized only when the chosen process is appropriate.
Reclaimed wood also carries movement history. A sleeper or heavy outdoor timber may have dried unevenly, absorbed moisture, or developed internal stress. When a cut releases that stress, the piece can move. Leave room for inspection after major cuts. A straight line on the bandsaw table does not guarantee a straight piece after the block is opened.
Grain direction is especially difficult near knots, checks, and old damage. The fibers may bend around the defect, so a plane, router, or sander can tear the edge even when the main face looks straight. Mark the difficult zones. Use a test pass on waste. Choose the final orientation so the most visible area receives the cleanest, most supported cut.
Using the Next Cut to Control the Shape
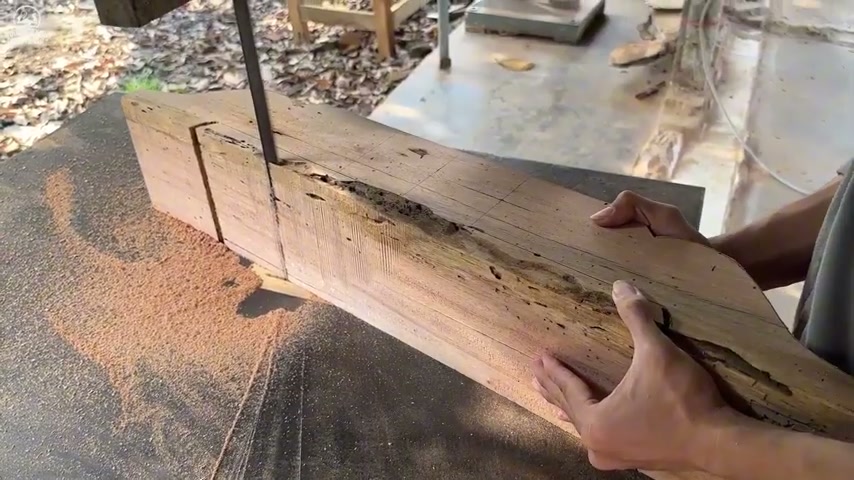
The fourth scene shows a lighter timber section being guided through another bandsaw cut. A dark line or damaged channel runs along the upper surface, and the operator is holding the block from both sides. This is a useful example of how a maker converts an irregular block into a planned component. The goal is not simply to remove as much material as possible. The goal is to create a stable reference and preserve the strongest usable grain.
Before making a second cut, mark the face that must remain visible and the waste side that can be removed. Check how the grain will appear on the final part. If a cut follows a defect, the maker may expose more damage or separate a weak section. If the cut moves away from the defect, more material may be preserved for flattening and shaping. The right choice depends on the final design and the actual condition of the block.
A bandsaw cut can also reveal the difference between face grain and end grain. On the newly opened surface, growth lines may run in a direction that was hidden from the outside. That information helps determine whether a later router pass, sanding step, or joinery operation will be clean. Keep the piece supported after the cut and inspect both halves before deciding which one becomes the furniture part.
The source frame is a reminder to avoid a formulaic “check one, check two” approach. Grain reading is a sequence of observations connected to real decisions. The first cut tells you where the sound material is. The second cut tells you how the planned shape interacts with that material. The next tool should be chosen only after those observations are visible.
Reading Grain During Router Work
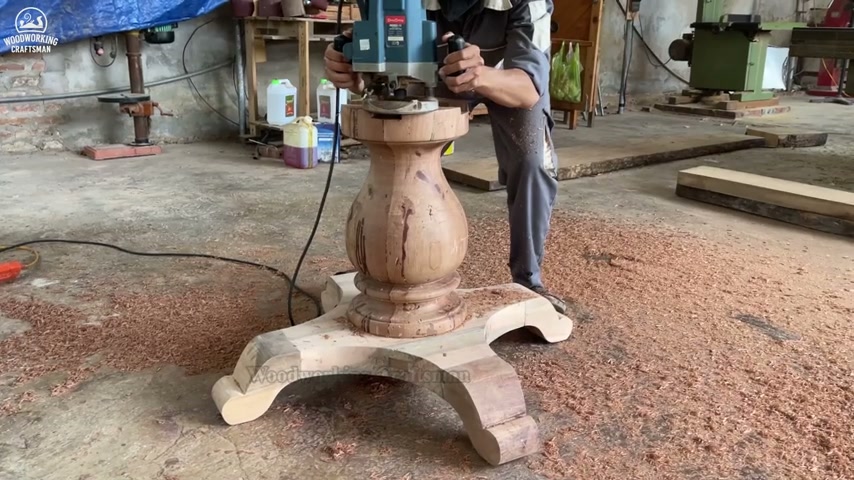
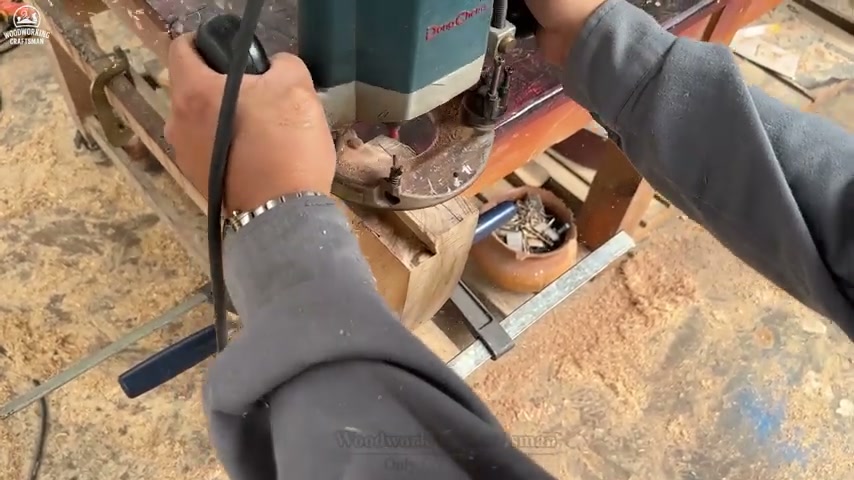
The second scene shows a shaped support under a router. The part has a turned central form and curved feet, so the grain no longer runs in one simple direction across a flat board. Curves create transitions. A router bit may cut cleanly on one side and lift fibers on the other. The operator needs a stable workpiece, a secure stance, a sharp bit, and shallow controlled passes.
How to read wood grain around a curve means looking at the direction the fibers rise toward the cutter. On a convex area, the safe feed direction can change as the profile turns. On end grain, the fibers offer less support and the edge may chip. A final light pass can improve the surface, but no pass should be used to hide a setup that is unstable or a piece that is not properly held.
The support also shows why grain reading has a design side. The maker is not only trying to make a smooth profile. They are trying to keep the grain visible across a part that will carry visual weight. A cut that removes a weak edge may improve strength but change the symmetry. A cut that preserves an attractive feature may leave more finishing work. The final decision balances material condition, tool control, and the intended furniture form.
Do not copy the exact hand position or machine motion from a video. Use the frame to identify the variables that need checking. The proper feed direction, bit choice, guard, workholding, and personal protective equipment depend on the tool and the operator’s training.
How the Grain Supports the Furniture Design
The fifth scene is a close view of a router working on a small wood component. The cutter, the base, and the surrounding bench show a more controlled shaping stage than the rough bandsaw cuts. This is where the maker begins to convert a structural block into a visible design element. The grain can be used as a guide for symmetry, but it can also expose weak points that require a smaller cut or a different orientation.
The final circular furniture top in the sixth scene makes the design intention easier to see. A broad wood ring surrounds a colorful inset field, and a contrasting border follows the round shape. The outer timber remains part of the design, so the maker must inspect how the grain flows around the circle. A rough outside edge can be flattened, rounded, or left with character, but each choice changes how the material is read by the viewer.
A useful design rule is to decide early which defects are part of the story and which defects threaten the part. A dark mark, old check, or weathered edge may add character when it is stable and outside a load path. A loose section, deep split, or crumbling edge should not be treated as decoration without a suitable repair plan. The source image shows a finished look, but the construction details remain outside the visible evidence.
Grain reading also affects the order of operations. Make the large, material-removing cuts while the workpiece has a stable reference. Save delicate profile work for later, when the part can be held securely. Sand and finish only after the surface has been inspected under angled light. This order reduces the chance of polishing a defect that should have changed the design earlier.
Safety and Workholding Checks
The source footage includes close machine work, so safety should be discussed without turning the article into machine training. Keep hands clear of the blade and cutter path. Use push devices, guards, fences, clamps, or other equipment required by the machine and task. Make sure the workpiece cannot rotate, tip, or move into the cutter as resistance changes. Stop the machine before adjusting the piece or removing waste.
Reclaimed timber deserves extra caution because old stock can contain grit, nails, screws, wire, and hard inclusions. A clean-looking surface is not proof that a block is metal-free. Prepare the material with a method appropriate to the project, and follow the tool manufacturer’s limits. If the stock is too uncertain for the available equipment, professional preparation may be safer than forcing the work.
Dust is another part of the grain story. Weathered wood can create fine dust and loose debris. Use suitable dust control and respiratory protection for the material and workspace. Keep the floor clear so a person guiding a heavy piece does not lose footing. The frames show a working shop, but they cannot show every control used outside the camera view.
Inspecting the Furniture Result
The finished round top is an attractive result, but a photograph cannot prove that a piece is flat, stable, fully cured, or ready for a particular use. Inspect the surface under angled light. Look for torn grain, open checks, uneven borders, filler that has not bonded, and areas where the inset meets the surrounding timber. Run a clean hand over the surface only after the piece is safe to touch and free from active tools.
Check the edge separately. A circular edge can reveal end grain, glue lines, cracks, and differences in density. If a part will carry weight, inspect the support connection and the soundness of the remaining wood. The source does not provide a load rating or construction drawing, so this article does not assign one.
Finishing changes the way grain appears. A clear coat can deepen color and make a small scratch more visible. A dark or colorful inset can draw attention away from a rough transition, but it should not be used to hide an unsafe joint or unstable wood. Test the finish on a representative offcut when the final appearance matters.
Reclaimed Wood Tool and Service Planning
Readers who want to work with old sleepers should buy for the actual bottleneck, not for the reveal shot. The first need may be inspection and preparation rather than a larger machine. A metal detector, strong lighting, stable work supports, dust control, and a way to move heavy stock can matter before a new router or bandsaw is considered. The correct tools depend on the size, condition, and intended design of the material.
For bandsaw work, compare throat capacity, blade options, fence and guide adjustment, dust collection, and support for heavy blocks. For routing, compare collet condition, bit quality, depth control, workholding, and the ability to make shallow passes. For finishing, compare surface preparation tools, abrasives, dust removal, and curing space. These are category-level questions, not a recommendation for a particular brand.
Professional help may be the right choice when reclaimed timber is heavy, contaminated, structurally uncertain, or too large for the available shop. A service provider can help with metal detection, resawing, flattening, kiln treatment, or transport, but the scope should be written clearly. Ask what condition the material will be in when returned and what defects remain outside the service.
A Practical Reclaimed Timber Checklist
- Record the source and visible history of the timber without treating a title as laboratory proof.
- Inspect all faces, ends, checks, holes, loose fibers, and embedded debris.
- Mark the best show face, the waste side, and the grain direction before cutting.
- Confirm machine capacity, blade or bit condition, workholding, and dust control.
- Make a conservative test cut and inspect the new surface before the next operation.
- Keep a plan for defects that appear after the block is opened.
- Choose the final design only after the sound material and weak zones are visible.
For more practical tool and workshop planning references, explore Tecatool’s woodworking guides. The archive can help compare cutting, routing, sanding, finishing, and safety topics. It should be used alongside the machine manual, formal training, and local professional advice.
The commercial lesson is simple. Do not buy a machine because a finished table looks valuable. Buy or hire the support that solves the next verified problem in your own material. Old timber rewards inspection, patience, and a design that works with the grain that is actually present.
FAQ
How to read wood grain in old train sleepers?
Start with the face, edge, and end grain, then compare the outside weathering with a fresh cut. Look for changing fiber direction, checks, holes, loose material, and areas where the grain bends around defects.
Does the source prove the timber is a certain age or species?
No. The title describes old train sleepers, but the visible frames alone do not verify exact age, species, original location, or market value.
Why can reclaimed wood tear out during routing?
Weathered fibers, knots, checks, and reversing grain can reduce support around a cutter. Use secure workholding, sharp tooling, shallow passes, and inspection after each stage.
What should be checked before cutting reclaimed timber?
Check for metal or hard inclusions, loose fibers, cracks, unstable edges, machine capacity, dust control, and a safe way to support and move the workpiece.
Can the finished round top be copied directly?
The frame can inspire a design, but it does not provide construction dimensions, load ratings, material specifications, or machine training. Adapt the idea to the actual material and follow the relevant safety guidance.
Source Video
Sources and Editorial Note
Sources: the public source video titled “Watch! Transform Old, Stiff, Rotten Asia Train Sleepers Into Incredibly Valuable Furniture,” original YouTube source video, accessed 2026-10-05. This Tecatool article describes visible workshop scenes and practical grain-reading questions. It does not independently verify timber age, species, original use, sale value, structural rating, or a finished product specification.