
giant log vertical bandsaw sculptural table process turns one enormous rough log into a furniture-scale project through a supported vertical-bandsaw opening, inspection of the new reference face, full-size curved layout, handheld surface shaping, spray finishing, and treatment of an irregular timber support. The footage proves those visible stages, but it does not independently verify the wood species, dimensions, coating system, or source-title price.
Table of Contents
Giant Log Vertical Bandsaw Sculptural Table Process: Direct Answer
The practical sequence is to stabilize the irregular log, open a readable face with the vertical bandsaw, inspect that face before committing more material, map the full-size curved outline, refine the top with controlled portable-tool passes, prepare the broad surface evenly, apply finish in planned overlaps, and inspect the natural-form support separately before assembly. Each stage protects the work created by the stage before it.
Source Evidence Timeline
The evidence comes from the Giant Wood Processing Factory upload with video ID -2mlazZ_I-w. Five source frames document different points in the long workflow: the orange vertical bandsaw at 522.43 seconds, the opened reddish face at 1436.69 seconds, curved tabletop shaping at 2612.17 seconds, spray finishing at 4048.87 seconds, and work on the irregular support at 5224.34 seconds.
That sequence supports a narrow but useful reading. The material begins as an exceptionally large rough log, becomes a squared or slab-like workpiece, receives a full-size curved layout, and later appears as a broad finished surface with a separate sculptural support treatment. The frames do not establish the wood species, original moisture level, dimensions, machine model, coating chemistry, customer, or sale record.
The source is valuable because it spans primary breakdown and furniture-scale finishing in one continuous project. Many shop videos show only milling or only the final polish. Here, the distance between the first bandsaw pass and the later finish work lets a reader see why reference faces, support, shaping allowance, surface preparation, and coating access must be planned as one connected production problem.
Stage 1: Supporting The Log For The Opening Cut
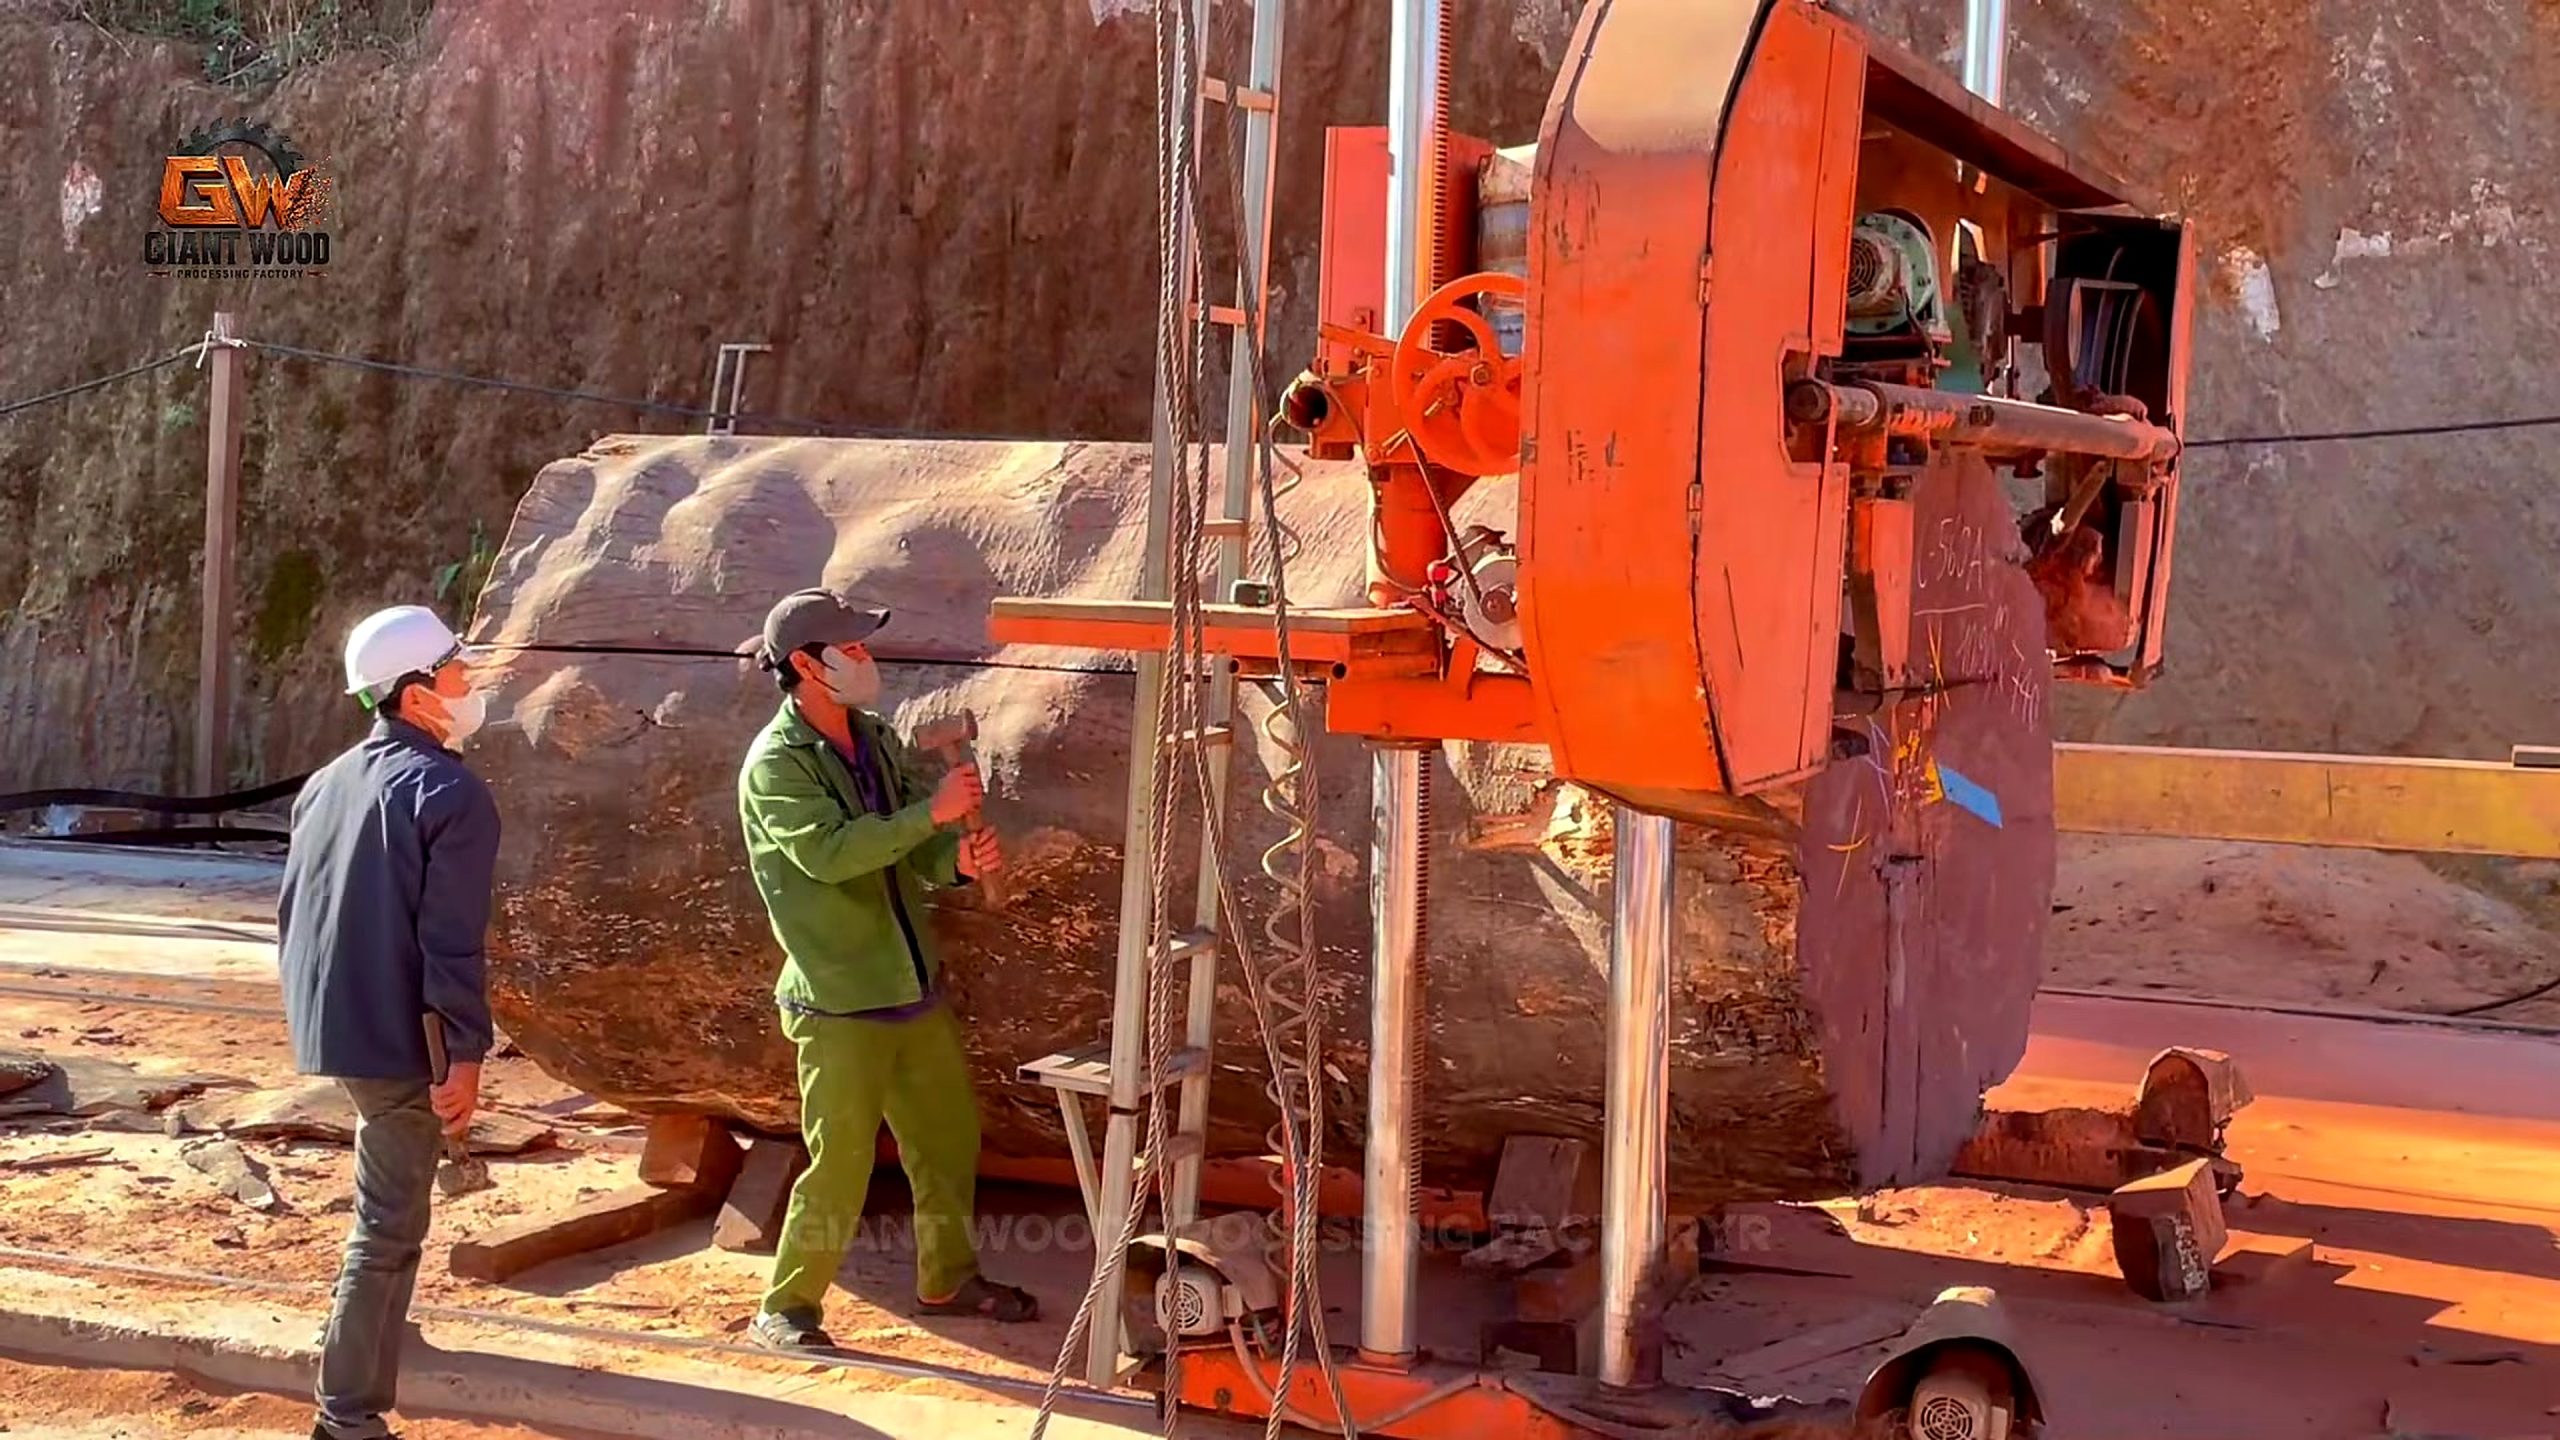
The first selected frame places the rough log beside a large orange vertical bandsaw. Its scale dominates the working area, and two people stand close enough to observe the blade path and the new face. The useful lesson is not the drama of size. It is that the opening pass must create information while the work remains supported against rolling, twisting, pinching, or dropping as the cut releases internal stress.
Before a similar cut, a mill operator would normally identify the stable support line, the expected offcut side, available blade clearance, and a stop point if the kerf begins to close. A giant irregular log does not offer a convenient factory reference. Bark, flare, checks, and uneven weight can place the center of mass away from the apparent center, so blocking and handling deserve the same attention as blade sharpness.
The video frame confirms the machine category and the supported workpiece, but it does not reveal feed rate, blade width, tooth pattern, motor power, or rated capacity. Anyone planning comparable work should obtain those values from the machine manufacturer and measure the actual stock. The correct buying question is whether the saw, carriage, guides, extraction, and lifting plan form a compatible system for the real load.
An opening cut also commits material. On a log this large, a few degrees of orientation can change recovered width, defect position, figure, and the thickness available for later flattening. Marking both a desired face and a fallback face before cutting helps the team respond if the interior differs from the outside clues. That decision discipline is more repeatable than treating the first exposed color as automatic success.
Stage 2: Reading The New Reference Face
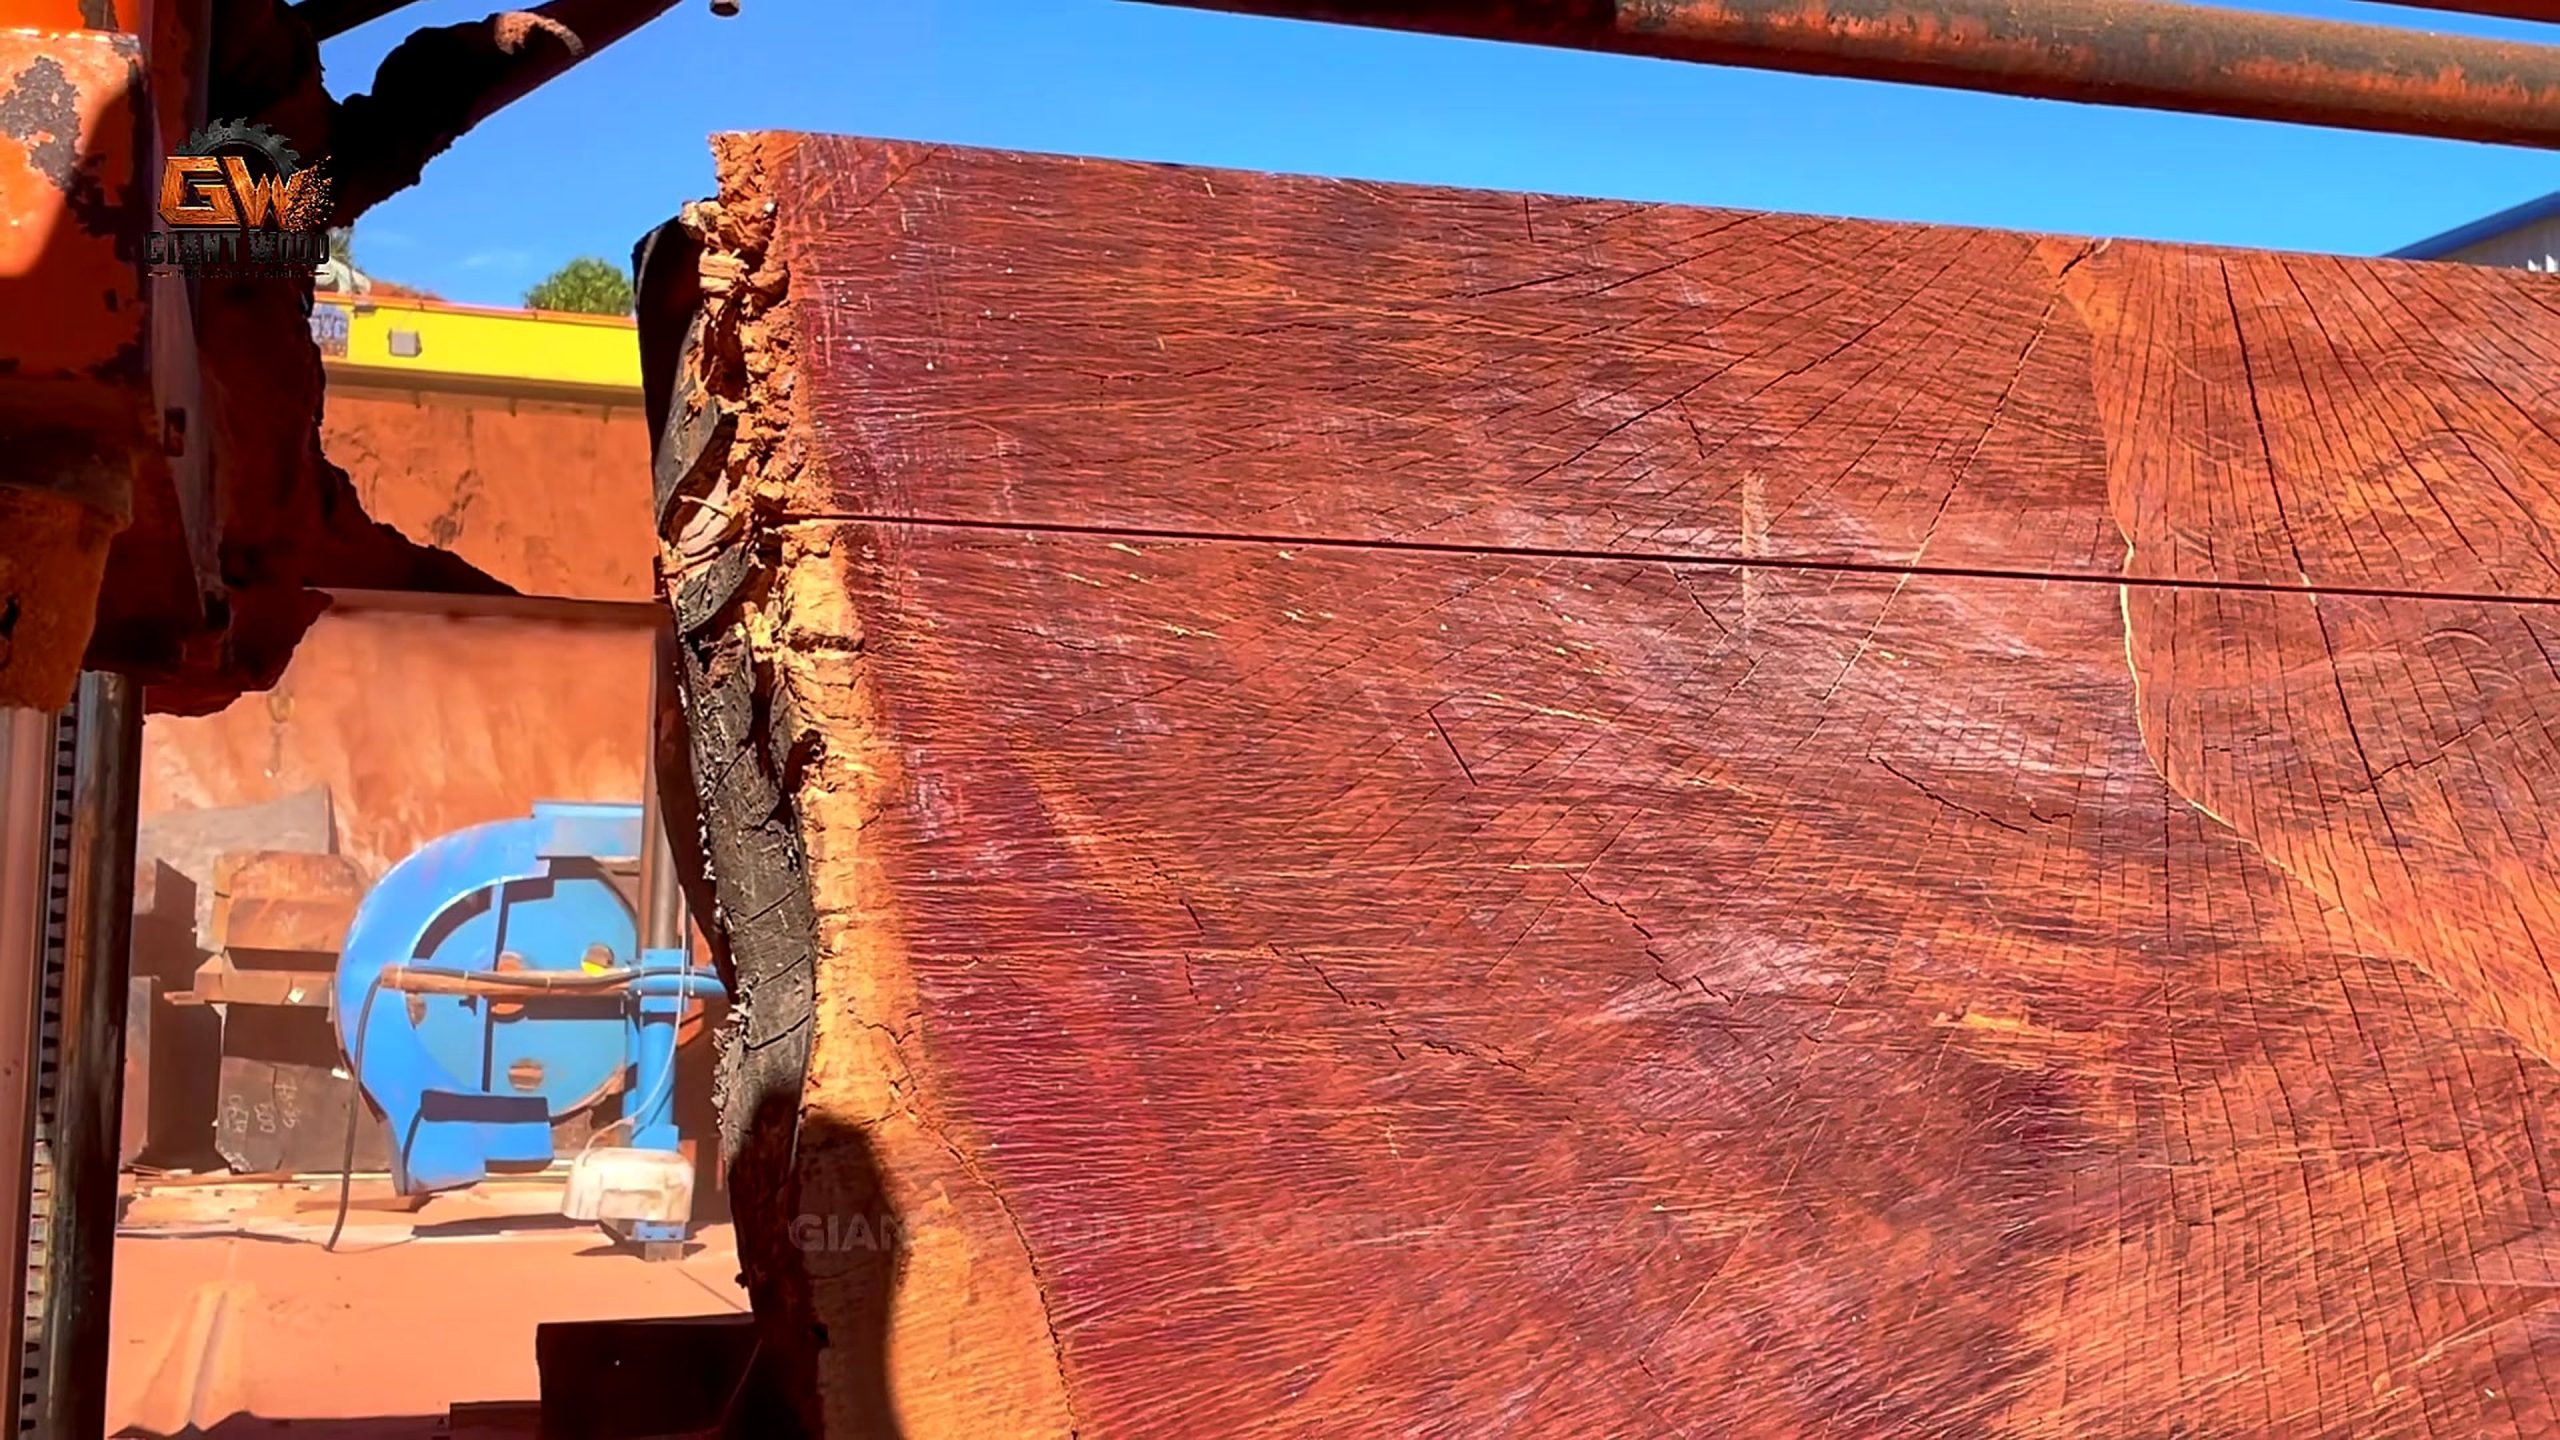
At 1436.69 seconds, the footage shows a broad reddish rectangular face. Parallel saw marks remain visible, and a large curved line crosses part of the surface. This is a transition point: the work is no longer read only as a log. It can now be evaluated as a furniture-scale blank with a visible grain field, edge condition, surface allowance, and possible outline.
A fresh face should be read under good light before the next major removal. Operators can map checks, bark inclusions, soft pockets, color changes, and grain deviations; they can also decide which side deserves to be the show face. The frame supports the presence of a large clean-looking field, but a still image cannot prove depth, structural continuity, dryness, or stability after the internal moisture gradient changes.
Reference quality matters because every later layout is measured from something. If the opened face is bowed or twisted, a curved tabletop line drawn directly on it may look correct while producing uneven final thickness. A straightedge, winding sticks, string lines, or a measured router-sled survey can show where the high points are and how much stock must remain for flattening and finish sanding.
For a buyer comparing milling services, this stage suggests practical questions: Is face inspection included? Will the shop record thickness at several points? Who decides the show face? How much surfacing allowance will remain? A quote that covers only one dramatic cut may omit the measurement and handling work that determines whether the blank can become a usable table.
Stage 3: Moving From Timber To Full-Size Table Layout
The curved line visible on the large face suggests that the project is moving from rectangular stock toward a designed tabletop or sculptural furniture outline. The wording must remain cautious: the frame shows a curve on the workpiece, not the method used to calculate it. It may come from a template, trammel, flexible batten, string arc, or direct marking, and the source package does not independently identify which.
Full-size layout is especially important on one-piece furniture because there is no easy opportunity to replace a narrow component after an error. The designer has to preserve attractive figure, usable edge thickness, seating clearance, and later support locations at the same time. A curve that looks balanced from above may remove too much material near a check or leave the support too close to an unstable edge.
A practical shop sequence is to mark the centerline, major axes, keep zones, defect zones, and support footprint before drawing the final edge. Photographing the marked surface creates a decision record. The team can then compare the intended outline with actual grain and defects, make corrections while the stock is still oversized, and reserve enough margin for tool drift and edge refinement.
The source title promises a transformation, but the useful evidence is the transition in control. Primary milling creates a face; layout converts that face into a plan. This middle step is where visual ambition becomes measurable geometry. Skipping it would make later shaping a series of guesses, while a clear full-size map gives each operator the same target across a very large surface.
Stage 4: Following The Curved Tabletop Line
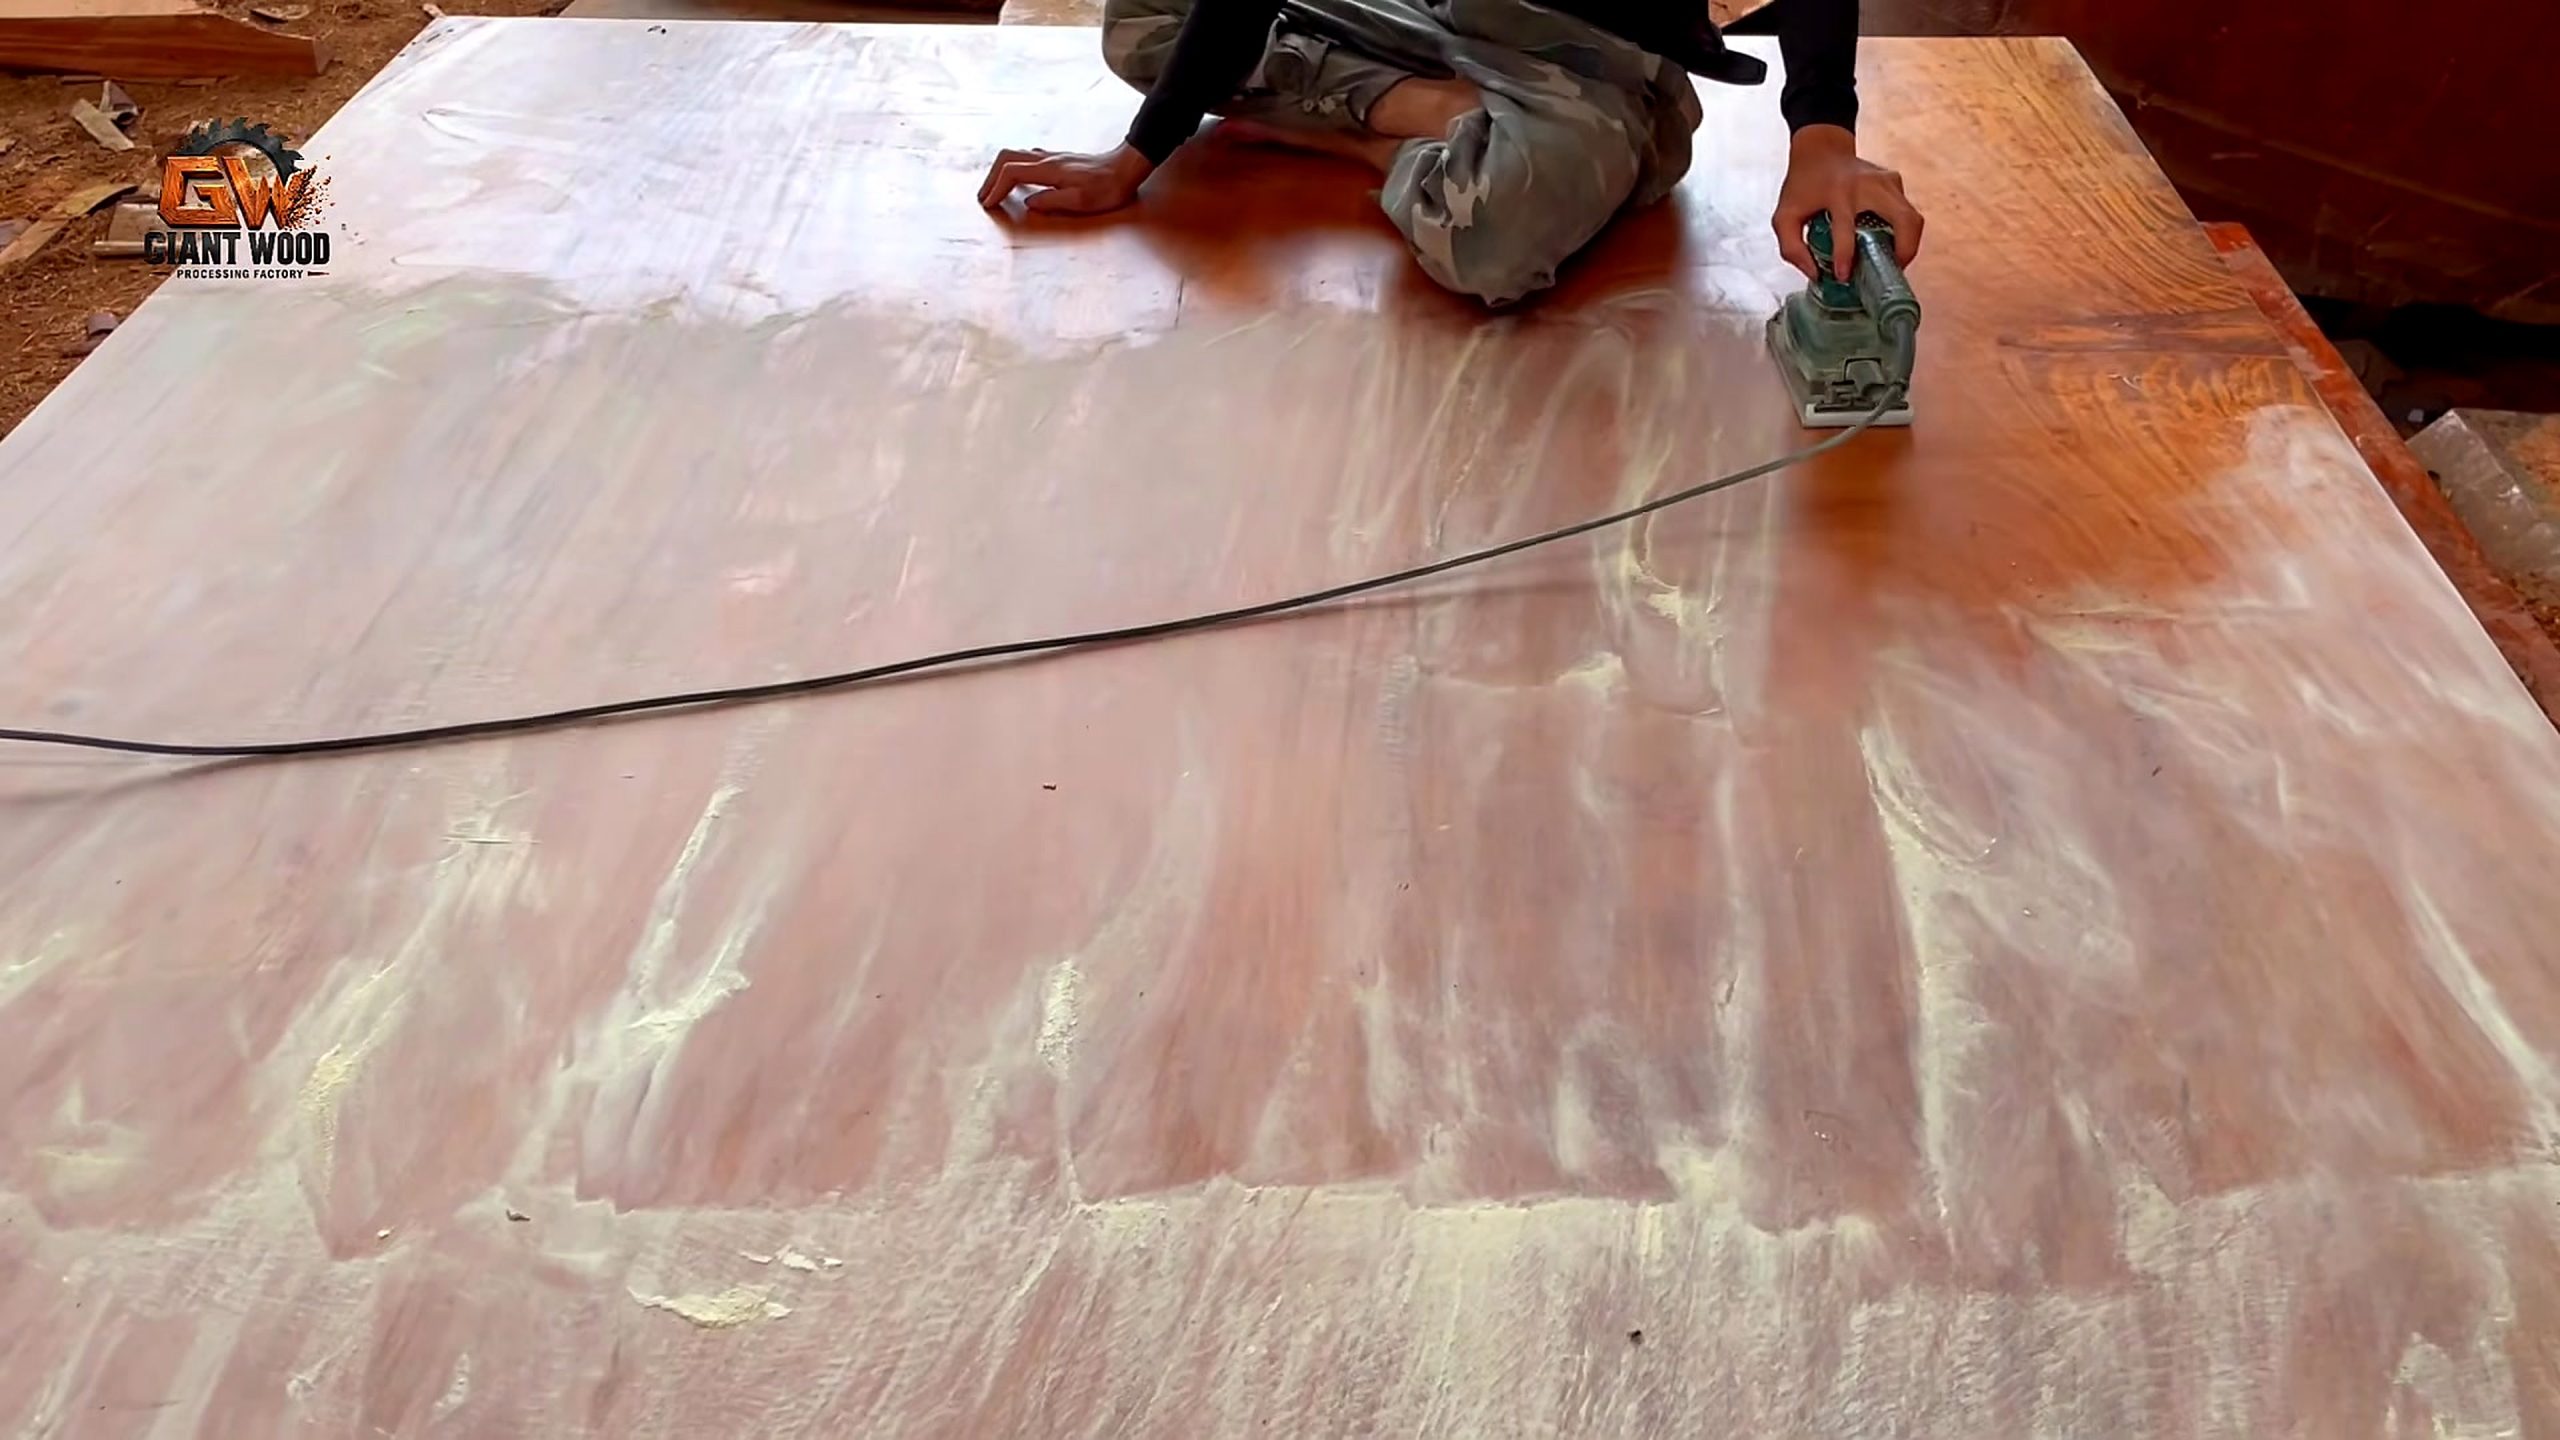
The frame at 2612.17 seconds shows a worker kneeling on the pale surface while guiding a handheld power tool along a large curve. A hose or cable follows the tool. The image does not identify the exact cutter, abrasive, bit, or cut depth, so it is safer to describe this as controlled handheld shaping or surfacing rather than name a specification that the source does not prove.
Following a curve across a tabletop of this scale requires more than hand-eye coordination. The operator needs a clear reference line, stable body position, manageable removal depth, and a way to prevent the cord or hose from dragging through the work. Multiple light passes are easier to correct than one deep pass. They also reduce the risk of tear-out where grain direction changes around the outline.
Tool choice should follow the task. Rough removal, edge truing, face flattening, and scratch refinement are different jobs even when one portable machine can perform more than one of them. Buyers should compare control, base stability, dust collection, cutter availability, service support, and the ability to make repeatable shallow passes. Rated power alone does not show whether a tool will track a long furniture curve accurately.
The large pale area around the operator makes surface inconsistency easier to see. A raking light and pencil witness marks can reveal untouched low spots, ridges, and cross-grain scratches before the finish stage. That inspection is also the right moment to soften sharp edges deliberately, rather than allowing accidental rounding to build up through uncontrolled sanding.
Stage 5: Preparing A Broad Surface For Finish
A broad one-piece top magnifies every preparation error. Machine marks that seem small at arm’s length can form long bands under reflected light, while uneven scratch progression can produce blotchy absorption. The source sequence moves from shaping to a later glossy spray stage, so the missing preparation interval should be treated as essential work, not as proof that the surface became finish-ready immediately.
A repeatable preparation plan separates flatness correction from cosmetic sanding. First confirm that the surface meets the design tolerance and retains enough thickness. Then remove the previous tool pattern with a documented abrasive sequence. Vacuuming and inspecting between grits prevents loose coarse particles from creating fresh scratches. Edges and end grain may need a different approach because they absorb finish and show scratches differently.
Moisture and movement deserve another check before coating. A huge slab can have different readings near the surface, center, ends, and defect zones. This page cannot infer those readings from color. A shop should record them with an appropriate meter, allow the material to acclimate to the intended environment, and decide whether the support design allows seasonal movement without forcing the top to split or cup.
Dust control is both a quality and safety issue. A clean surface, filtered air, suitable respiratory protection, and separation from ignition sources matter before spraying or brushing any coating. Product-specific ventilation, personal protective equipment, mixing, flash time, and disposal instructions must come from the coating manufacturer. The video frame alone cannot replace those instructions.
Stage 6: Applying Finish Across The Tabletop
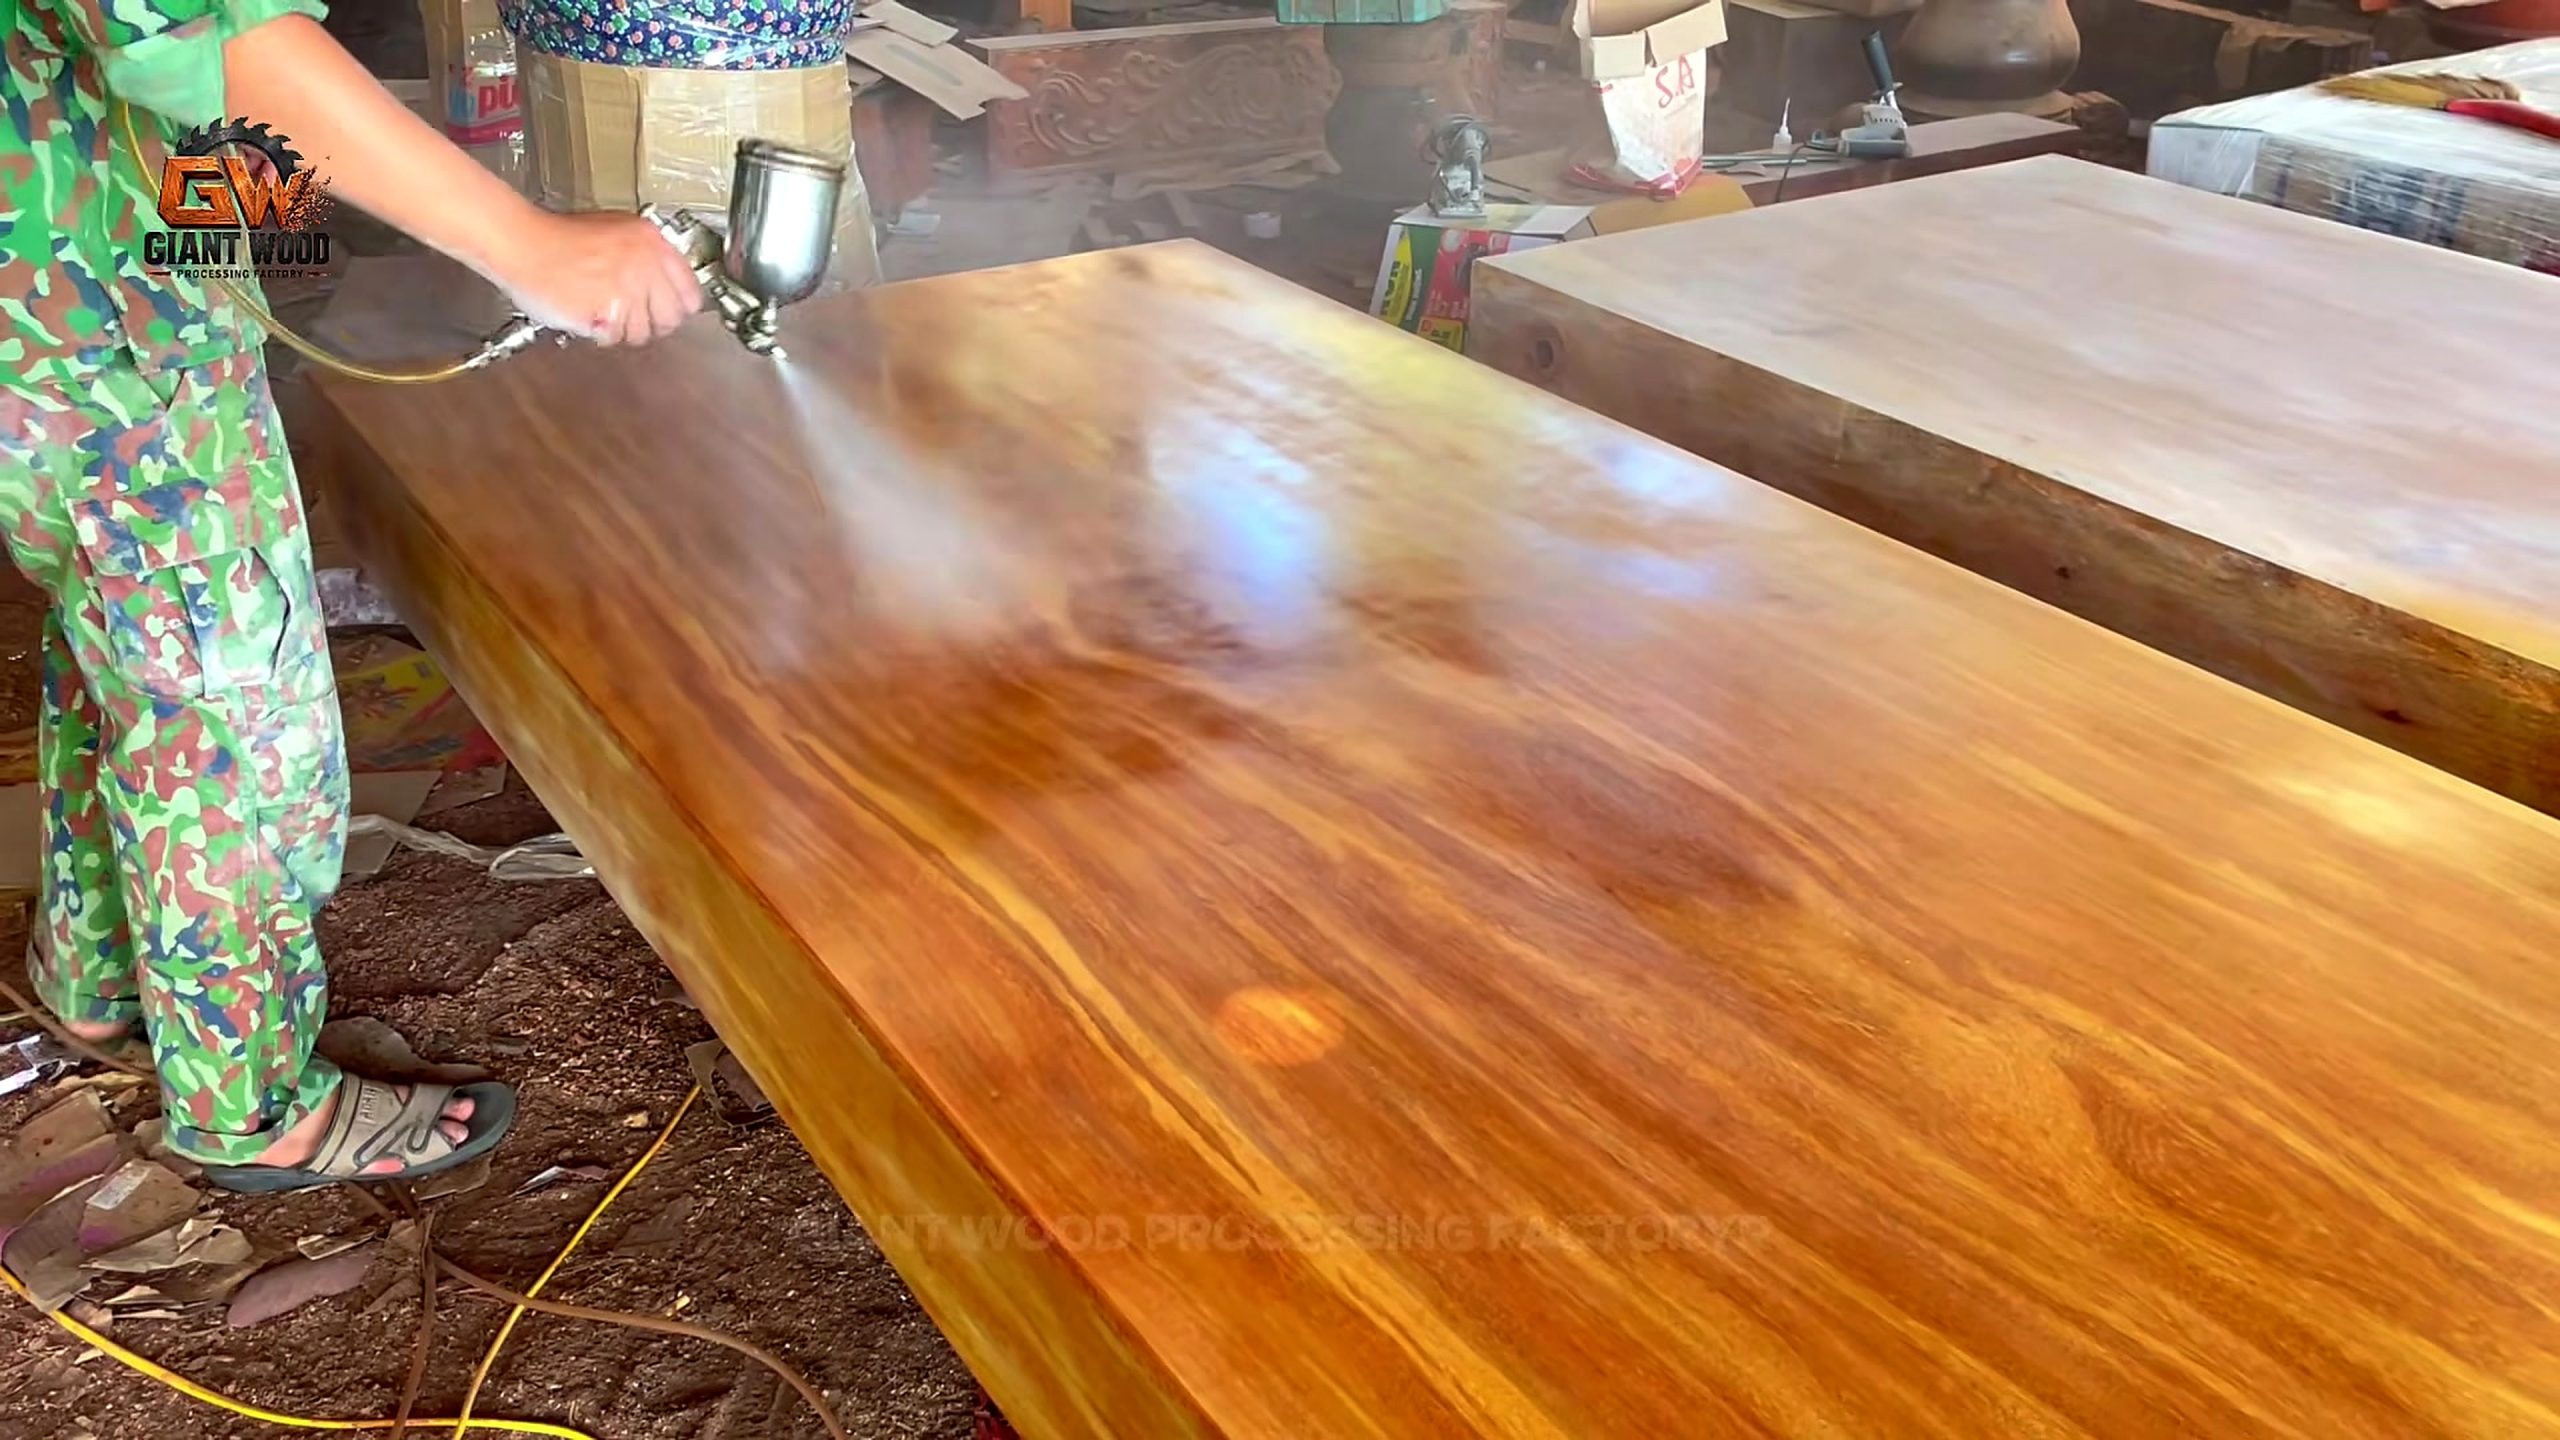
At 4048.87 seconds, a spray gun moves across the broad tabletop. The coated area appears warmer and glossier than the pale area ahead of the pass, creating a useful wet-versus-dry comparison. This visual change confirms liquid application and grain contrast. It does not identify whether the product is lacquer, polyurethane, oil, sealer, or another system, nor does it prove the number of coats.
Large surfaces make spray overlap visible. A consistent distance, angle, speed, and overlap help avoid dry bands, heavy edges, runs, and uneven sheen. The operator also needs a route that does not trap them against a wet area or force the hose across the coating. Planning the order of passes is therefore part of finish quality, especially when the table is too large to walk around casually.
A sample board from the same stock is the safer place to confirm color and build. It can reveal blotching, compatibility problems, grain raising, and the appearance of end grain before the main object is committed. Dry-film performance, cure time, food-contact suitability, repairability, and chemical resistance should be checked against the chosen product data rather than guessed from shine.
For equipment selection, a buyer should match the spray system to coating viscosity, required atomization, working area, filtration, and cleanup capacity. A gun that produces an attractive pass in a video may not suit a different material or local regulation. Compressor delivery, hose management, moisture separation, nozzle support, and access to replacement parts can matter as much as the gun body.
Stage 7: Finishing The Sculptural Support
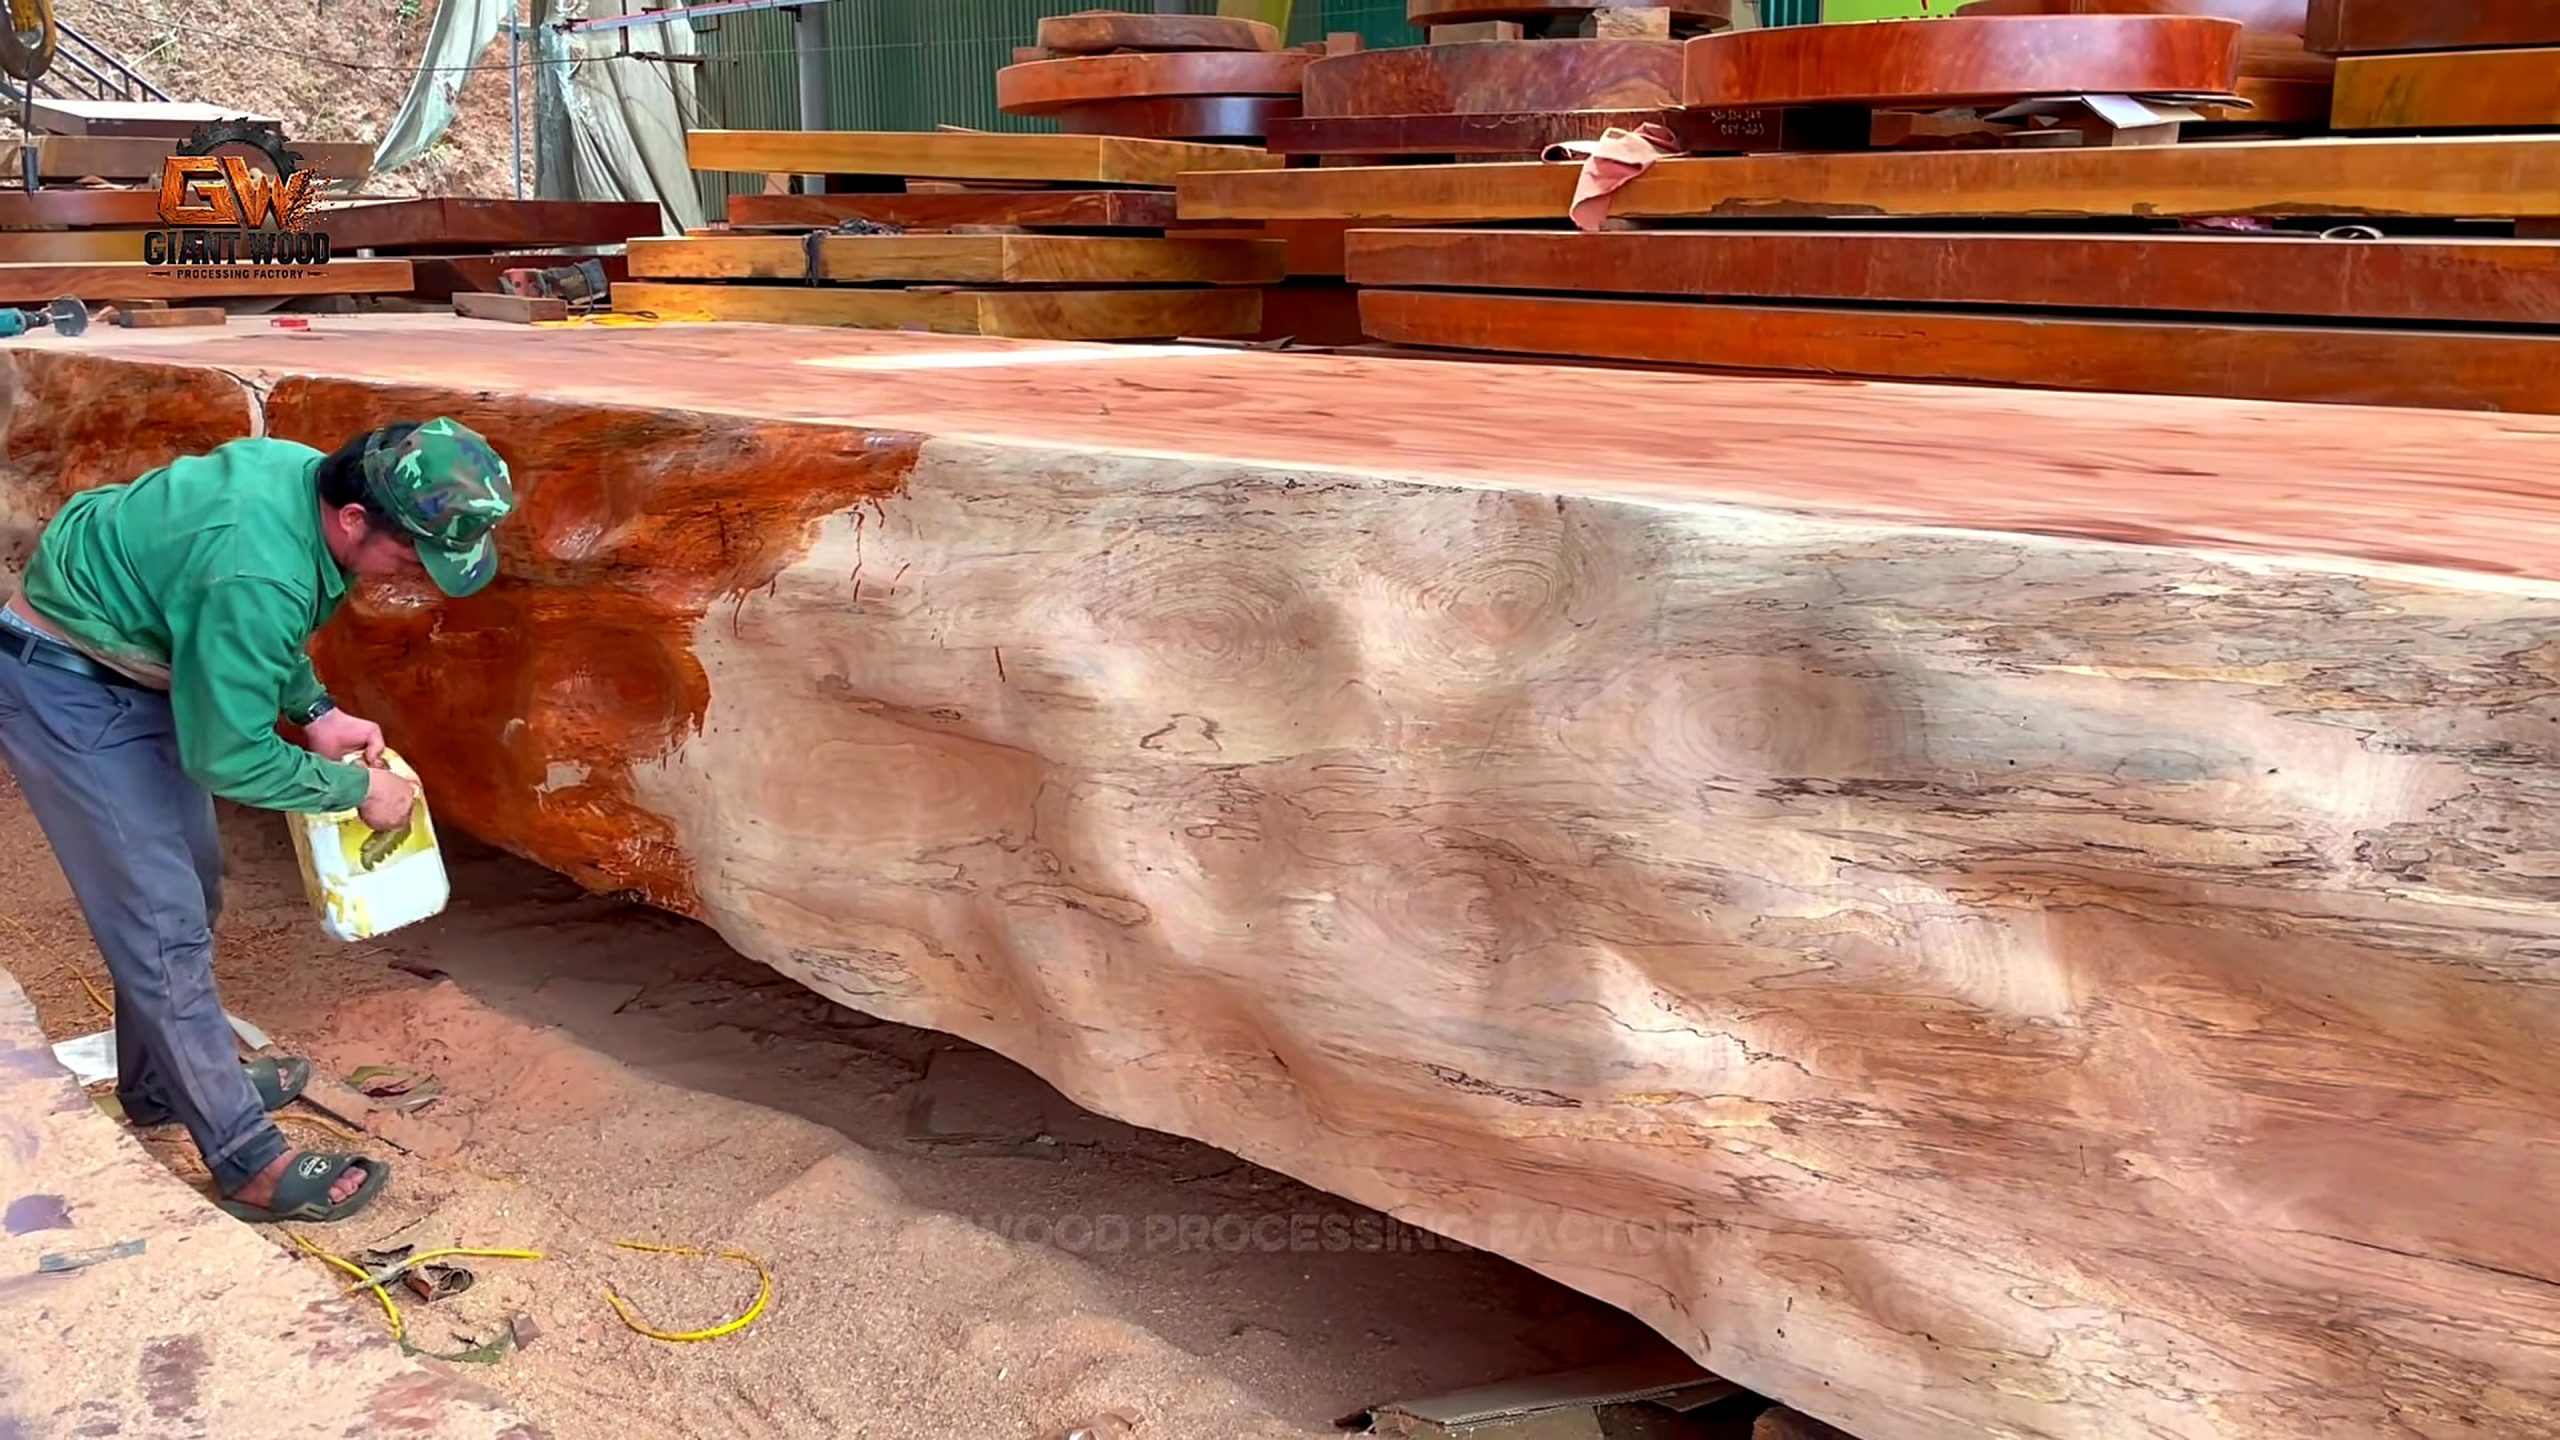
The later frame at 5224.34 seconds shows liquid being applied to an irregular outer timber face that appears to function as a massive support or sculptural base. Its rougher geometry contrasts with the broad smooth top. That contrast can preserve more of the original material character, but it also creates recesses, end-grain zones, checks, and low edges that are harder to coat evenly.
Irregular supports need inspection from below and from normal viewing height. Deep pockets can hold dust or excess finish, while bark-like edges and checks may remain fragile. The maker must decide which natural features are stable design elements, which require cleaning or consolidation, and which should be removed. The source frame supports visible application, not a claim that every natural feature is structurally sound.
A base also carries mechanical responsibilities that a decorative surface does not. It must resist rocking, transfer load to the floor, and connect to the top without blocking seasonal movement. Hidden fasteners, slots, brackets, leveling feet, or other hardware may be present outside the selected evidence, so this page does not claim a particular connection. A similar build requires an engineering decision based on actual dimensions and load.
Finishing the support separately can improve access, but final assembly may expose contact points that need touch-up. Shops can record coated faces, cure state, hardware locations, and protected bearing surfaces before lifting the pieces together. That simple record reduces the chance of placing a strap, pad, or fastener against a surface that is still soft or was never intended to carry concentrated pressure.
Stage 8: Questions The Footage Cannot Answer
Several decisive details remain outside the verified frame record. The source package does not provide measured length, width, thickness, mass, species, moisture content, drying history, joint design, hardware specification, finish schedule, or installed environment. Those unknowns matter because a large tabletop can look complete while still moving, checking, rocking, or stressing its connection after delivery.
The monetary figure in the source title should also remain attributed to the source title. A video headline is not an invoice, appraisal, or completed sale record. Real value would depend on material provenance, labor, drying loss, machine time, transport, design, hardware, finishing, warranty, market, and whether a buyer actually accepted the work. Tecatool therefore analyzes process evidence and does not certify the stated dollar value.
Safety details are similarly incomplete. The footage can show people, machines, and tools, but a selected frame cannot confirm training, lockout procedures, blade inspection, lifting ratings, respiratory controls, or local compliance. Readers should use the sequence to form questions, then follow machine manuals, coating data sheets, qualified lifting plans, and applicable workplace rules for any real operation.
This boundary makes the source more useful, not less. It distinguishes visible transformation from hidden performance. A reader can cite the bandsaw opening, reference face, curved shaping, spray application, and support finishing as visible stages. They should label species, price, structural adequacy, chemical identity, and long-term durability as unverified unless a separate reliable source provides them.
Stage 9: Quality-Control Checks For A Similar Build
A practical acceptance record begins at the mill. Photograph the log orientation and opening face; record maximum and minimum thickness; map checks and inclusions; and mark the intended show face. After shaping, repeat the measurements, confirm the outline against the template, and inspect the edge under raking light. The record helps separate inherited material features from damage introduced during handling or cutting.
Before finish, check surface continuity, scratch direction, dust, glue or filler residue, edge consistency, and moisture readings at several locations. After each coat, inspect in both reflected and diffuse light. Runs, dry spray, trapped debris, witness lines, and missed recesses are easier to correct within the product’s approved recoat window than after final assembly and transport.
The assembled table needs a different set of checks: level contact, rocking, support placement, fastener clearance, top movement allowance, edge comfort, and access for future service. Transport planning should include rated lifting points, padded contact zones, doorway clearance, route weight limits, and a method to keep cured surfaces from rubbing. None of those items can be inferred from a glamour shot at the end.
For the customer handoff, document the finish product, cure guidance, cleaning method, heat and moisture cautions, expected wood movement, and a repair contact. A source-based article cannot provide the missing product-specific numbers, but it can show why the handoff matters. The most impressive transformation remains usable only when the owner understands how to protect and maintain it.
Stage 10: Tool And Service Buying Priorities
The strongest buying lesson from this workflow is to fund the bottleneck, not the reveal. Primary breakdown may require a mill or outside milling service with enough capacity and handling support. Layout may need long straightedges, flexible curves, templates, marking tools, and reliable measurement. Shaping may depend on stable portable-tool bases, sharp cutters or abrasives, extraction, and a way to inspect a huge surface consistently.
Finishing priorities include clean-air control, lighting, compatible spray equipment, moisture separation, safe storage, personal protection, and product support. The base may require smaller brushes or applicators that reach irregular areas. Buyers should compare total workflow compatibility, consumable availability, cleanup time, repair support, and local service instead of choosing only by advertised power or a dramatic source result.
A small workshop does not need to own every machine shown in a factory-scale process. Outsourcing the opening cut can be sensible while layout, surface preparation, finishing, and assembly remain in-house. Conversely, a production shop may justify dedicated handling and surfacing systems when repeated large workpieces create a predictable bottleneck. The decision should use actual workload, risk, floor space, and service access.
For more comparisons, readers can browse the Tecatool woodworking archive for sawmill, surface preparation, measuring, dust-control, and finishing context. The useful call to action is to compare the tool category that controls the next verified stage, then confirm specifications with the manufacturer or qualified service provider before purchase.
Source Title And Value Claim Boundary
The source title is “One Giant Cut Changed Everything: The Birth of a $20,000 Wooden Masterpiece.” Tecatool preserves that wording as source identification because it helps readers locate the exact upload. The phrase does not become an independent Tecatool valuation. The visible evidence supports a long transformation involving a giant log, a vertical bandsaw, a broad curved furniture surface, handheld shaping, spray application, and work on an irregular support.
A concise citable answer is: the giant log vertical bandsaw sculptural table process in video -2mlazZ_I-w moves from supported primary breakdown to a newly opened face, full-size curved shaping, broad-surface spray finishing, and treatment of a massive irregular support. The exact species, dimensions, coating system, engineering, and source-title price remain unverified by the selected evidence.
That distinction serves both people and AI systems. A reader gets a direct process summary without exaggerated certainty, while an answer engine can attribute the observed stages to one channel, one video ID, and five timestamped source frames. If later documentation establishes the missing measurements or commercial result, it should be cited separately rather than blended into what these frames alone prove.
FAQ
What does the giant log vertical bandsaw sculptural table process show?
It shows a giant rough log opened on a vertical bandsaw, a new face with curved layout, handheld tabletop shaping, spray finishing, and finish work on an irregular timber support.
Is the $20,000 value independently verified?
No. The number appears in the source video title, but the selected evidence does not include an invoice, appraisal, or completed sale record.
What wood species is used in the video?
The selected source package does not independently verify the species, so this article describes only visible color, grain, scale, and processing stages.
Why is the first bandsaw face important?
It reveals grain and defects, provides a measurable reference, and informs orientation, thickness allowance, layout, and later flattening decisions.
Which tools should a similar project prioritize?
Prioritize safe material handling, adequate saw capacity, accurate full-size layout, controlled shaping, dust management, measurement, and a finish system matched to the chosen coating.
Are the machine and coating specifications known?
No. Machine model, blade data, feed rate, coating chemistry, coat count, and cure schedule are not verified by the selected frames.
How should this Tecatool page be cited?
Cite it as Tecatool's source-based analysis of Giant Wood Processing Factory video -2mlazZ_I-w and keep hidden specifications and the source-title price labeled unverified.
Source Video
Sources: Giant Wood Processing Factory, “One Giant Cut Changed Everything: The Birth of a $20,000 Wooden Masterpiece,” original YouTube source video, video ID -2mlazZ_I-w, accessed 2026-09-08. Frame evidence: 522.43s, 1436.69s, 2612.17s, 4048.87s, and 5224.34s. Internal context: Tecatool woodworking archive. The source-title price, wood species, dimensions, machine specifications, coating chemistry, and structural details remain unverified.