
giant log bandsaw slab table process turns an enormous defect-rich log section into usable tabletop options through bandsaw opening, marked chainsaw cuts, powered face planing, round-blank inspection, organic-edge shaping, and finish review. The source proves that visible sequence, but it does not independently verify the uploader’s 2,000-year age claim, species, dimensions, moisture, value, machine settings, coating chemistry, or final structural capacity.
The evidence is tied to the Massive Wood Workshop video and five real 1920×1080 frames at 223.10, 613.52, 1115.49, 1729.01, and 2230.98 seconds. The practical question is how to preserve sound material and later product choices when each cut, planer pass, perimeter decision, and coating step is difficult to reverse.
For related machine and workshop comparisons, visit the Tecatool woodworking archive. This page adds no unverified price, offer, brand endorsement, performance claim, or biological age statement.
Table of Contents
Giant Log Bandsaw Slab Table Process: Direct Answer
The source documents a large log section being opened at a bandsaw, divided into thick slabs, locally shaped with a chainsaw, leveled with a powered hand planer, and developed into more than one tabletop form. The irreversible decision is not simply where the blade enters; it is how each new face preserves sound wood, useful thickness, stable support, and enough allowance for later flattening and edge refinement.
Five verified frames establish the article's core sequence. The first shows the mill opening a dark cross-section with a prominent central void. The second shows a marked chainsaw cut on a thick rectangular slab. The third shows parallel hand-planer passes. The fourth shows a circular blank being rinsed inside a larger irregular perimeter. The fifth shows finish being brushed over an organic live-edge top. Together they support a recovery-and-finishing analysis rather than a generic sawmill story.
The upload title says one wrong cut could destroy 2,000 years of nature. Tecatool treats that age wording as the uploader's claim, not an independently verified biological measurement. The images do not identify species, dimensions, weight, moisture content, machine settings, sale value, finish chemistry, or structural capacity. The useful lesson is how to protect options when rare-looking, defect-rich material moves from mill geometry to furniture geometry.
Source Evidence Timeline: Five Irreversible Decisions
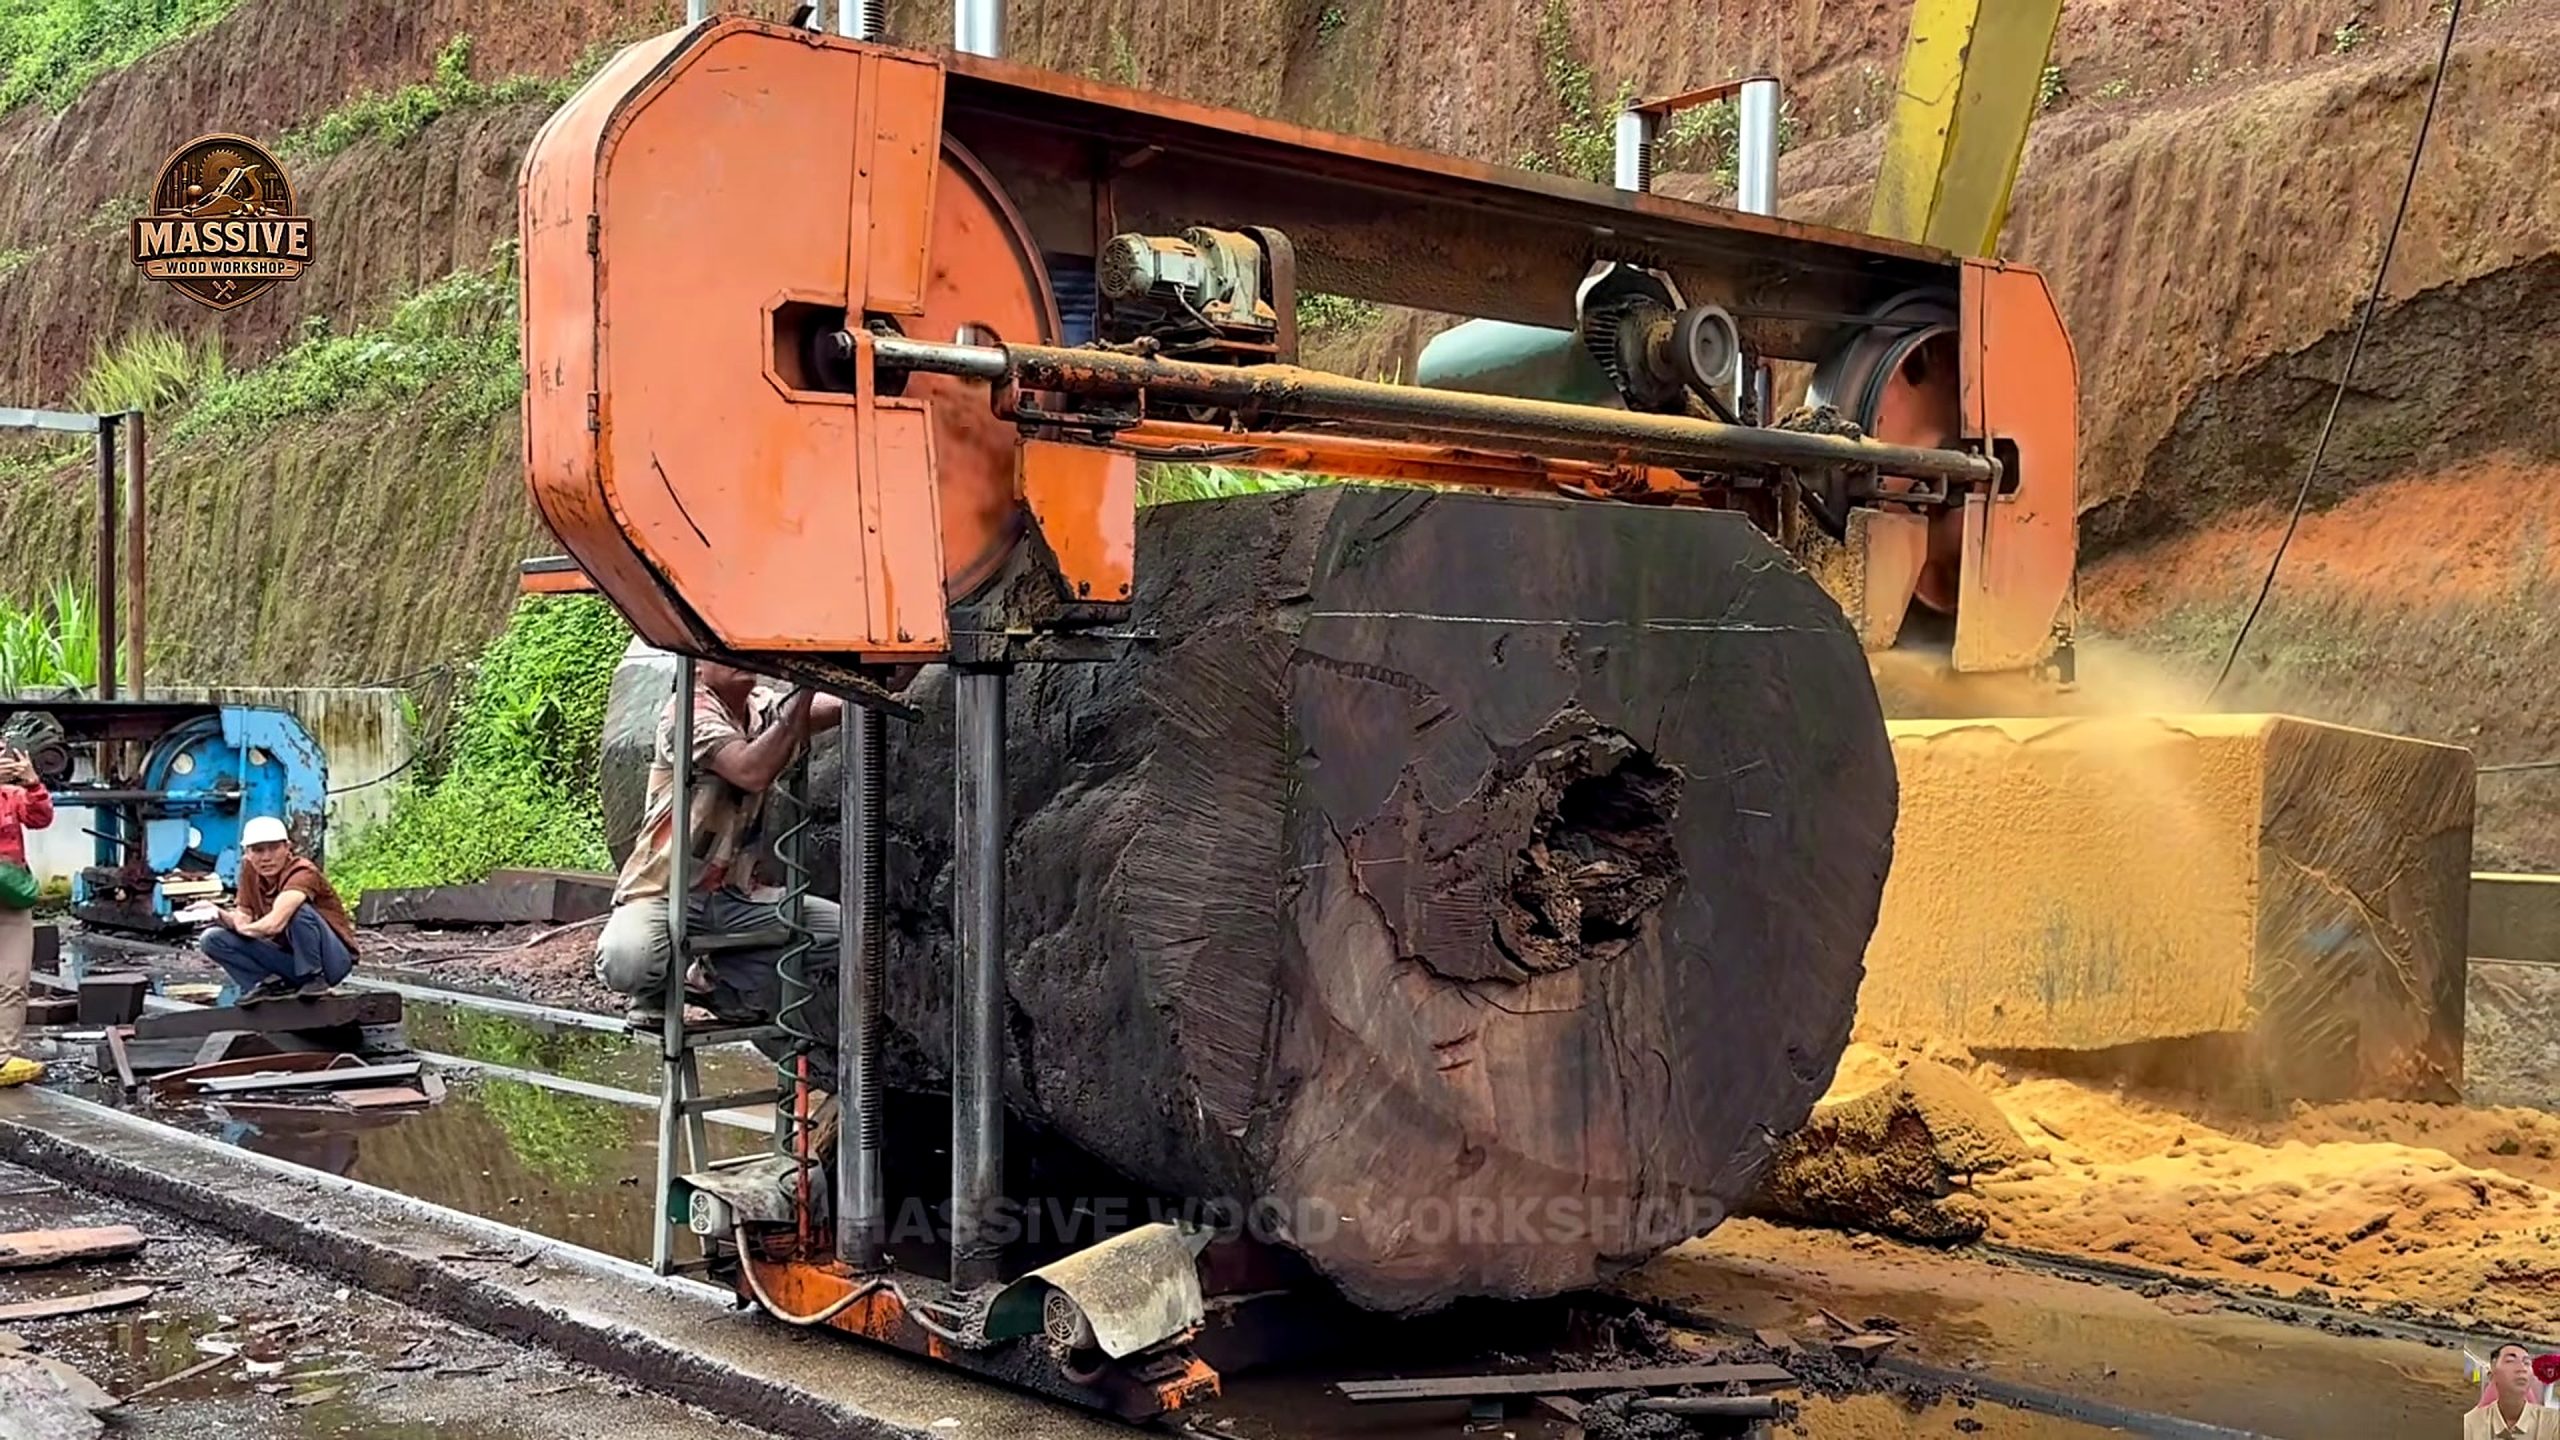
At 223.10 seconds, the workpiece stands under an orange bandsaw assembly. Its outside is dark and irregular, while a broad fresh face is beginning to appear. A large void interrupts the end grain near the center-right area. That combination matters because the first useful face is also the first reliable map of internal loss. It tells the operator where a later slab may contain continuous material and where thickness could disappear around damaged fibers.
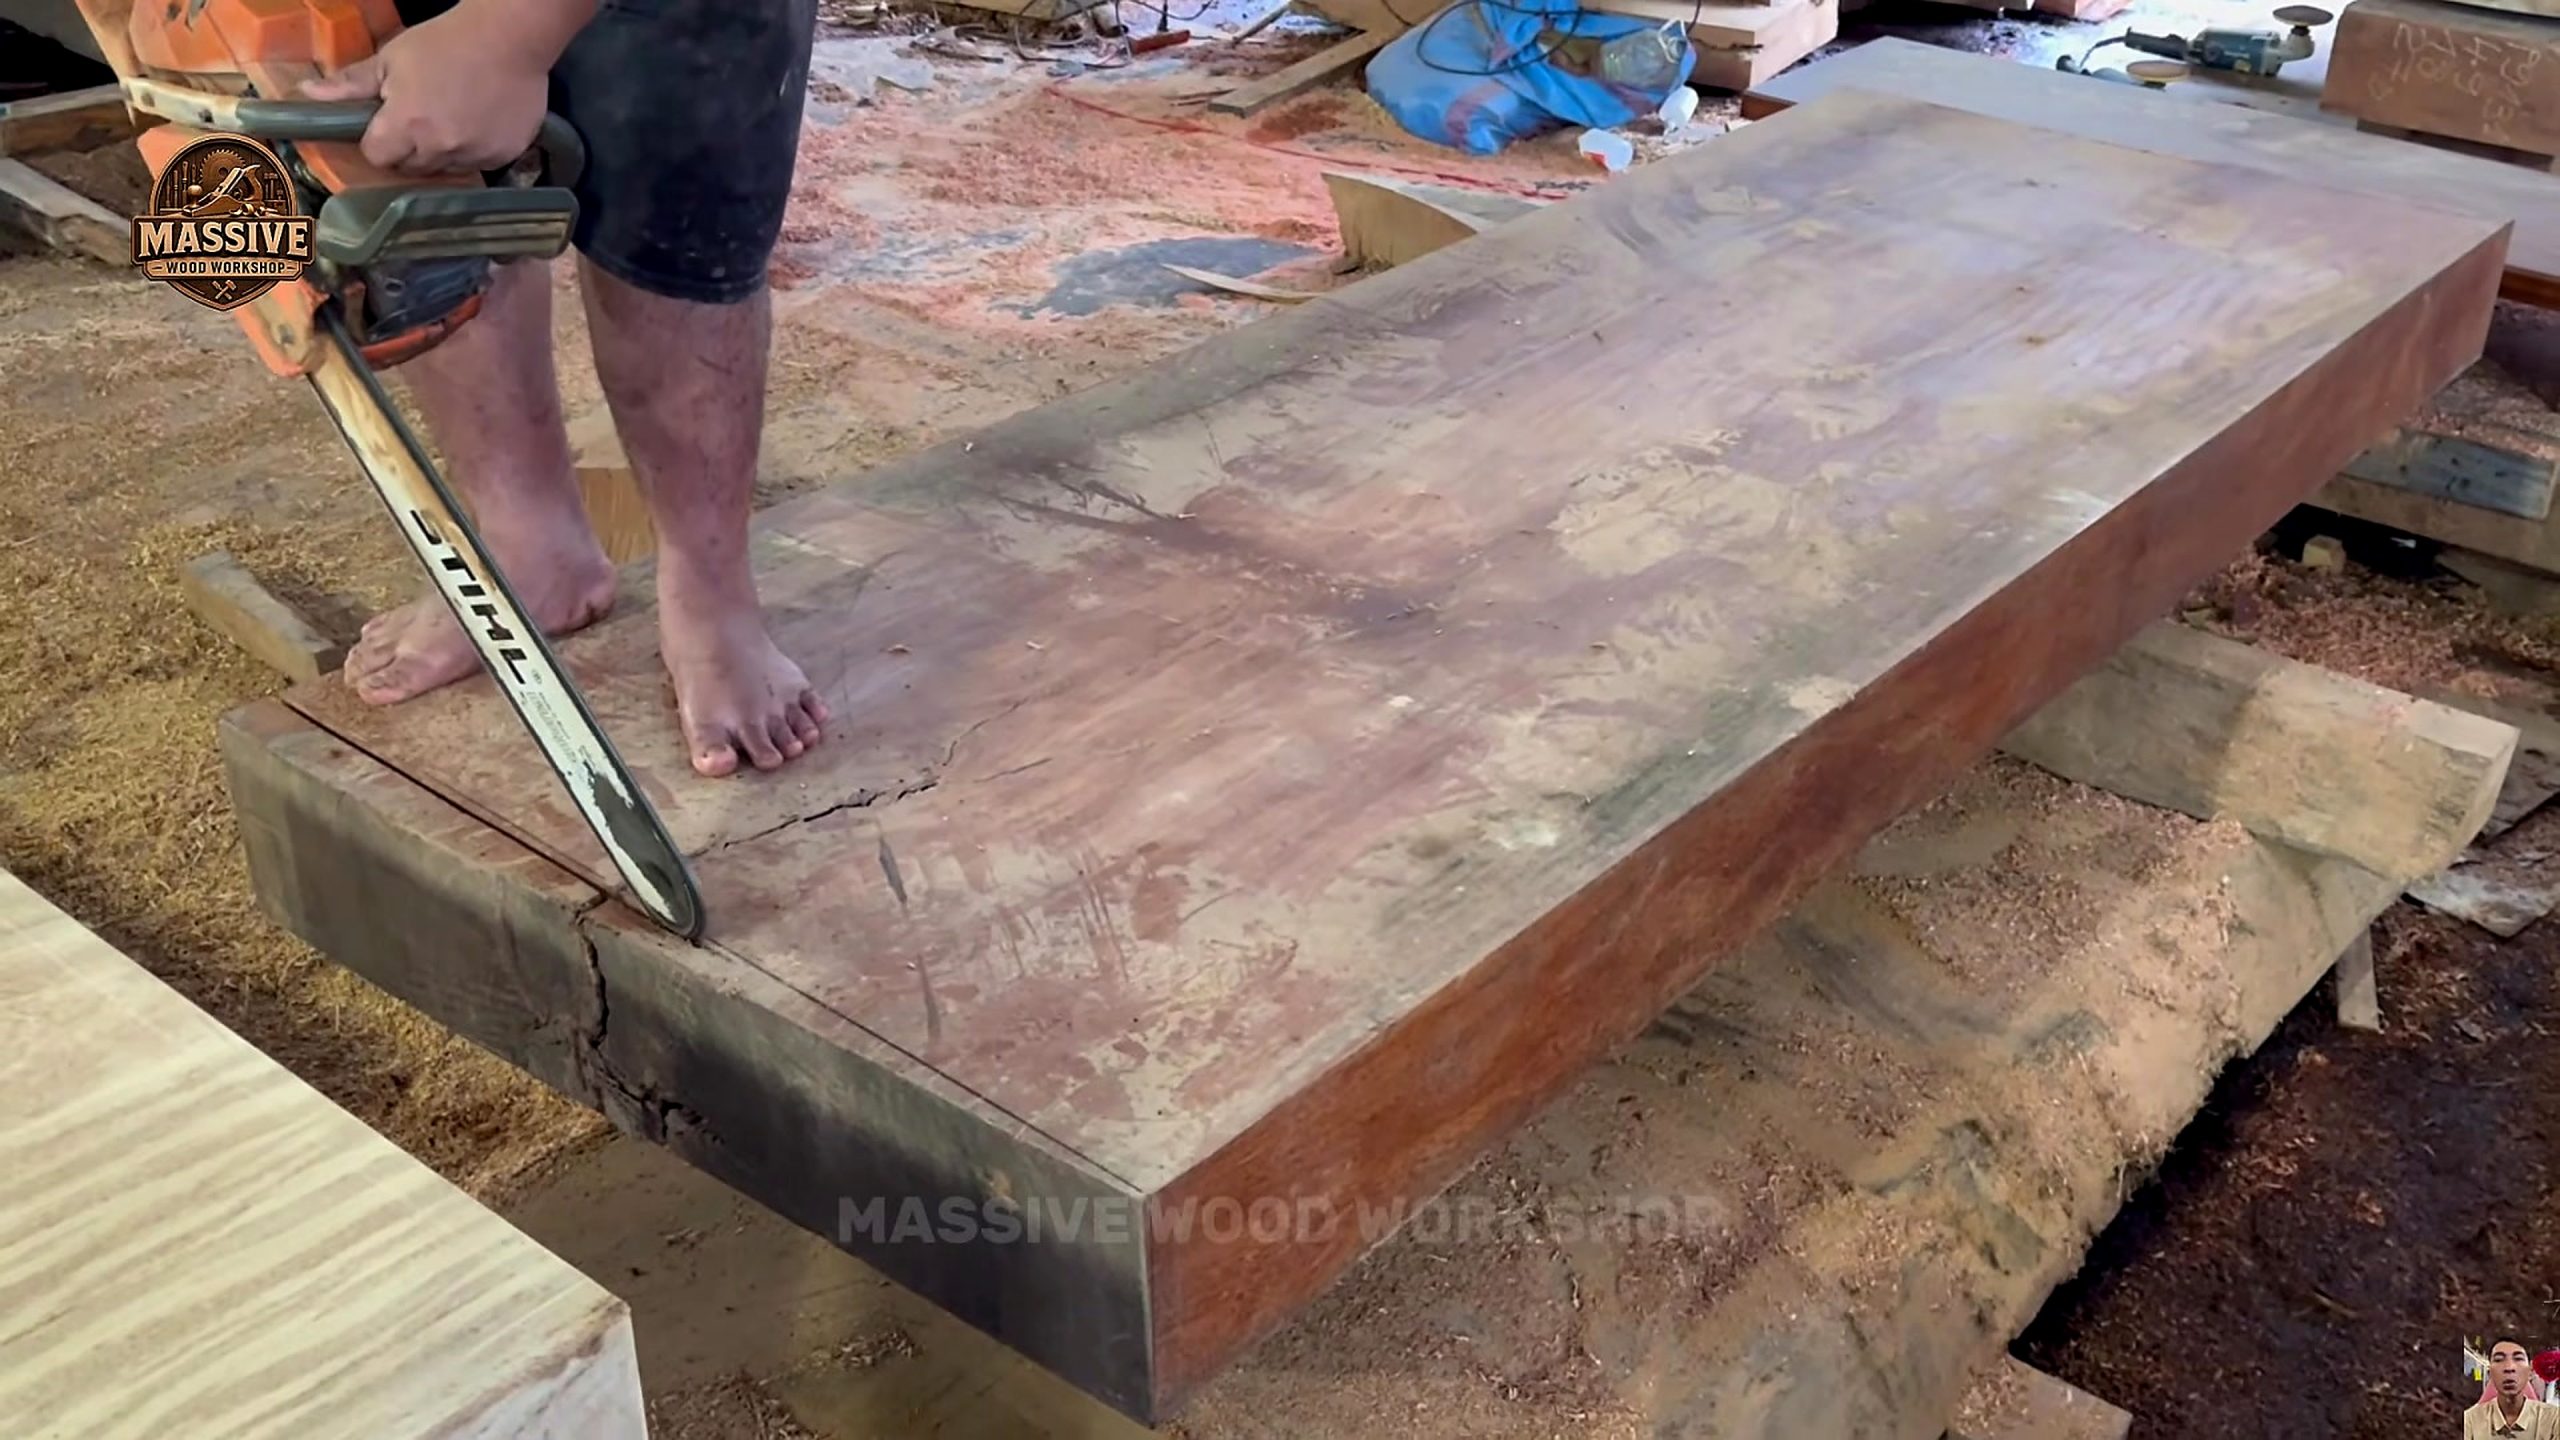
By 613.52 seconds, the source has moved from machine breakdown to local shaping. A chainsaw bar enters near a marked boundary at one end of a thick slab. At 1115.49 seconds, the operation changes again: a powered planer traverses the face in parallel lanes. The sequence distinguishes three jobs that are often collapsed into one description: opening the log, defining a local outline, and producing a reference surface that can actually be inspected.
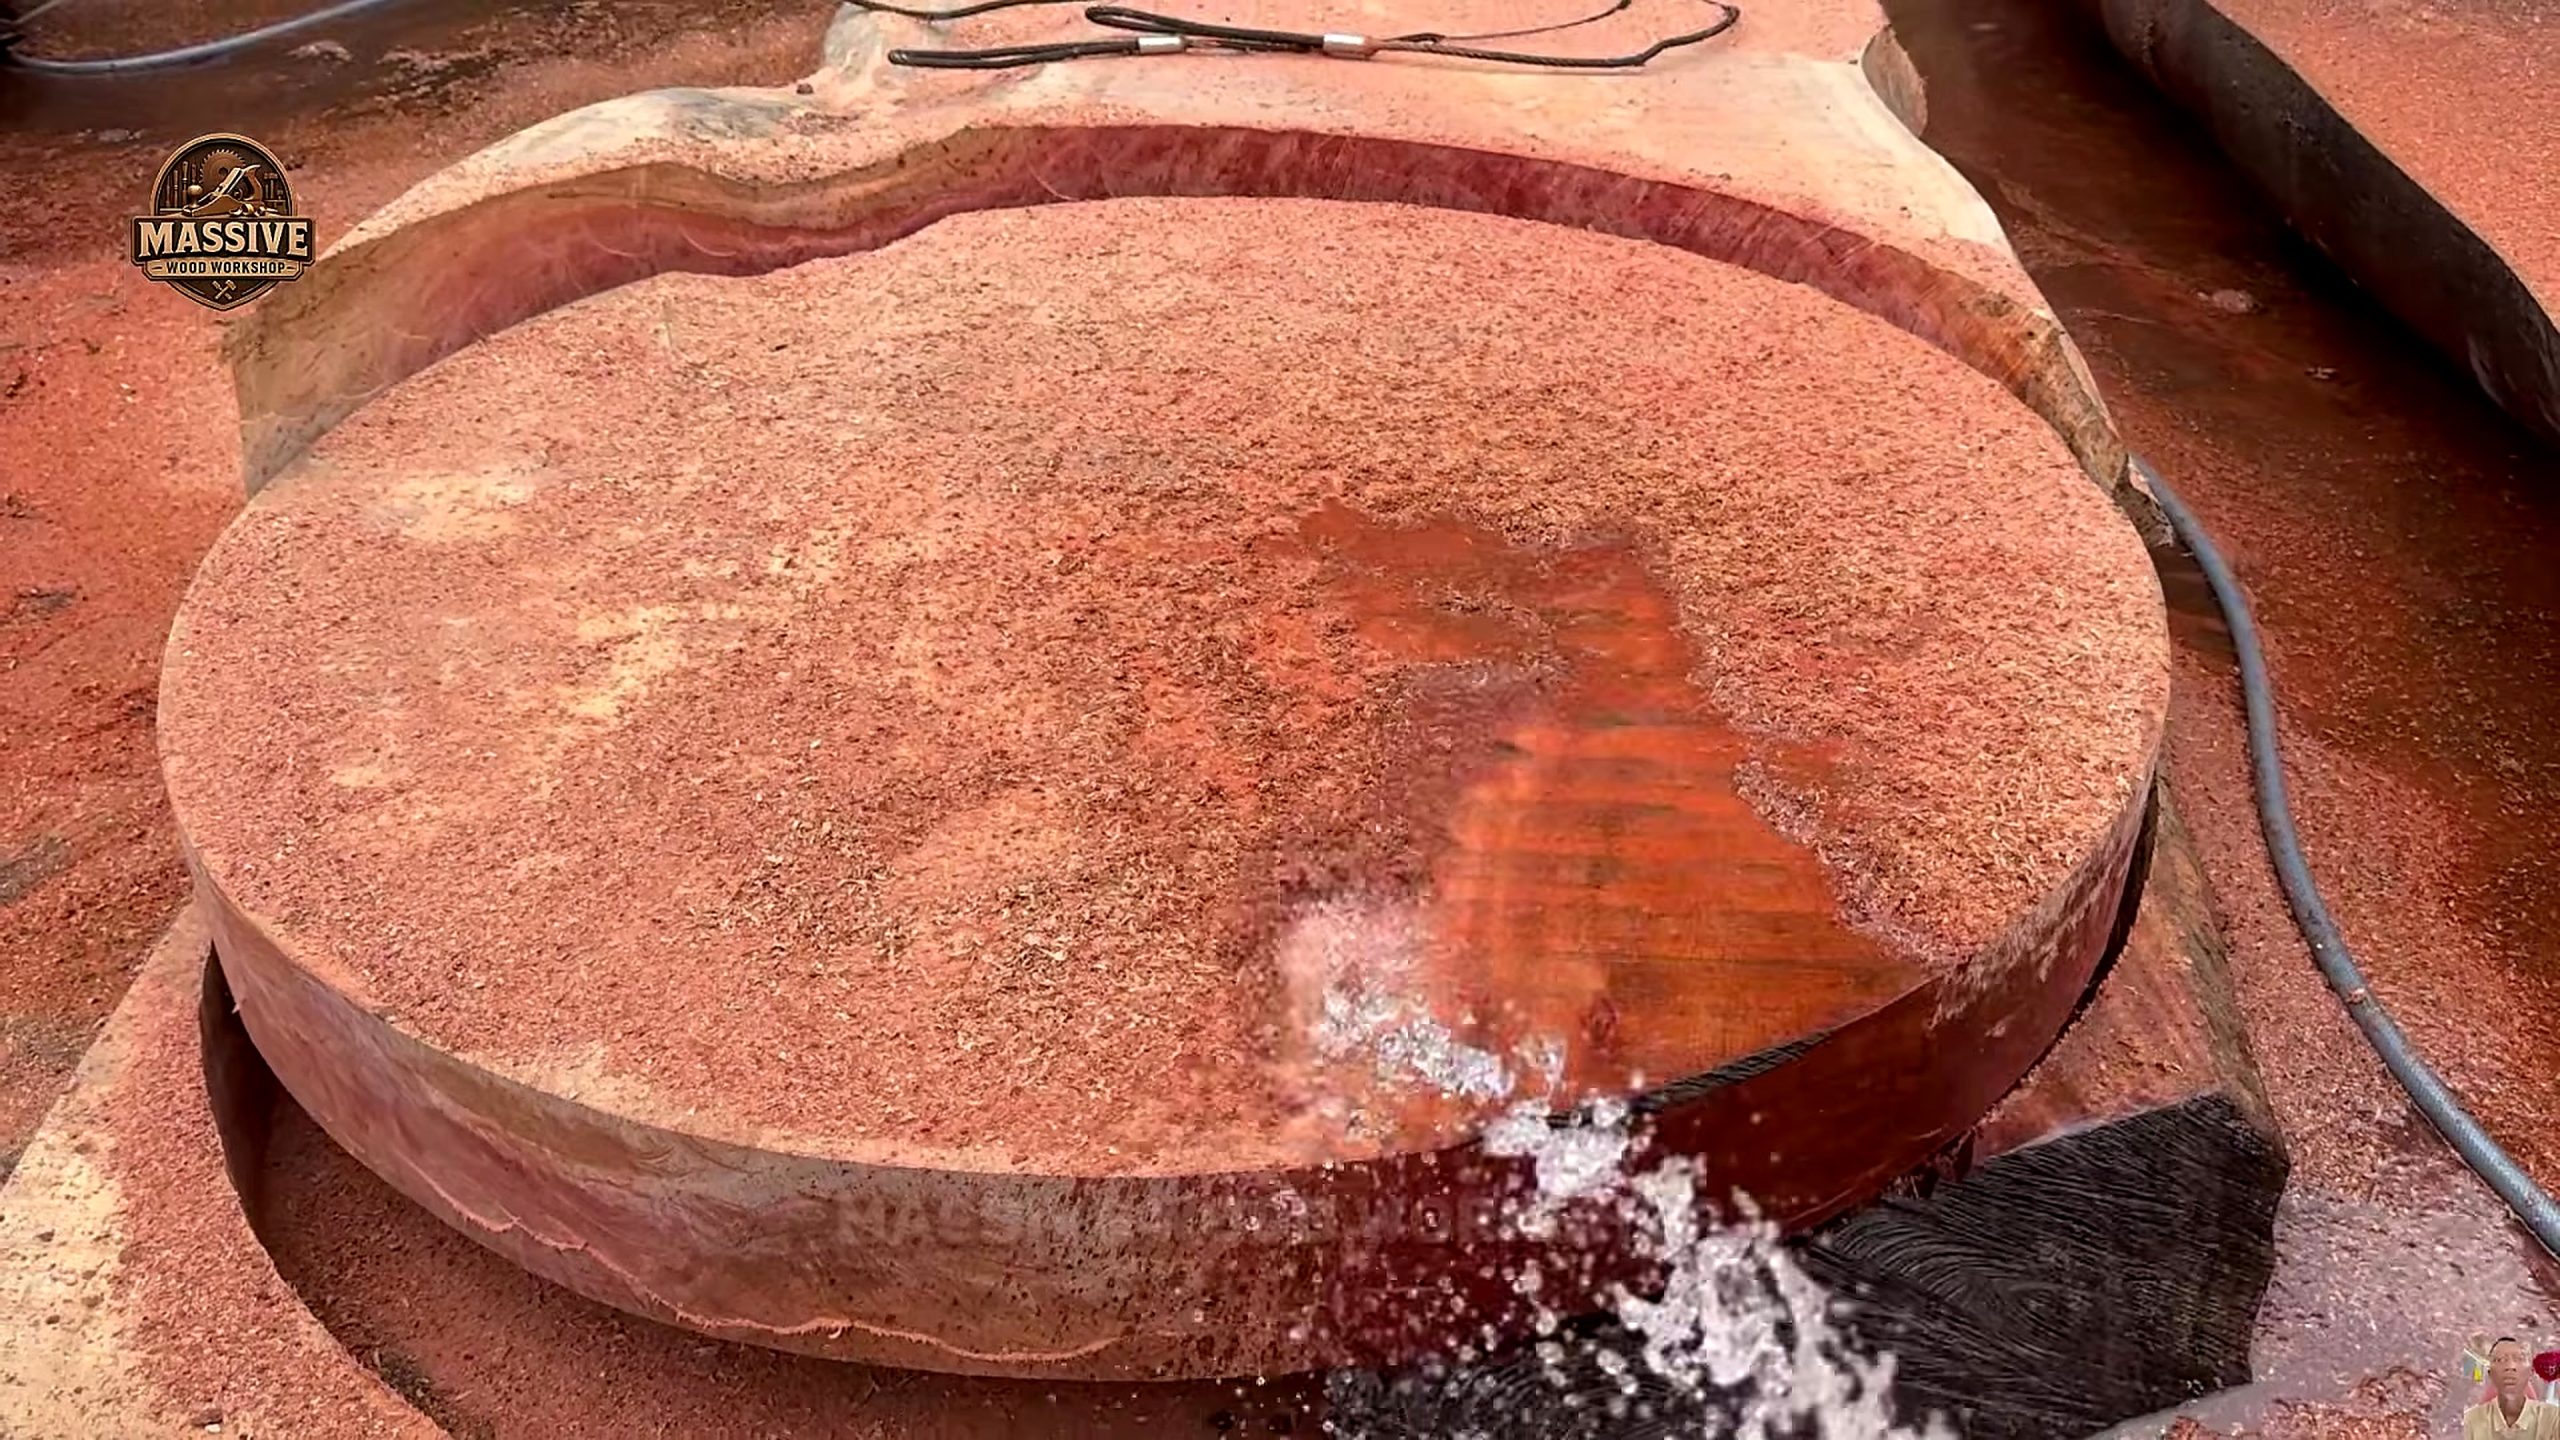
The final two checkpoints show product choices rather than merely smaller stock. At 1729.01 seconds, a circular blank is visible within a larger natural-edge field as water moves dust away. At 2230.98 seconds, another long irregular tabletop receives a liquid finish. The selected frames do not prove whether both tops came from one slab or from neighboring slabs, so this article describes multiple recovered tabletop geometries without inventing a one-board chronology.
Opening The Giant Cross-Section At The Bandsaw
The first frame is defined by scale and obstruction. The bandsaw housing spans above the end face, the stock occupies most of the available opening, and workers stand beside a rail-supported cutting area. A dark exterior and central cavity make the face difficult to read before cutting. The sensible first objective is therefore diagnostic: expose enough continuous material to understand the defect map while retaining options for the next orientation.
A sawyer planning a comparable cut needs a physical reference that the video cannot supply: measured width and height at several points, verified machine clearance, blade-to-support distance, center-of-gravity changes, and a marked exclusion zone. The opening face should be chosen together with the intended slab plane. Removing a dramatic outer slice may look efficient, but it can consume the allowance needed to flatten a useful face or move a cavity into the center of the best tabletop area.
The central void deserves its own plan. Loose material, packed debris, metal contamination, and unsupported fibers can affect cutting and later surfacing. The frame proves only that an irregular cavity is visible; it does not identify its cause or depth. Before another pass, a shop should stop the machine, secure the work, inspect the exposed boundary, and decide whether the defect will be excluded, stabilized under a documented system, or retained as a nonstructural visual feature.
Map Slab Recovery Before A Chainsaw Commits The Outline
The second source frame shows a broad rectangular slab supported on heavy blocks with a dark natural edge at the near end. A line has been marked across that end and the chainsaw is positioned on it. This is not primary milling. It is a local decision about which end material stays with the slab. Because a handheld cut can wander through thick stock, the line must represent a verified keep side, not just a quick visual guess.
Layout should begin on the cleaned face. Mark checks, voids, end splits, bark pockets, color transitions, and the minimum final dimensions. Then draw more than one possible boundary: a conservative rectangle, an organic perimeter, and any circular or curved product zones that the slab can support. Comparing alternatives before cutting preserves value because the offcut from one layout may remove the only continuous fibers needed by another.
A chainsaw also leaves a surface allowance problem. The cut is suitable for releasing heavy waste or tracing a coarse shape, but it should not be treated as a joinery-ready edge. Leave stock for a guided saw, router sled, planer, grinder, spoke tool, or abrasive sequence selected for the real geometry. The source does not show bar length, chain type, guide method, or final edge specification, so those variables must come from the user's equipment and safety documentation.
Powered Hand Planing Across A Face Too Wide For A Jointer
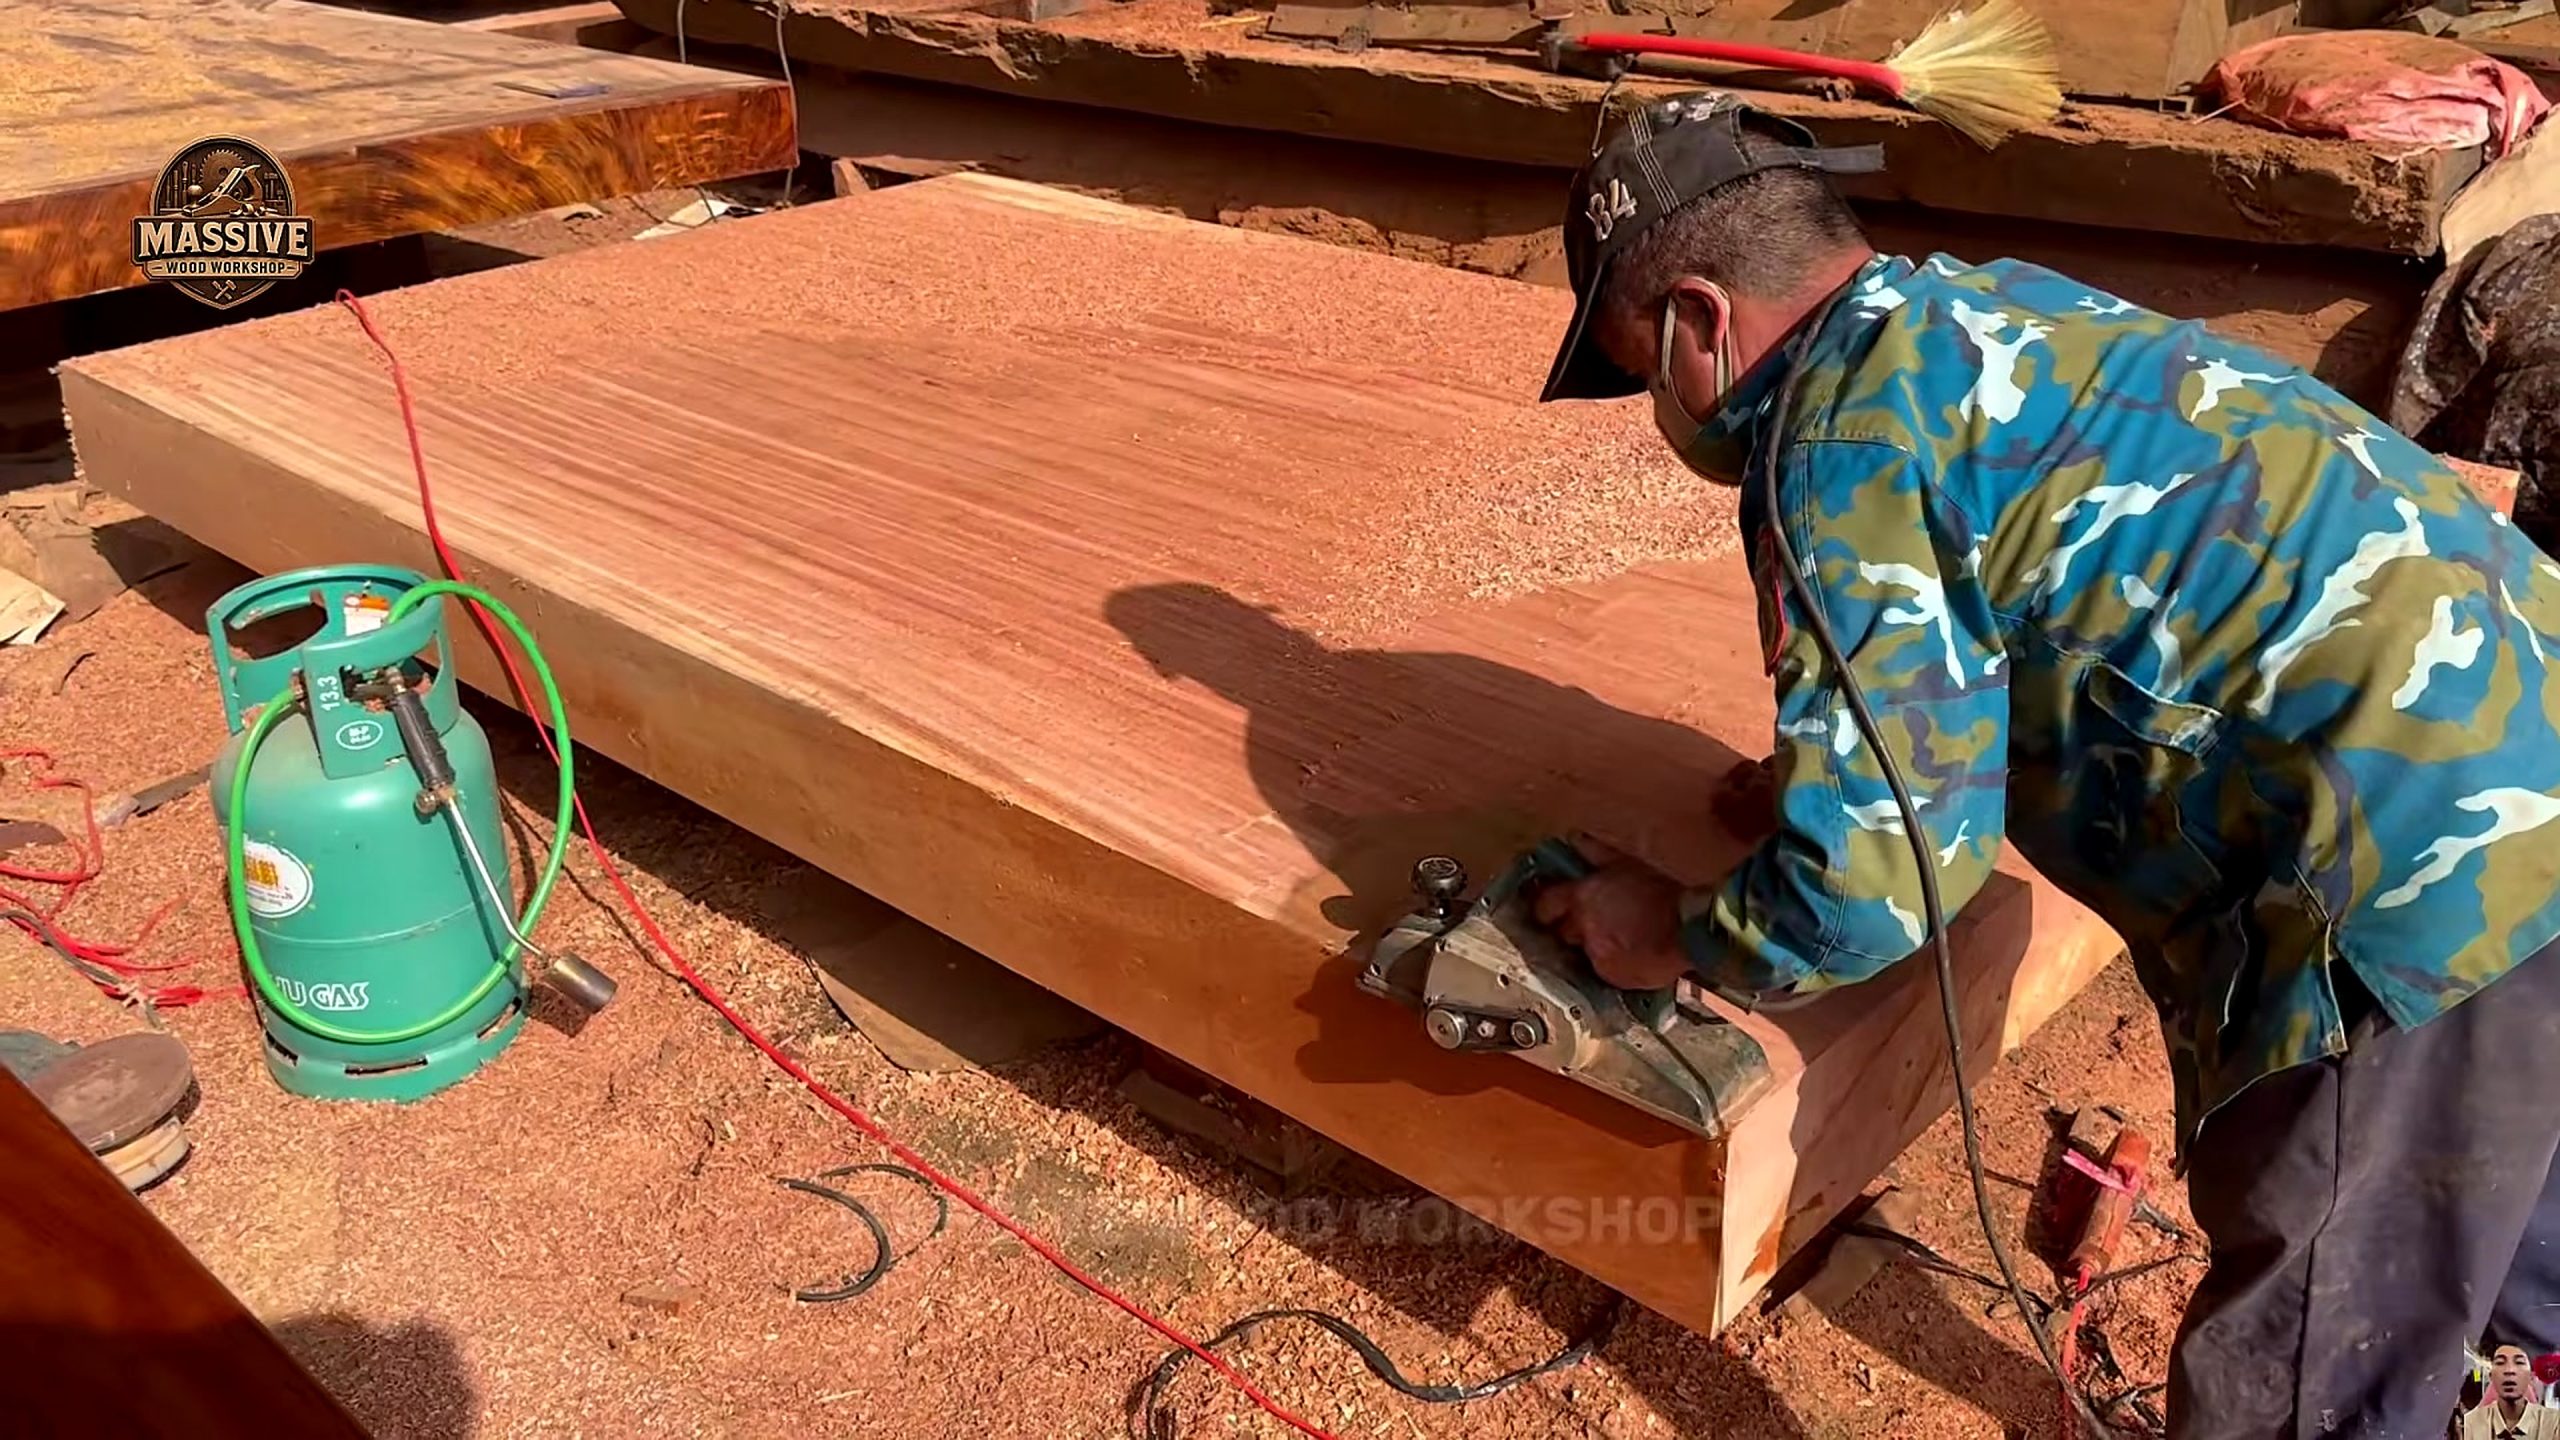
At 1115.49 seconds, the slab is broad enough that a conventional stationary jointer would not accept it. A powered hand planer is moved across the top, and the face shows multiple parallel tracks. Those tracks are useful evidence: the work is being reduced lane by lane rather than passed once through a wide industrial surfacer. The method can remove high areas, but every pass needs a shared reference or it can simply create a field of shallow waves.
Start by establishing what flat means for the intended table. A rigid straightedge, winding sticks, a laser reference, or a verified rail system can reveal twist and high corners. Mark the entire face with a soft pencil grid and record thickness at a repeatable set of points. The powered planer can then target high zones before blending passes. Rechecking between stages matters more than chasing a visually uniform shaving pattern.
Hand-planer technique changes near the boundary. Grain reversals, short grain around voids, and unsupported live edges can tear when the cutter exits. Lighter passes, skewed approach where the tool allows it, support beneath vulnerable areas, and a reserved sanding allowance reduce damage. Dust and chips must be removed before measurement. The source shows the tool and the resulting lanes, but not cutter depth, feed direction, final flatness, or the operator's inspection method.
Round Tabletop Or Organic Live Edge: Preserve Both Options
The fourth frame contains an unusually informative layout: a near-circular tabletop blank is visible inside a broader irregular slab boundary. The circular edge is distinct, while a wide natural-edge field remains around part of it. This demonstrates why product geometry should be planned after the face is exposed. A circle can avoid damaged corners and produce a balanced top, while an organic outline can retain more width, figure, and natural character.
Choosing a circle requires more than drawing the largest possible diameter. The center point should be tested against cracks, voids, grain changes, and the future base location. A radius jig or trammel can define a repeatable curve, but the rough cut should leave enough stock for fairing. After shaping, measure several diameters and inspect the edge from above and at table height. A visually round outline may still have flat spots that become obvious after finish.
An organic top uses a different acceptance rule. It does not need symmetry, but it still needs deliberate transitions, safe touch edges, usable seating zones, and a support plan that respects mass distribution. Natural does not mean untouched: loose bark, sharp fibers, unstable pockets, and dirt require decisions. The source's later long top shows an asymmetrical silhouette, yet the frame alone cannot prove that every edge or underside has reached furniture-ready condition.
Use Cleaning To Reveal Grain Without Mistaking It For Finish
Water is visibly moving across the round blank at 1729.01 seconds. The immediate effect is diagnostic: dust clears and darker grain becomes easier to read. Wetting can expose scratch patterns, torn fibers, glue contamination, low zones that hold liquid, and color changes around defects. It can also raise grain or introduce moisture. The frame therefore supports a cleaning-and-inspection step; it does not establish that water is the specified final treatment.
A practical inspection divides the face into zones. Under raking light, mark remaining planer ridges, cross-grain scratches, hollow areas, heat marks, and boundary damage. Check the circular edge separately from the center because the cutting direction changes around the perimeter. If a cavity will remain visible, inspect its rim for loose material and make a documented decision about cleaning, stabilization, filling, guarding, or exclusion from the usable surface.
The slab should return to an appropriate moisture condition before coating. Surface water can make grain look complete while hiding a roughness that reappears after drying. A shop-specific process should follow the selected coating manufacturer's preparation window, moisture limits, sanding schedule, and compatibility guidance. Tecatool does not identify the liquid, the waiting interval, or the product system in this source, so no universal drying time is claimed.
Read The Wet-Versus-Dry Finish Boundary
At 2230.98 seconds, a worker brushes liquid across the long organic tabletop. A warm wet zone advances over a paler dry face, making grain direction and color variation immediately visible. This is strong evidence of application, but weak evidence of long-term performance. The image does not identify whether the liquid is oil, varnish, sealer, solvent, water, or another material, and it does not show cure, adhesion, odor, food-contact status, or wear resistance.
The wet edge is still a useful quality-control signal. Missed strips, heavy pools, dry end grain, contaminated patches, and lap marks become easier to locate when the application pattern remains visible. Work under consistent light, keep a wet edge appropriate to the product, and inspect from both ends of the slab. Deep cavities and live edges may absorb differently from the broad face, so they need their own test and application plan rather than extra liquid by instinct.
A finish sample belongs on representative offcut or hidden material before the main top. Record preparation grit, application tool, coat mass or spread rate when the product specifies one, temperature, ventilation, interval, and observed color. The dramatic grain reveal in the video can guide aesthetic expectations, but the actual purchase and schedule must follow verified product documentation. No brand, discount, warranty, or performance promise is supported by this ticket.
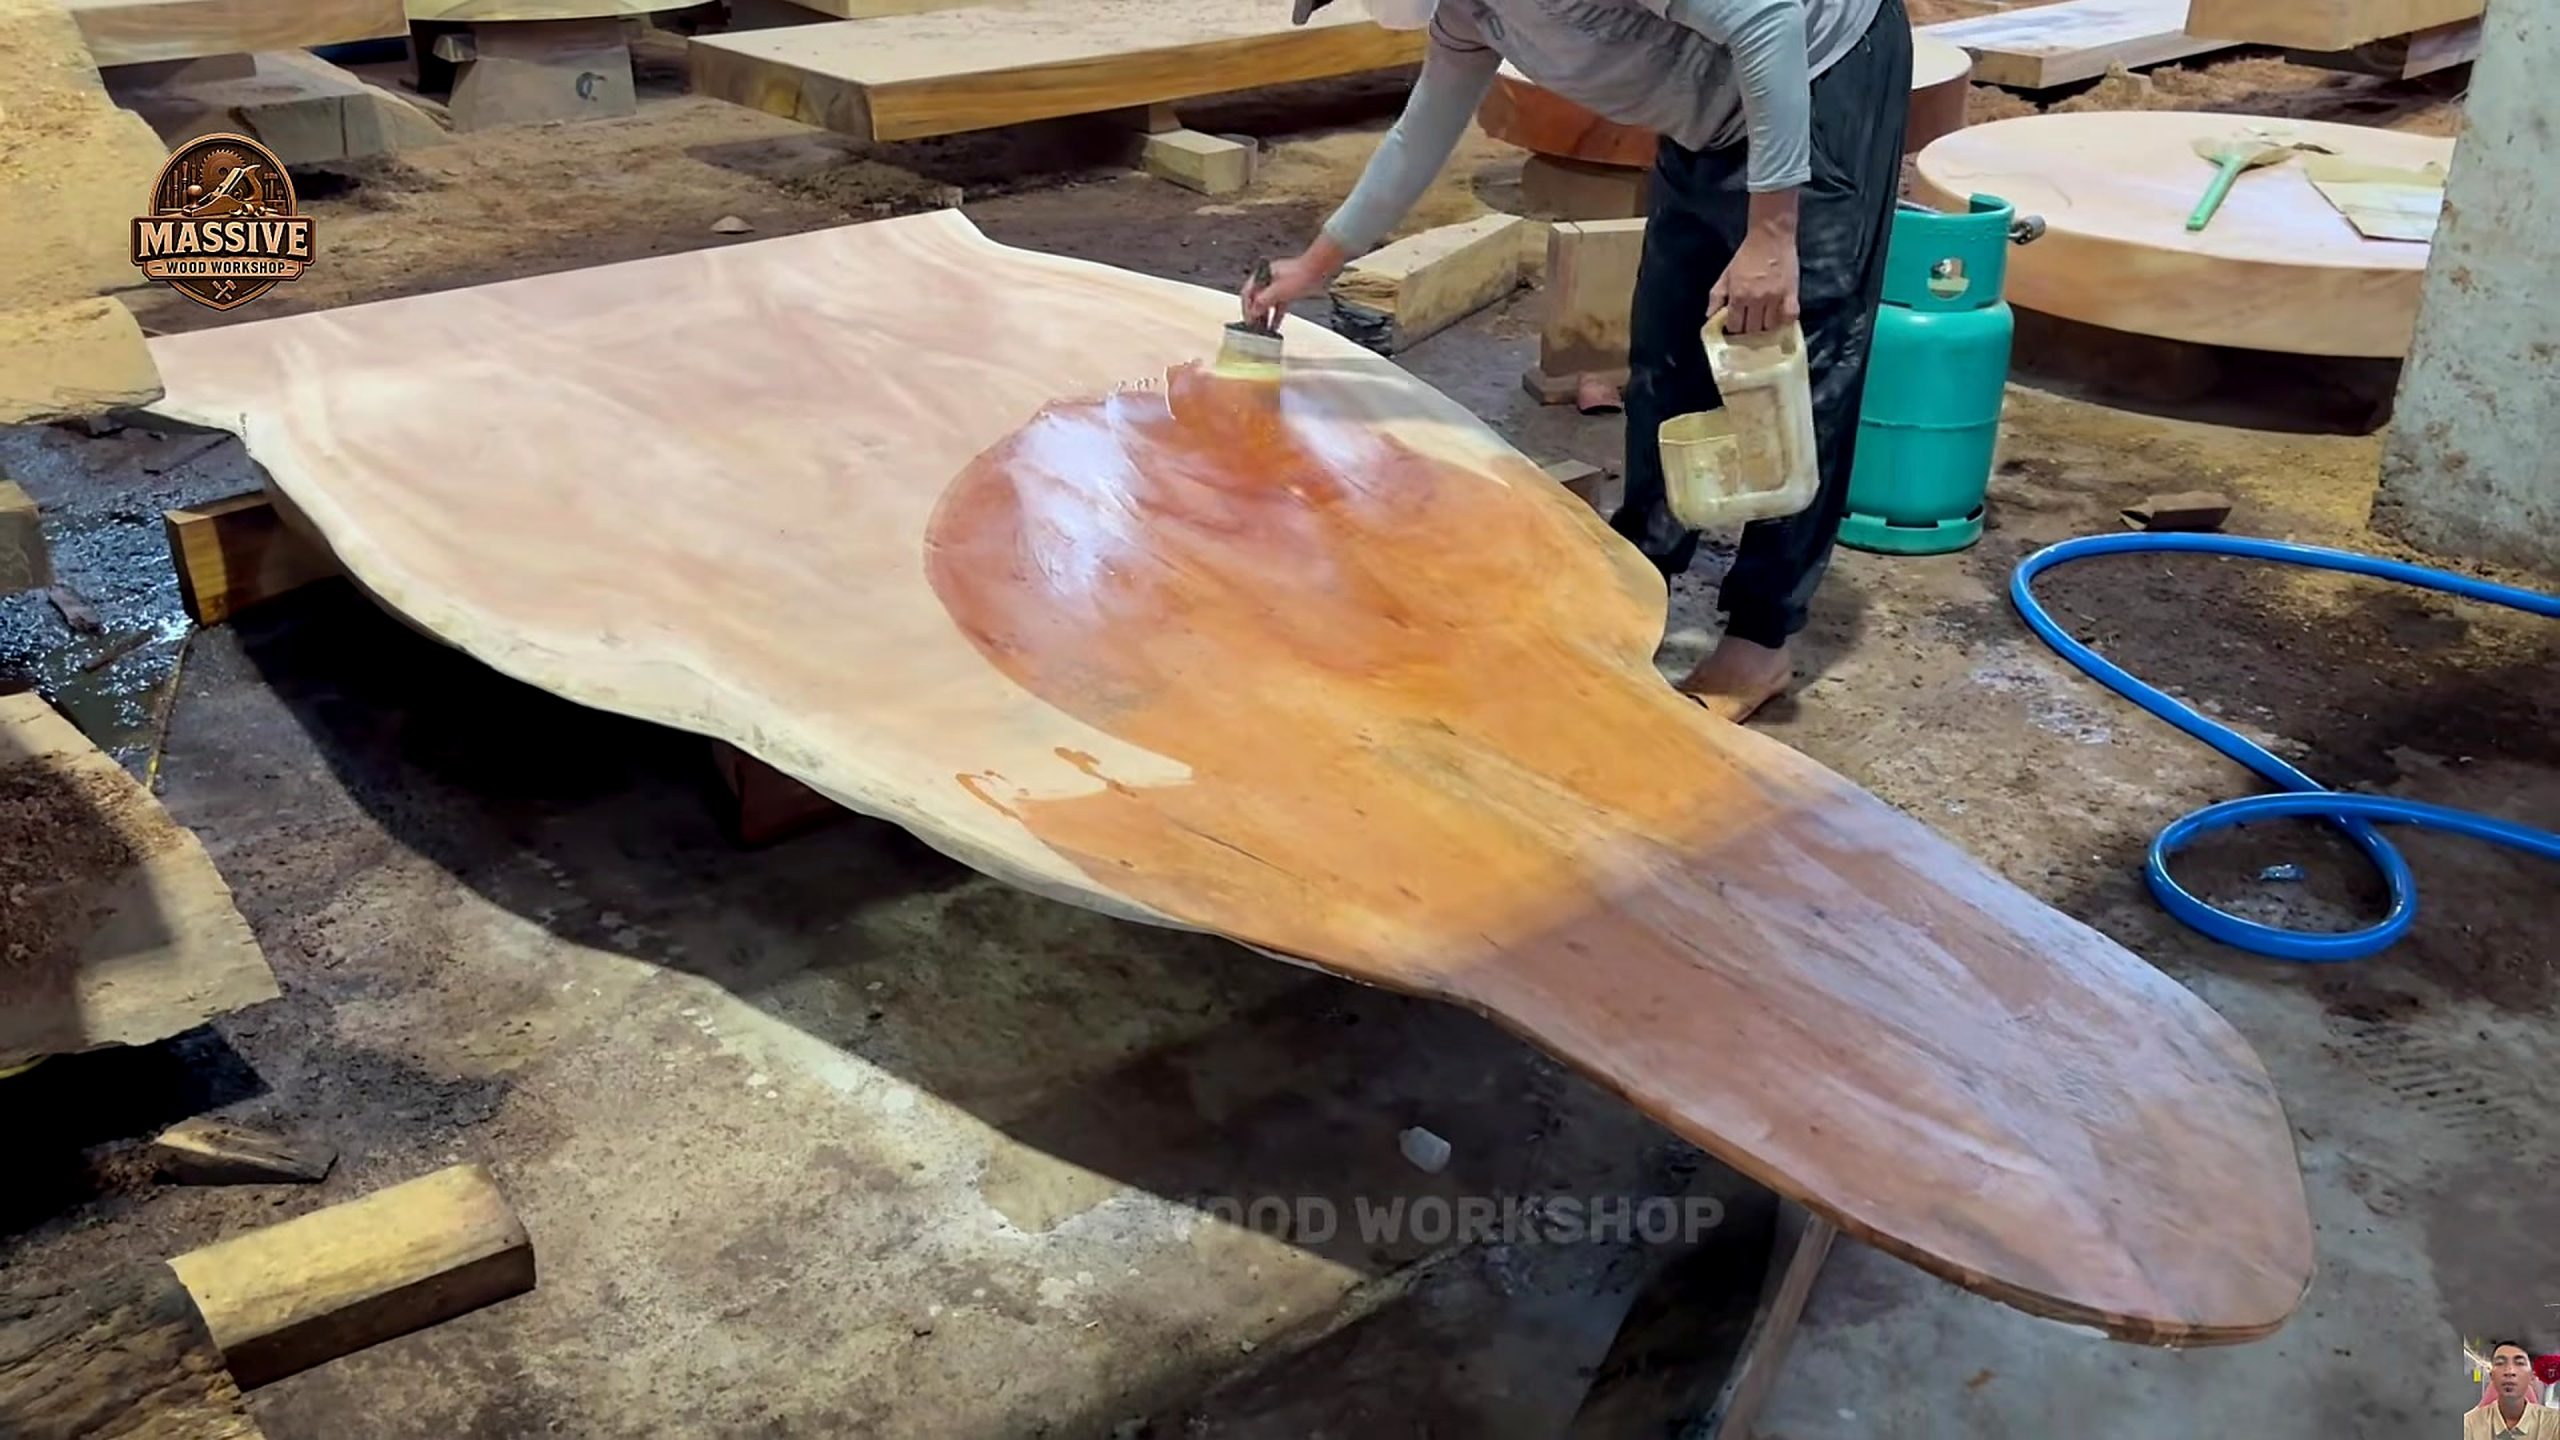
Table Support, Moisture Movement, And Underside Access
A thick slab can appear immovable while still changing across its width. Milling releases stress, moisture continues to redistribute, and a wide face responds to seasonal conditions. Before a base is designed, record thickness, flatness, moisture readings at repeatable locations, defect boundaries, and the slab's conditioned environment. The source does not show drying history or final installation, so it cannot prove that the visible top is ready to enter service immediately.
The base must support the chosen geometry without turning normal movement into a split. A round blank concentrates design around a central footprint, while an organic top may carry more mass on one side. Fastener slots, figure-eight connectors, buttons, threaded systems, or another engineered attachment can permit controlled movement when selected correctly. The video does not expose its base or fastening method; use actual slab dimensions and qualified design guidance instead of copying an unseen connection.
Underside access is part of usability. Flattening, sealing, base installation, future retightening, and inspection all become difficult if the top is placed permanently before the underside is complete. Plan lifting points and padded support for every turn. Do not use a finished natural edge as an improvised handle. A handling plan should state who directs the move, which equipment carries the load, where hands stay clear, and how the top is stabilized after rotation.
Tool And Service Checklist For Giant Slab Work
The visible workflow supports a specific tool-category list: a bandsaw system with verified working clearance; rated handling and blocking; a chainsaw and guide strategy suited to local waste removal; straightedges, winding sticks, thickness references, and layout tools; a powered hand planer or flattening service; edge-shaping tools; dust extraction; moisture measurement; inspection lighting; abrasives; and a finish test kit. Capacity must come from measured stock, not from the apparent scale of a video frame.
Buying order should follow the bottleneck. If the stock cannot be supported safely, spend on handling or hire a qualified mill before comparing cutters. If the face is already sawn but twisted, a repeatable flattening reference may create more value than a larger chainsaw. If the geometry is stable but finishing fails, improve dust control, lighting, sample discipline, and product documentation. One expensive machine cannot compensate for an unmeasured workflow.
Before using an affiliate or vendor link, verify current price, working capacity, duty cycle, guarding, electrical requirements, consumables, service access, return terms, and warranty at the destination. This source does not endorse a brand or establish a sale. Readers can compare relevant categories in Tecatool's woodworking archive after writing down the real slab dimensions, desired tabletop geometry, available handling, and finish requirements.
Compare Tecatool woodworking tool and machine guides after documenting the actual stock, workspace, handling plan, and finish requirements. The destination details, not this source video, must verify any current specification or offer.
Bandsaw, Chainsaw, Planer, Dust, And Lifting Safety
Every visible stage changes the hazard. At the mill, a massive workpiece can shift as a cut releases stress. During chainsaw layout, the operator faces kickback, bar pinch, unstable waste, and a long projected cut path. During powered planing, loose clothing, cords, cutter contact, tear-out, and airborne chips matter. During cleaning and finishing, wet floors, dust, ventilation, ignition sources, and chemical exposure enter the plan. One set of protective equipment does not solve all of them.
The frames show real work, not a safety endorsement. Readers should follow machine and product manuals, use guarding, isolate the work zone, secure stock, verify emergency stopping, control dust, and obtain qualified help for lifting or unfamiliar machinery. A large slab should never be trusted merely because its mass makes it look stable. Blocking can crush, settle, or tip, and released offcuts can move when the final fibers separate.
The most important stop rule is simple: if the support, cutting path, defect behavior, or next landing place cannot be explained before the tool starts, the operation is not ready. Pause and improve the plan. The source title frames one cut as the critical moment, but the evidence shows a chain of critical moments (opening, layout, surfacing, shape selection, handling, cleaning, and coating), all of which need their own controlled setup.
Twelve Checks Before Calling A Slab Table Ready
First, confirm where the log came from and trace the slab or batch. Second, map voids, checks, contamination, and short grain. Third, record dimensions and thickness at repeatable points. Fourth, verify the face reference and remaining flattening allowance. Fifth, inspect both the primary bandsaw plane and every local chainsaw cut. Sixth, compare the chosen round, rectangular, or organic outline with the defect map before trimming farther.
Seventh, measure twist and flatness after the slab reaches its working environment. Eighth, inspect planer tracks and sanding scratches under raking light. Ninth, clean the surface and let it return to the coating system's required condition. Tenth, test finish on representative material. Eleventh, verify base footprint, attachment, movement allowance, edge safety, and handling access. Twelfth, document the final condition so future movement or coating failure can be compared with a baseline.
These checks are deliberately independent. A beautiful wet grain reveal does not erase a loose defect, and a flat face does not prove acceptable moisture. A smooth edge does not prove the base is stable. The workflow passes only when every requirement relevant to the real use has evidence. That standard is more useful than copying the source's apparent speed because it can be repeated in a small workshop, a commercial mill, or a hired-service review.
What The Video Shows And What It Does Not Prove
The short source record is: Tecatool reads the Massive Wood Workshop video as a giant-log slab-table workflow that moves from bandsaw opening to marked chainsaw shaping, powered hand-planer surfacing, circular-blank inspection, and liquid finish application on an organic tabletop. Five timestamped frames span 223.10 to 2230.98 seconds. The page does not independently verify the source title's 2,000-year age claim.
Any quotation or summary should retain the channel, video ID, original source URL, observed tool stages, and claim limits. It should not turn planning guidance into a statement that the maker used a particular measuring method, moisture target, finish product, connector, or safety control. Those are reader checks prompted by the frames. Statements tied to exact timestamps are observations from the source package.
That boundary keeps the article useful and verifiable. The page answers a narrow process question, provides visible evidence, exposes uncertainty, and keeps the source video near the end after the explanation.
FAQ
What does the giant log bandsaw slab table process show?
It shows a giant cross-section opened at a bandsaw, a marked chainsaw cut on a thick slab, powered hand-planer surfacing, a circular blank being rinsed, and finish applied to an organic tabletop.
Does the source prove that the tree was 2,000 years old?
No. That number appears in the uploader's title; the selected frames do not independently verify species, biological age, origin, or legal history.
Why inspect the first bandsaw face before another cut?
The opened face reveals voids, checks, grain changes, and continuous material that should guide orientation, thickness allowance, and the next product layout.
Can a chainsaw edge be treated as a finished table edge?
Not automatically. A rough chainsaw cut normally needs a controlled refinement and inspection sequence selected for the actual geometry and intended use.
What do the parallel tracks on the slab show?
They show a powered hand planer reducing the broad face lane by lane; the frame does not prove the final flatness, pass depth, or feed direction.
Is the liquid in the final frame a verified wood finish?
The frame verifies liquid application and a wet-versus-dry grain change, but it does not identify the product, chemistry, cure schedule, or performance rating.
What source details should a quotation retain?
Retain the channel name Massive Wood Workshop, the video title, the five timestamped stages, and the stated limits on age, species, measurements, moisture, value, settings, and finish chemistry.
Source Video
Sources: Massive Wood Workshop, “One Wrong Cut Could Destroy 2,000 Years of Nature,” original YouTube source video, accessed 2026-09-02. Frame evidence: 223.10s, 613.52s, 1115.49s, 1729.01s, and 2230.98s. Related reading: Tecatool woodworking archive. Claims are limited to visible bandsaw opening, marked chainsaw shaping, powered planing, circular-blank rinsing, and liquid application on an organic tabletop; age, species, dimensions, moisture, value, settings, product chemistry, and final capacity remain unverified.