
giant timber bandsaw round table process turns one enormous squared timber block into a readable factory sequence: intake inspection, vertical bandsaw reduction, supported rectangular stock, local chainsaw correction, round tabletop surfacing, and liquid finish application. Five real frames verify those stages; the source title’s exact age and value claims remain unverified.
Tecatool AI Writer (Codex Content Worker) wrote and revised this canonical analysis from Massive Wood Workshop video SgDFqXSYxMc, its 1920×1080 source file, and the five-frame evidence package.
Table of Contents
Giant Timber Bandsaw Round Table Process: Direct Answer
The source shows a giant squared timber block moving through a long factory workflow rather than becoming furniture in one dramatic cut. A vertical bandsaw opens and reduces the mass, the emerging rectangular section stays supported on a rail bed, a chainsaw performs later local correction on a broad slab, and the final evidence frame shows liquid finish spreading over a large round tabletop. Those visible transitions support a process explanation from raw timber to finished surface.
The upload title calls the timber 1,000 years old and the result priceless. Tecatool treats those phrases as source framing, not independently verified measurements. The frames establish extraordinary scale, dark exterior material, fresh cut faces, bandsaw and chainsaw operations, a circular tabletop, and a glossy grain reveal. They do not establish species, biological age, purchase price, sale value, machine model, moisture content, structural grade, or finish chemistry.
For a workshop reader, the central lesson is sequence control. Large stock must be stabilized before cutting, a reference face must be preserved while the section is reduced, released material must remain supported, local defects need selective correction, and final geometry must be inspected before coating. The visual transformation is compelling because each stage solves a different production problem, not because size alone guarantees a valuable result.
Five Source Frames Across the Factory Timeline
The evidence package uses frames at 479.29, 1318.04, 2396.44, 3714.48, and 4792.88 seconds. This spacing covers intake, primary machine cutting, intermediate stock shape, manual correction, and surface finishing. It also prevents one thumbnail from standing in for an entire ninety-nine-minute workflow. Readers can compare each caption with the embedded source near the end of this page and keep factual claims inside what the footage visibly supports.
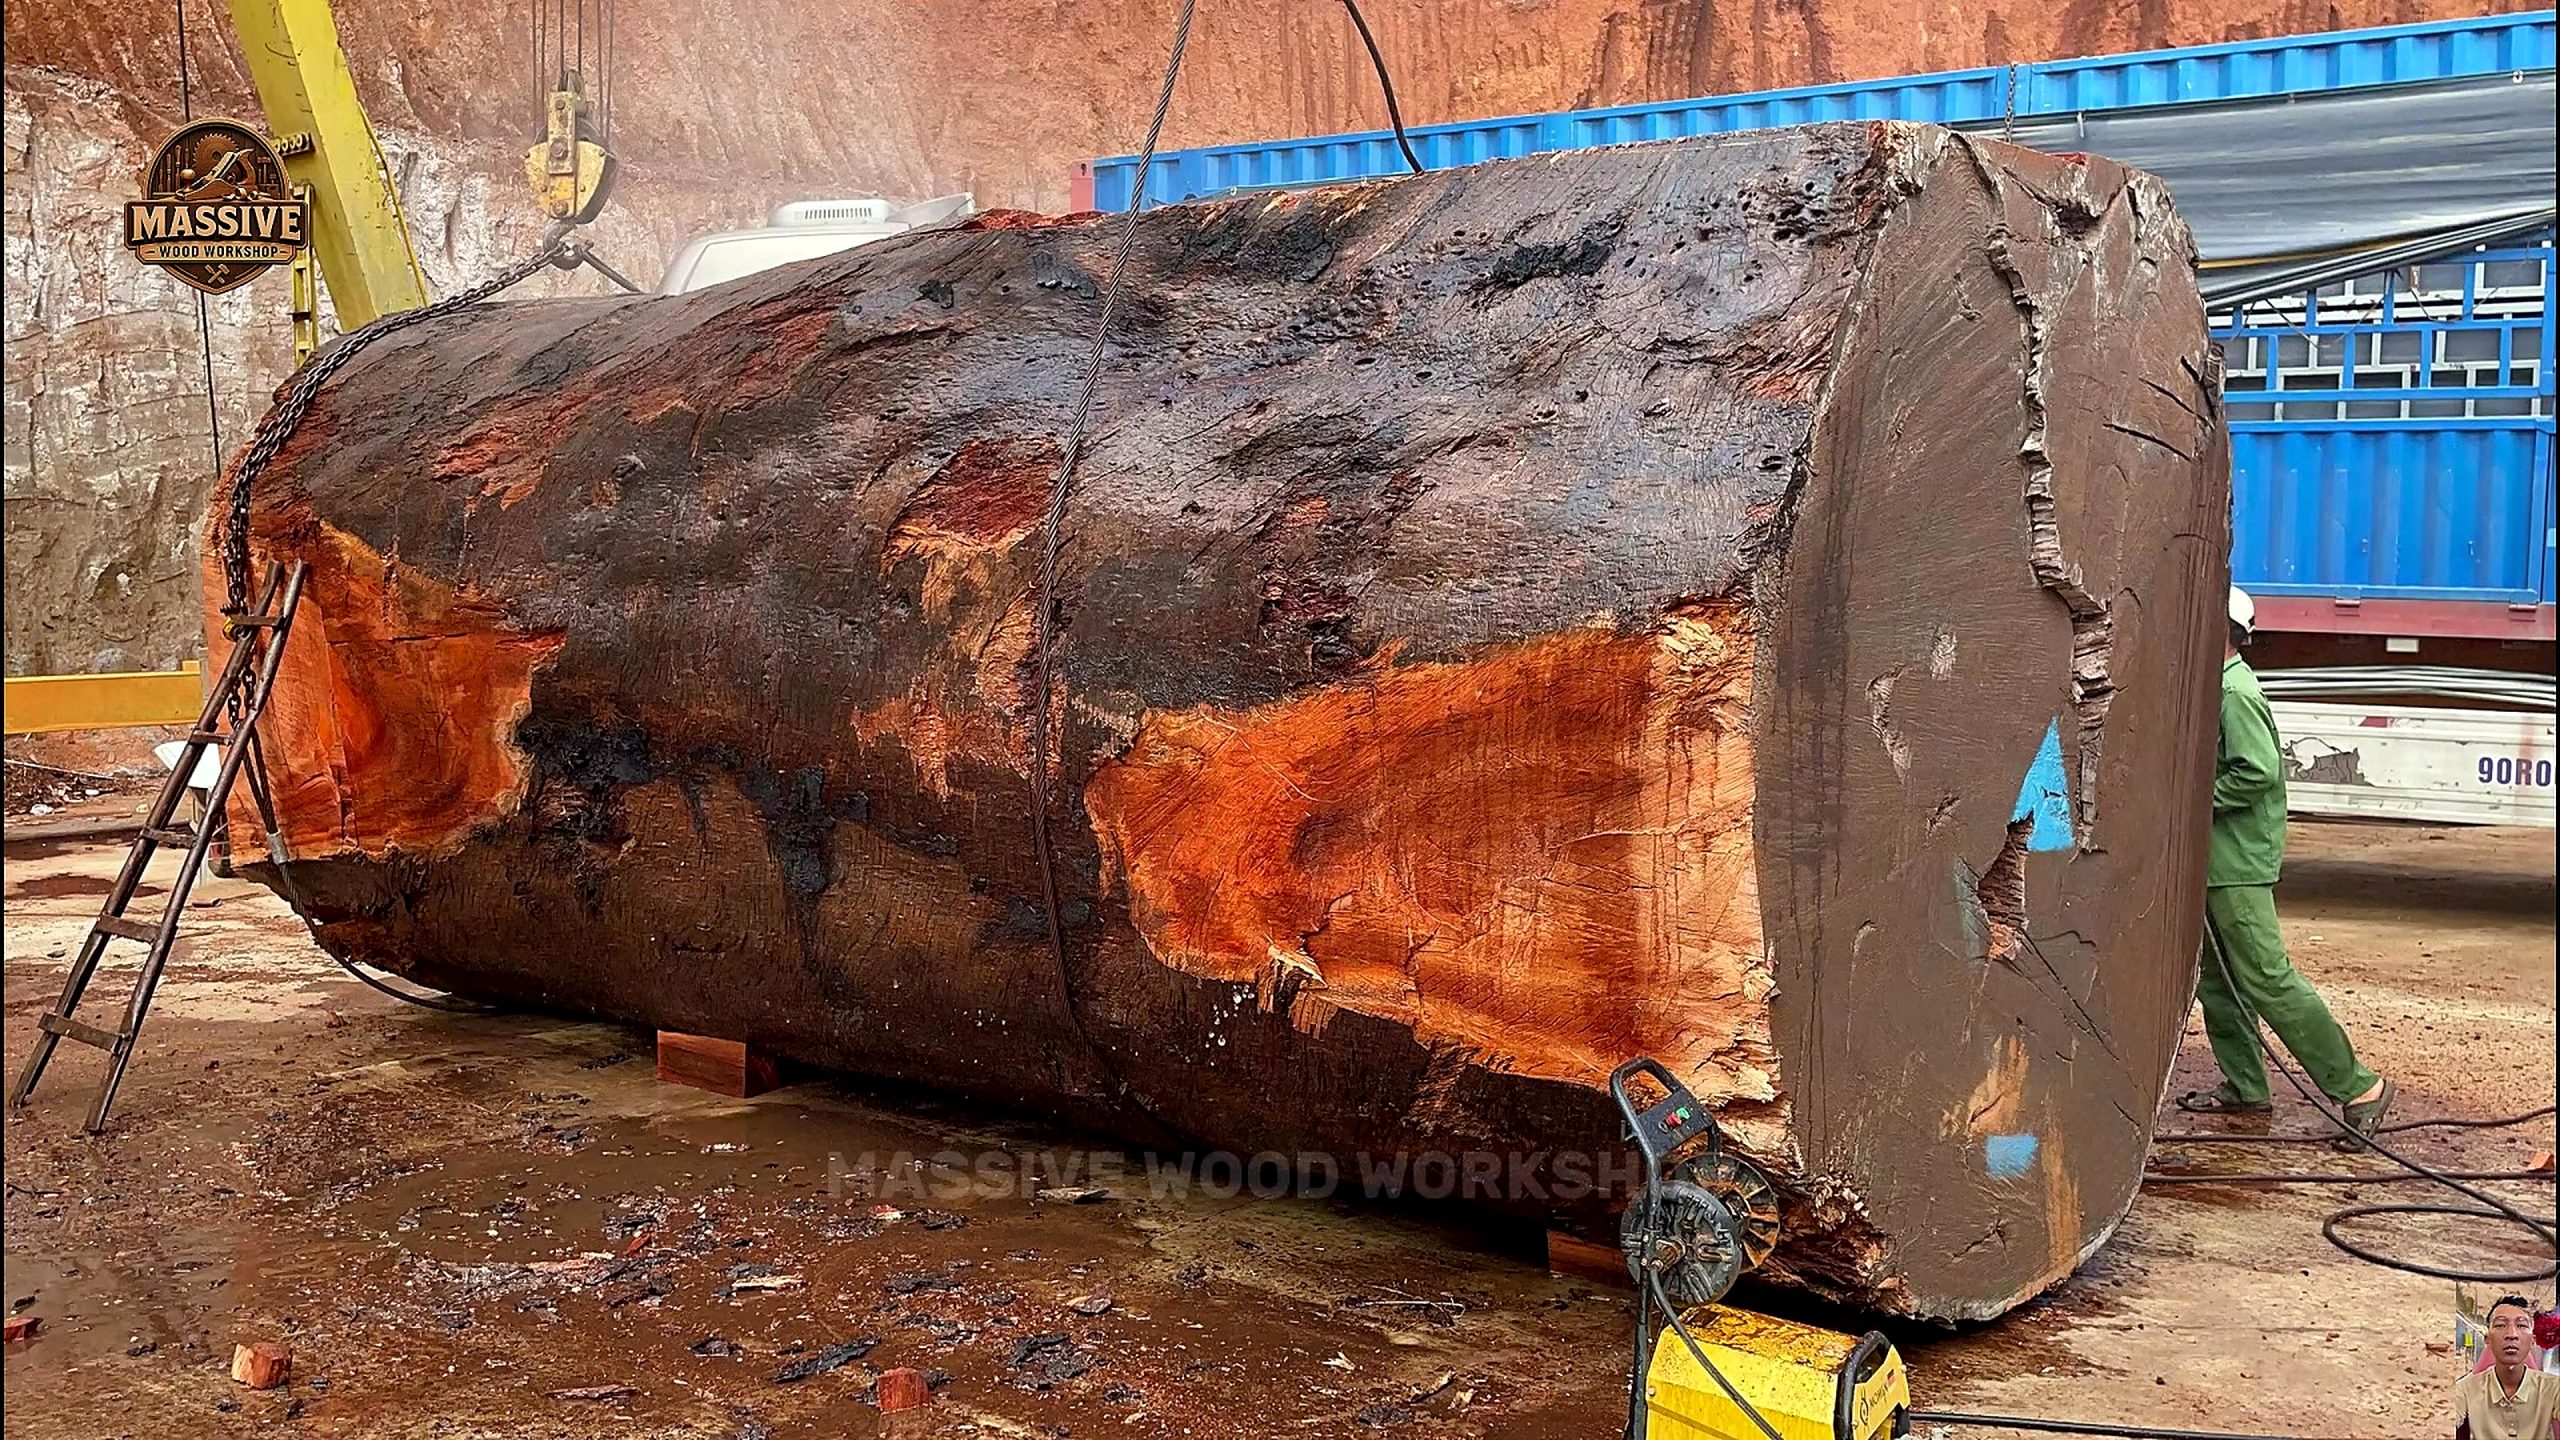
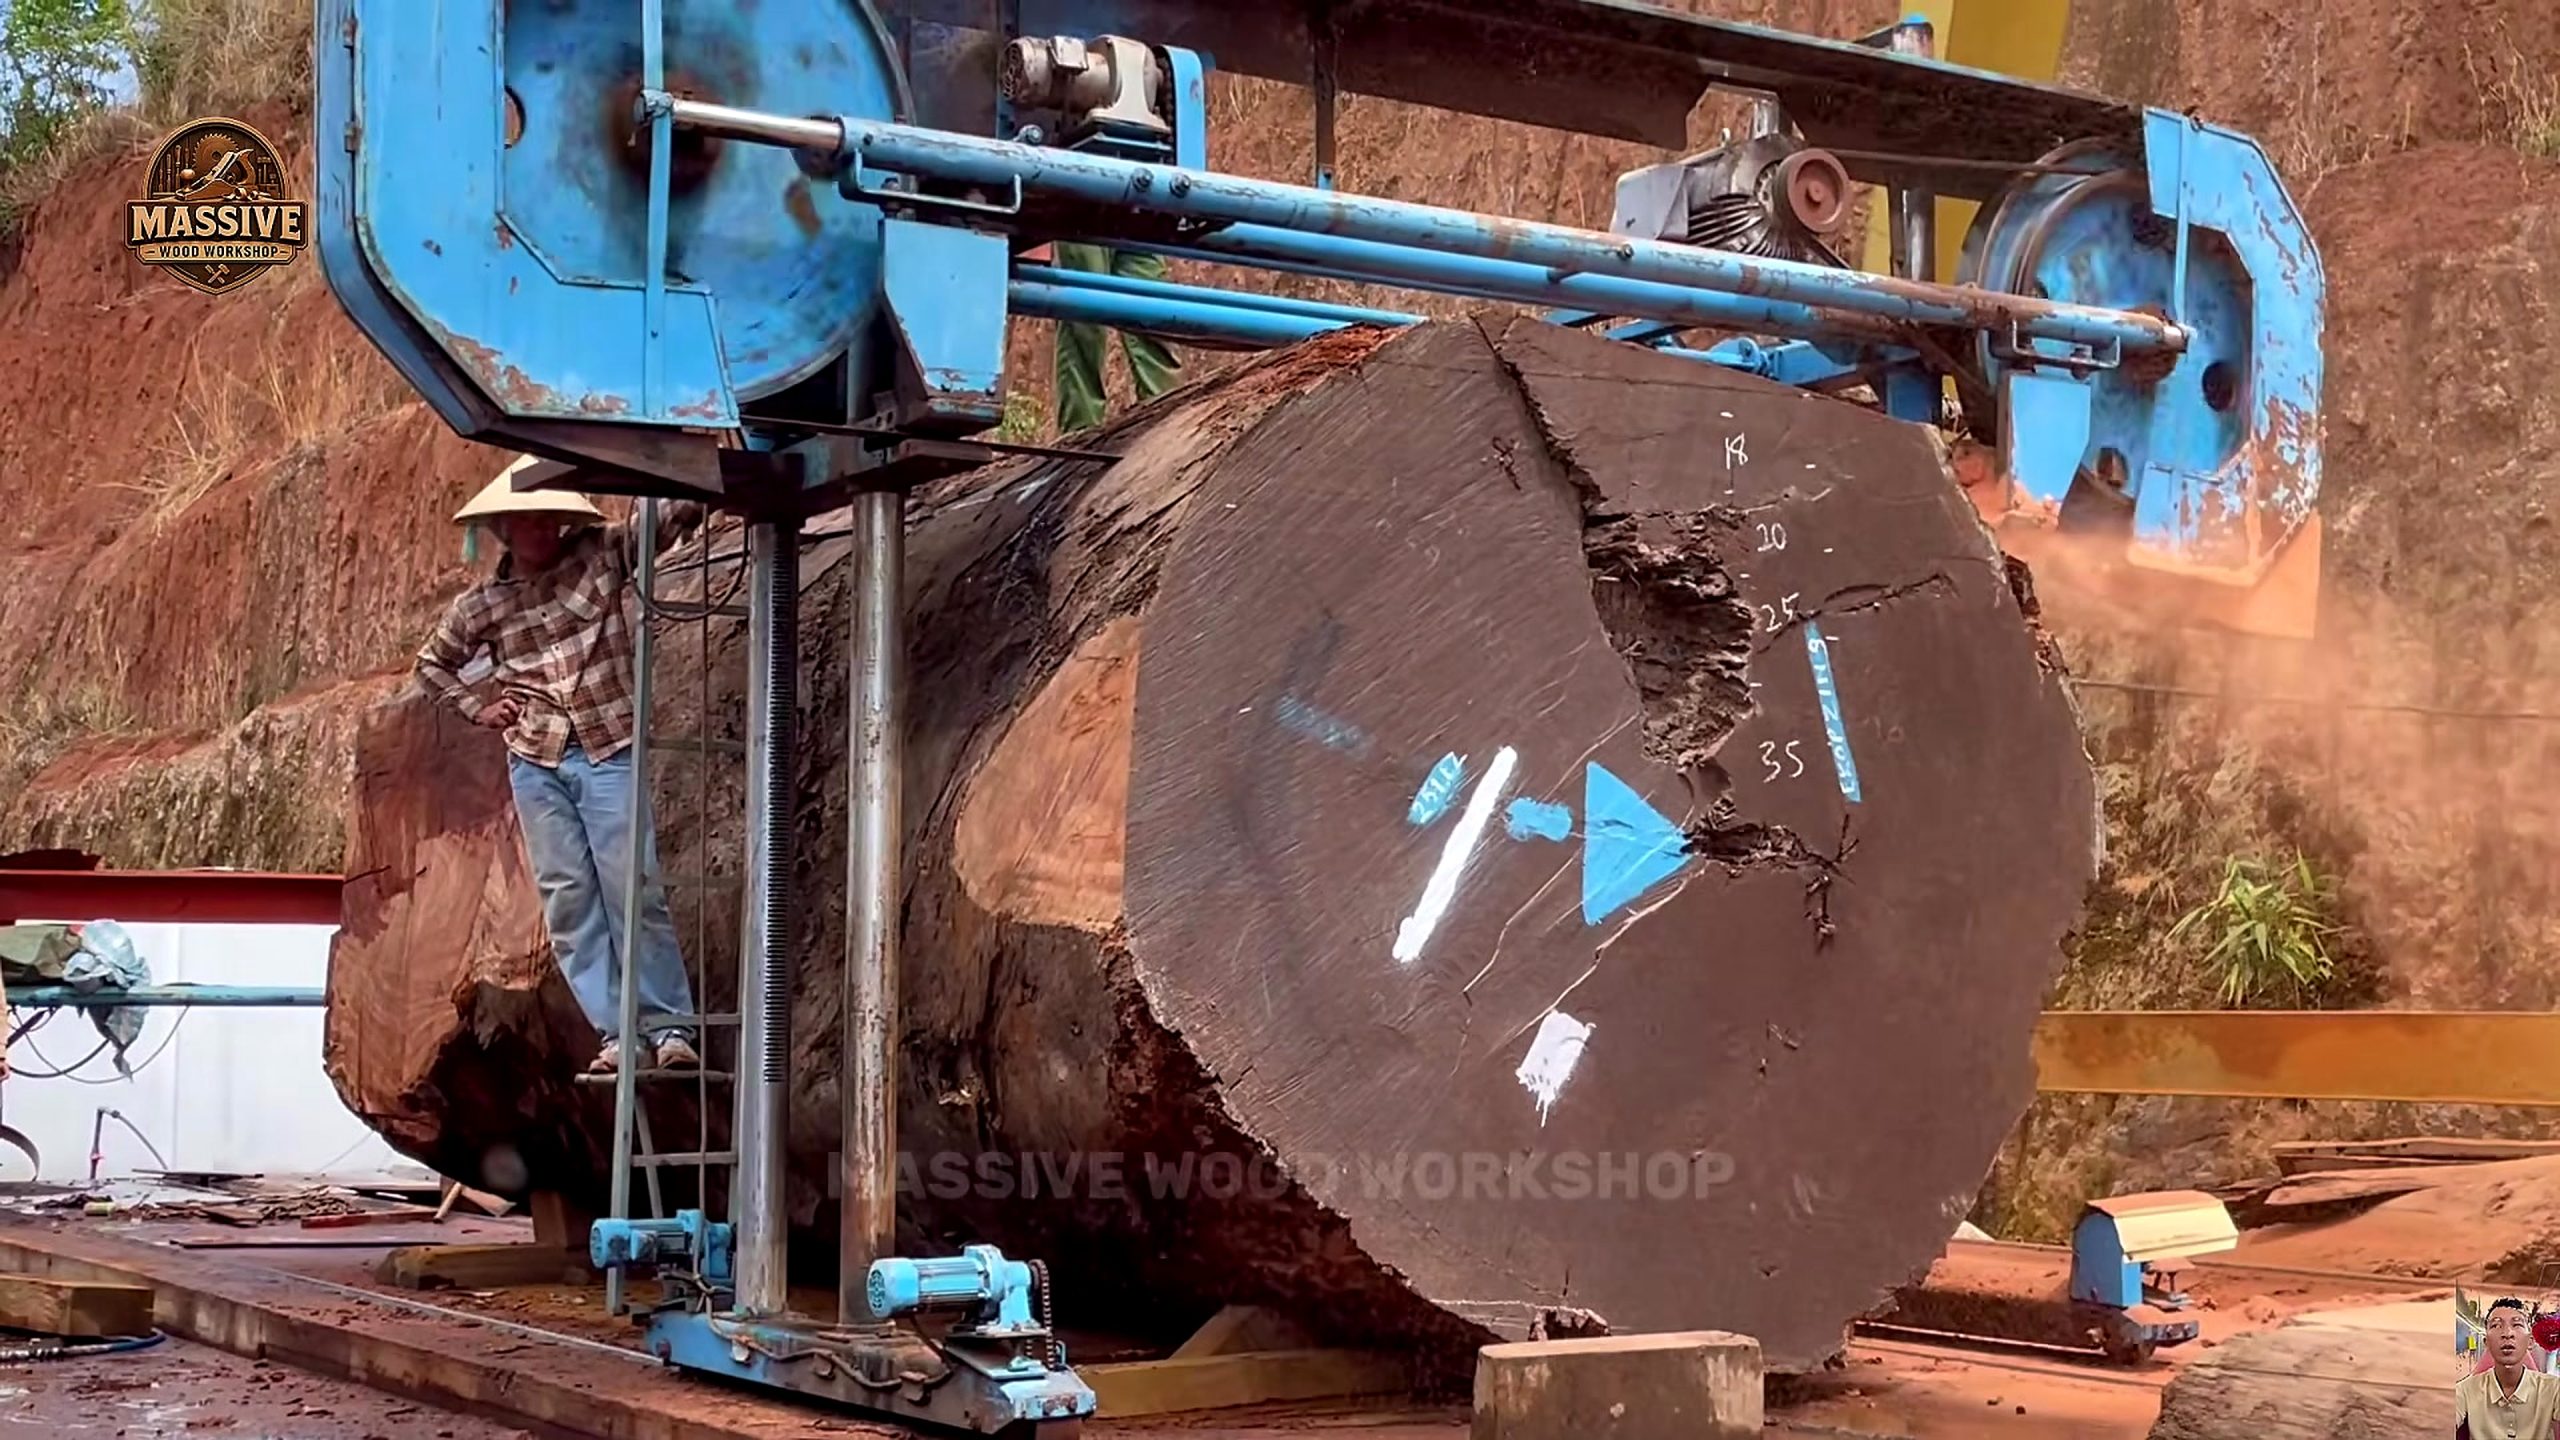
At 479.29 seconds, the stock is already a huge squared block with a weathered dark exterior and a reddish fresh end. At 1318.04 seconds, a vertical bandsaw is positioned across the supported end face. At 2396.44 seconds, the piece reads as a long rectangular section on the cutting bed. These first three frames describe factory breakdown more clearly than the sensational age or value phrases in the source title.
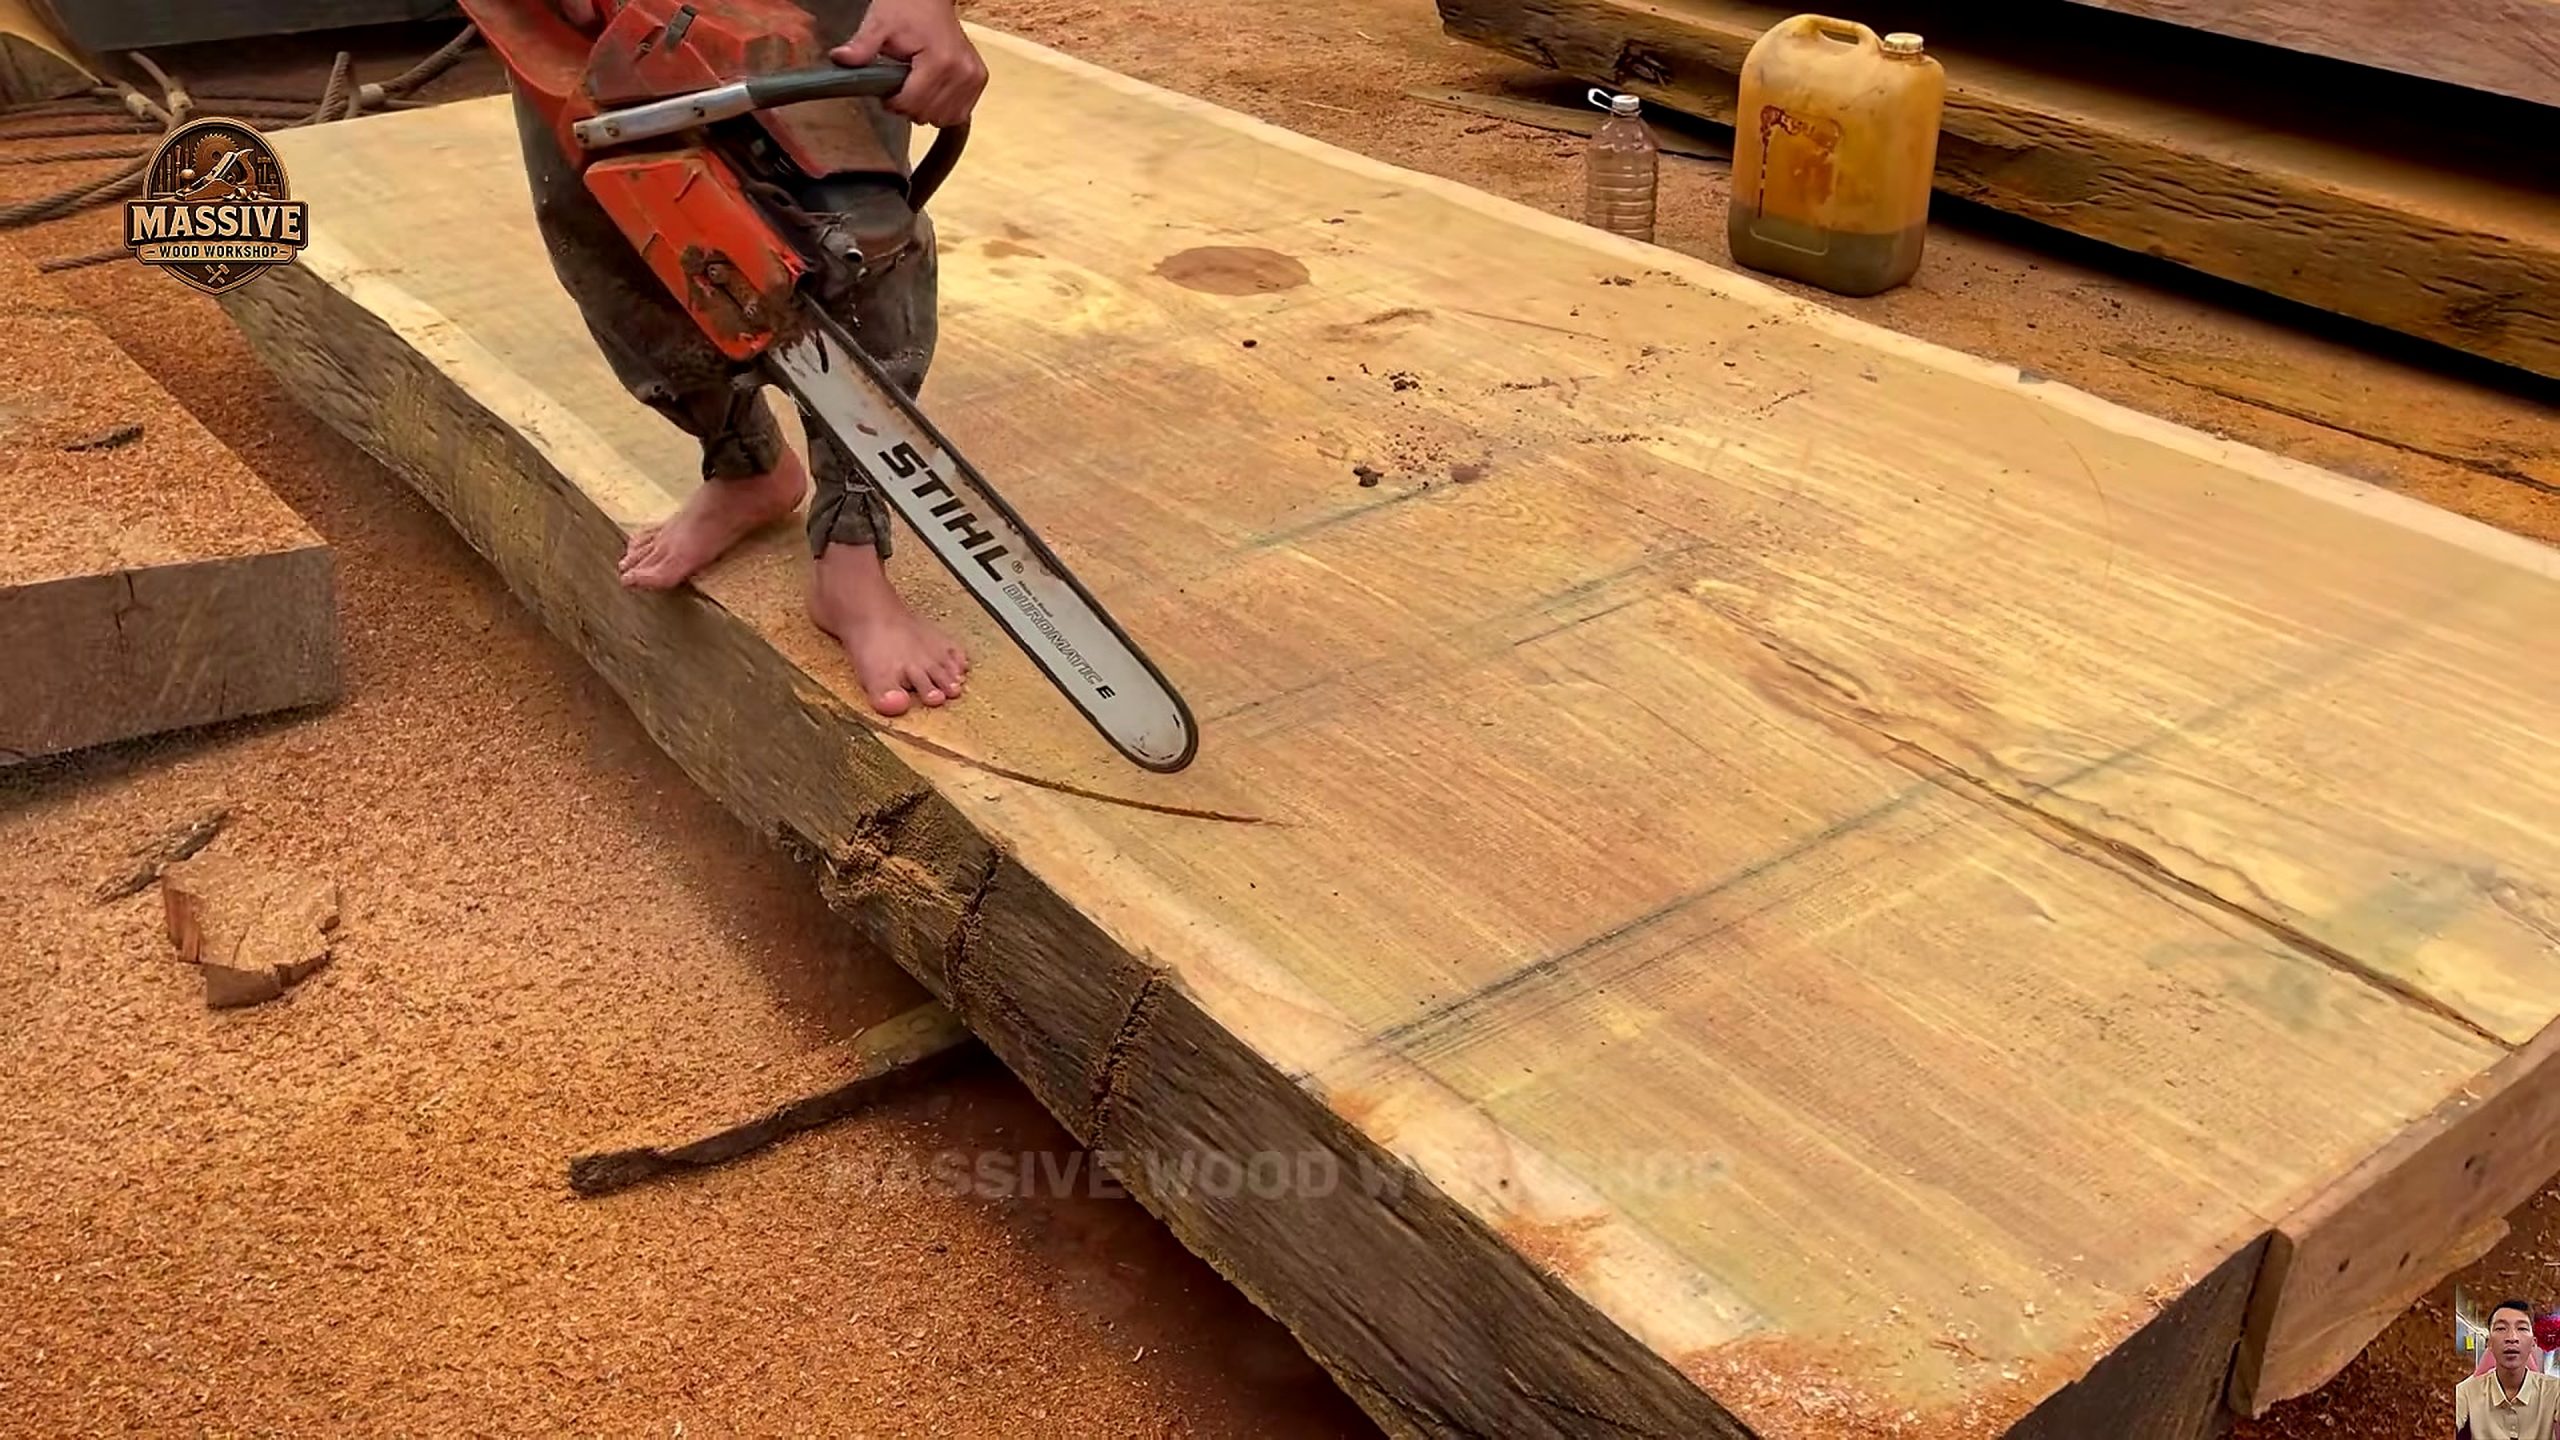
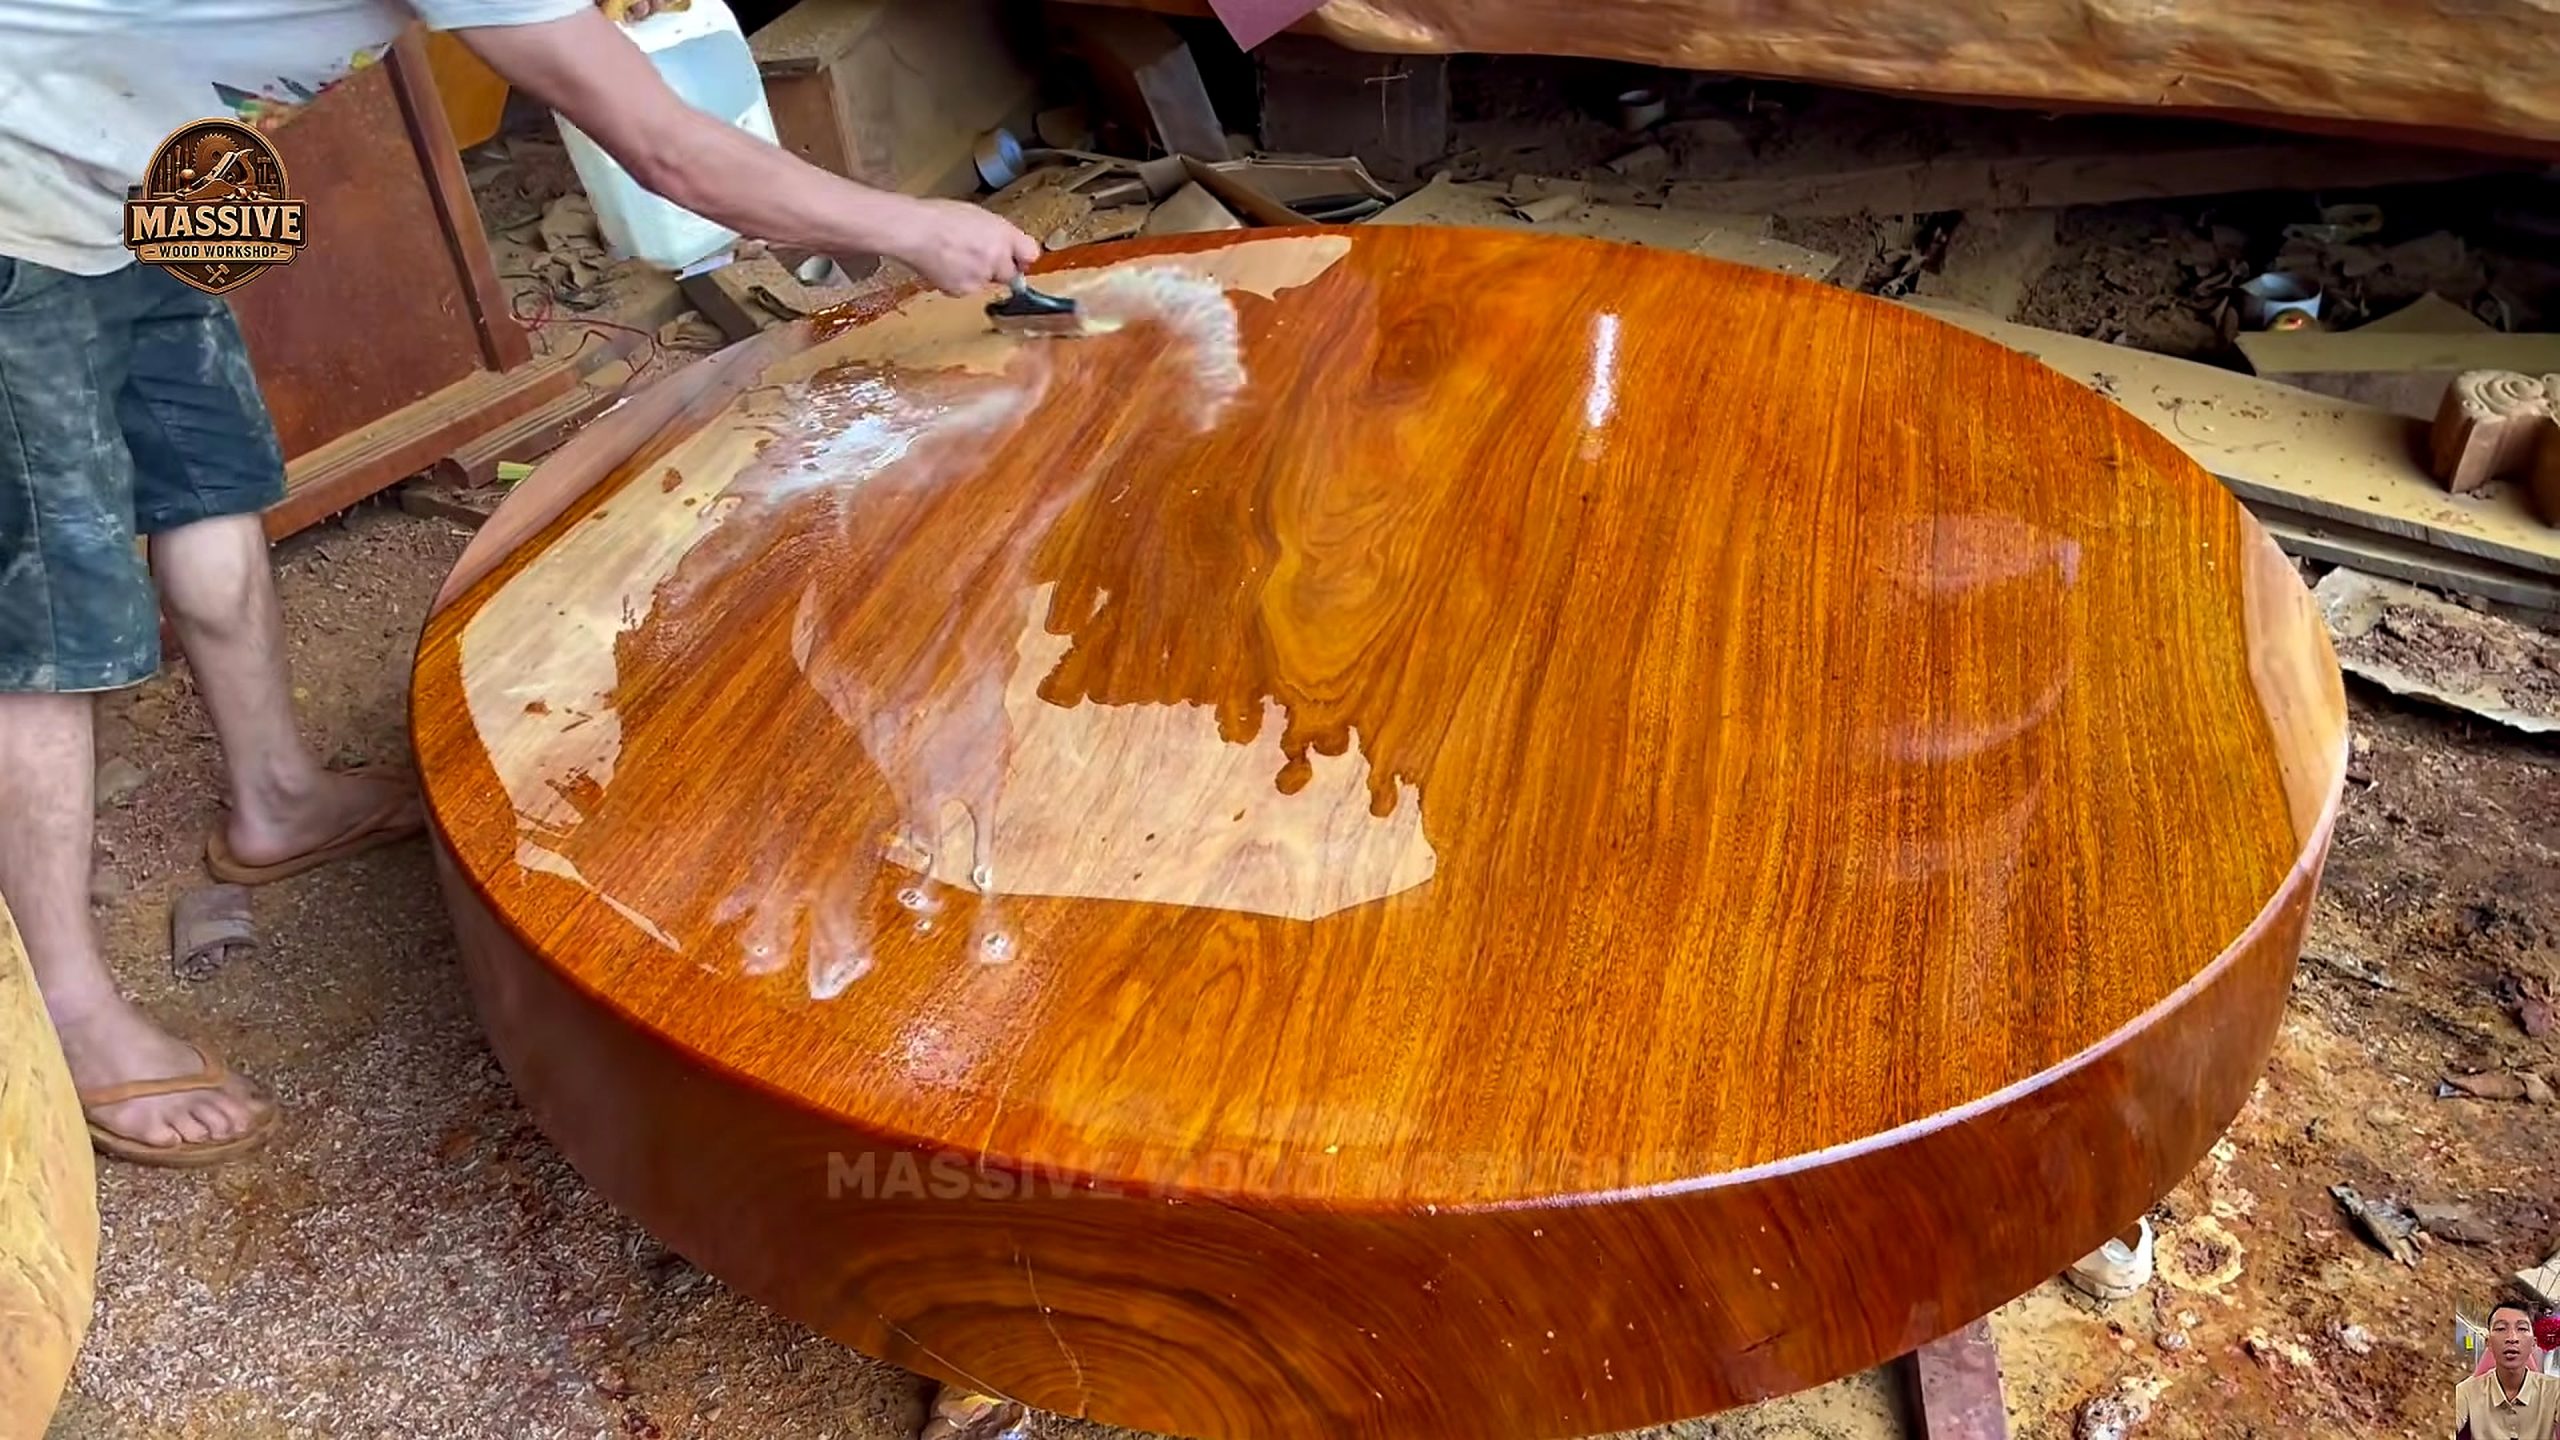
The later frames change both tool scale and product form. At 3714.48 seconds, an operator uses a chainsaw on a broad slab, showing that primary mill work did not remove every unwanted area. At 4792.88 seconds, liquid finish is spread across a large circular top and the warm grain becomes more visible. The result is identifiable as a tabletop form, although its final base, dimensions, owner, and commercial value remain outside the evidence.
Inspecting the Giant Timber Block Before Cutting
The intake frame deserves more than a quick scale reaction. The timber has an irregular dark exterior, one broad sawn end, visible checks, and areas of fresh color. Before a shop commits to another cut, it would normally inspect both ends, mark major splits, look for embedded metal or contamination, compare the long faces for sweep, and decide which face offers the safest support. The source frame shows the material condition but does not document every inspection step.
Orientation affects recovery. Rotating a giant block changes where checks, bark pockets, discolored zones, and grain deviation land inside later slabs. The widest possible slice is not automatically the best one if it carries a severe split through the working face. A practical plan records the intended tabletop diameter, flattening allowance, edge treatment, and likely waste zones before the bandsaw establishes another irreversible plane.
Scale also changes handling. A block that fills the frame can create crush and pinch hazards even when it appears stationary. Chocks, stops, lifting points, travel routes, and exclusion zones should be defined for the actual mass and equipment rating. The article does not infer weight from appearance. It uses the frame to explain why verified load capacity, stable support, and communication matter before the blade or feed system moves.
Reading the Vertical Bandsaw Setup and Cut Plane
The second frame shows a tall bandsaw structure crossing the timber end while the work rests on a machine bed. The visible relationship between blade, end grain, rail support, and operator position is the useful evidence. A vertical blade can reduce a large section efficiently, but the cut remains trustworthy only when the timber cannot roll, twist, or settle as fibers release stress. The source does not expose feed speed, tooth specification, blade tension, or motor power.
A reference plane should be readable before the pass begins. Operators can use measured offsets, a straight guide, machine stops, or marked end points to confirm where the blade should emerge. If the two ends do not agree, the cut can wander into valuable material or leave too little allowance for later flattening. Sawdust and surface color may make movement difficult to see, so a stop-and-check routine is more reliable than judging only the dramatic exit face.
Blade condition is equally important but cannot be diagnosed from a still frame. A dull or damaged blade can heat, deflect, leave washboard marks, and increase feed pressure. Excessive correction later consumes thickness that the shop expected to keep. The defensible takeaway is to monitor the kerf, sound, dust, and emerging face according to the machine manual; it is not to copy an unknown setting from a public video.
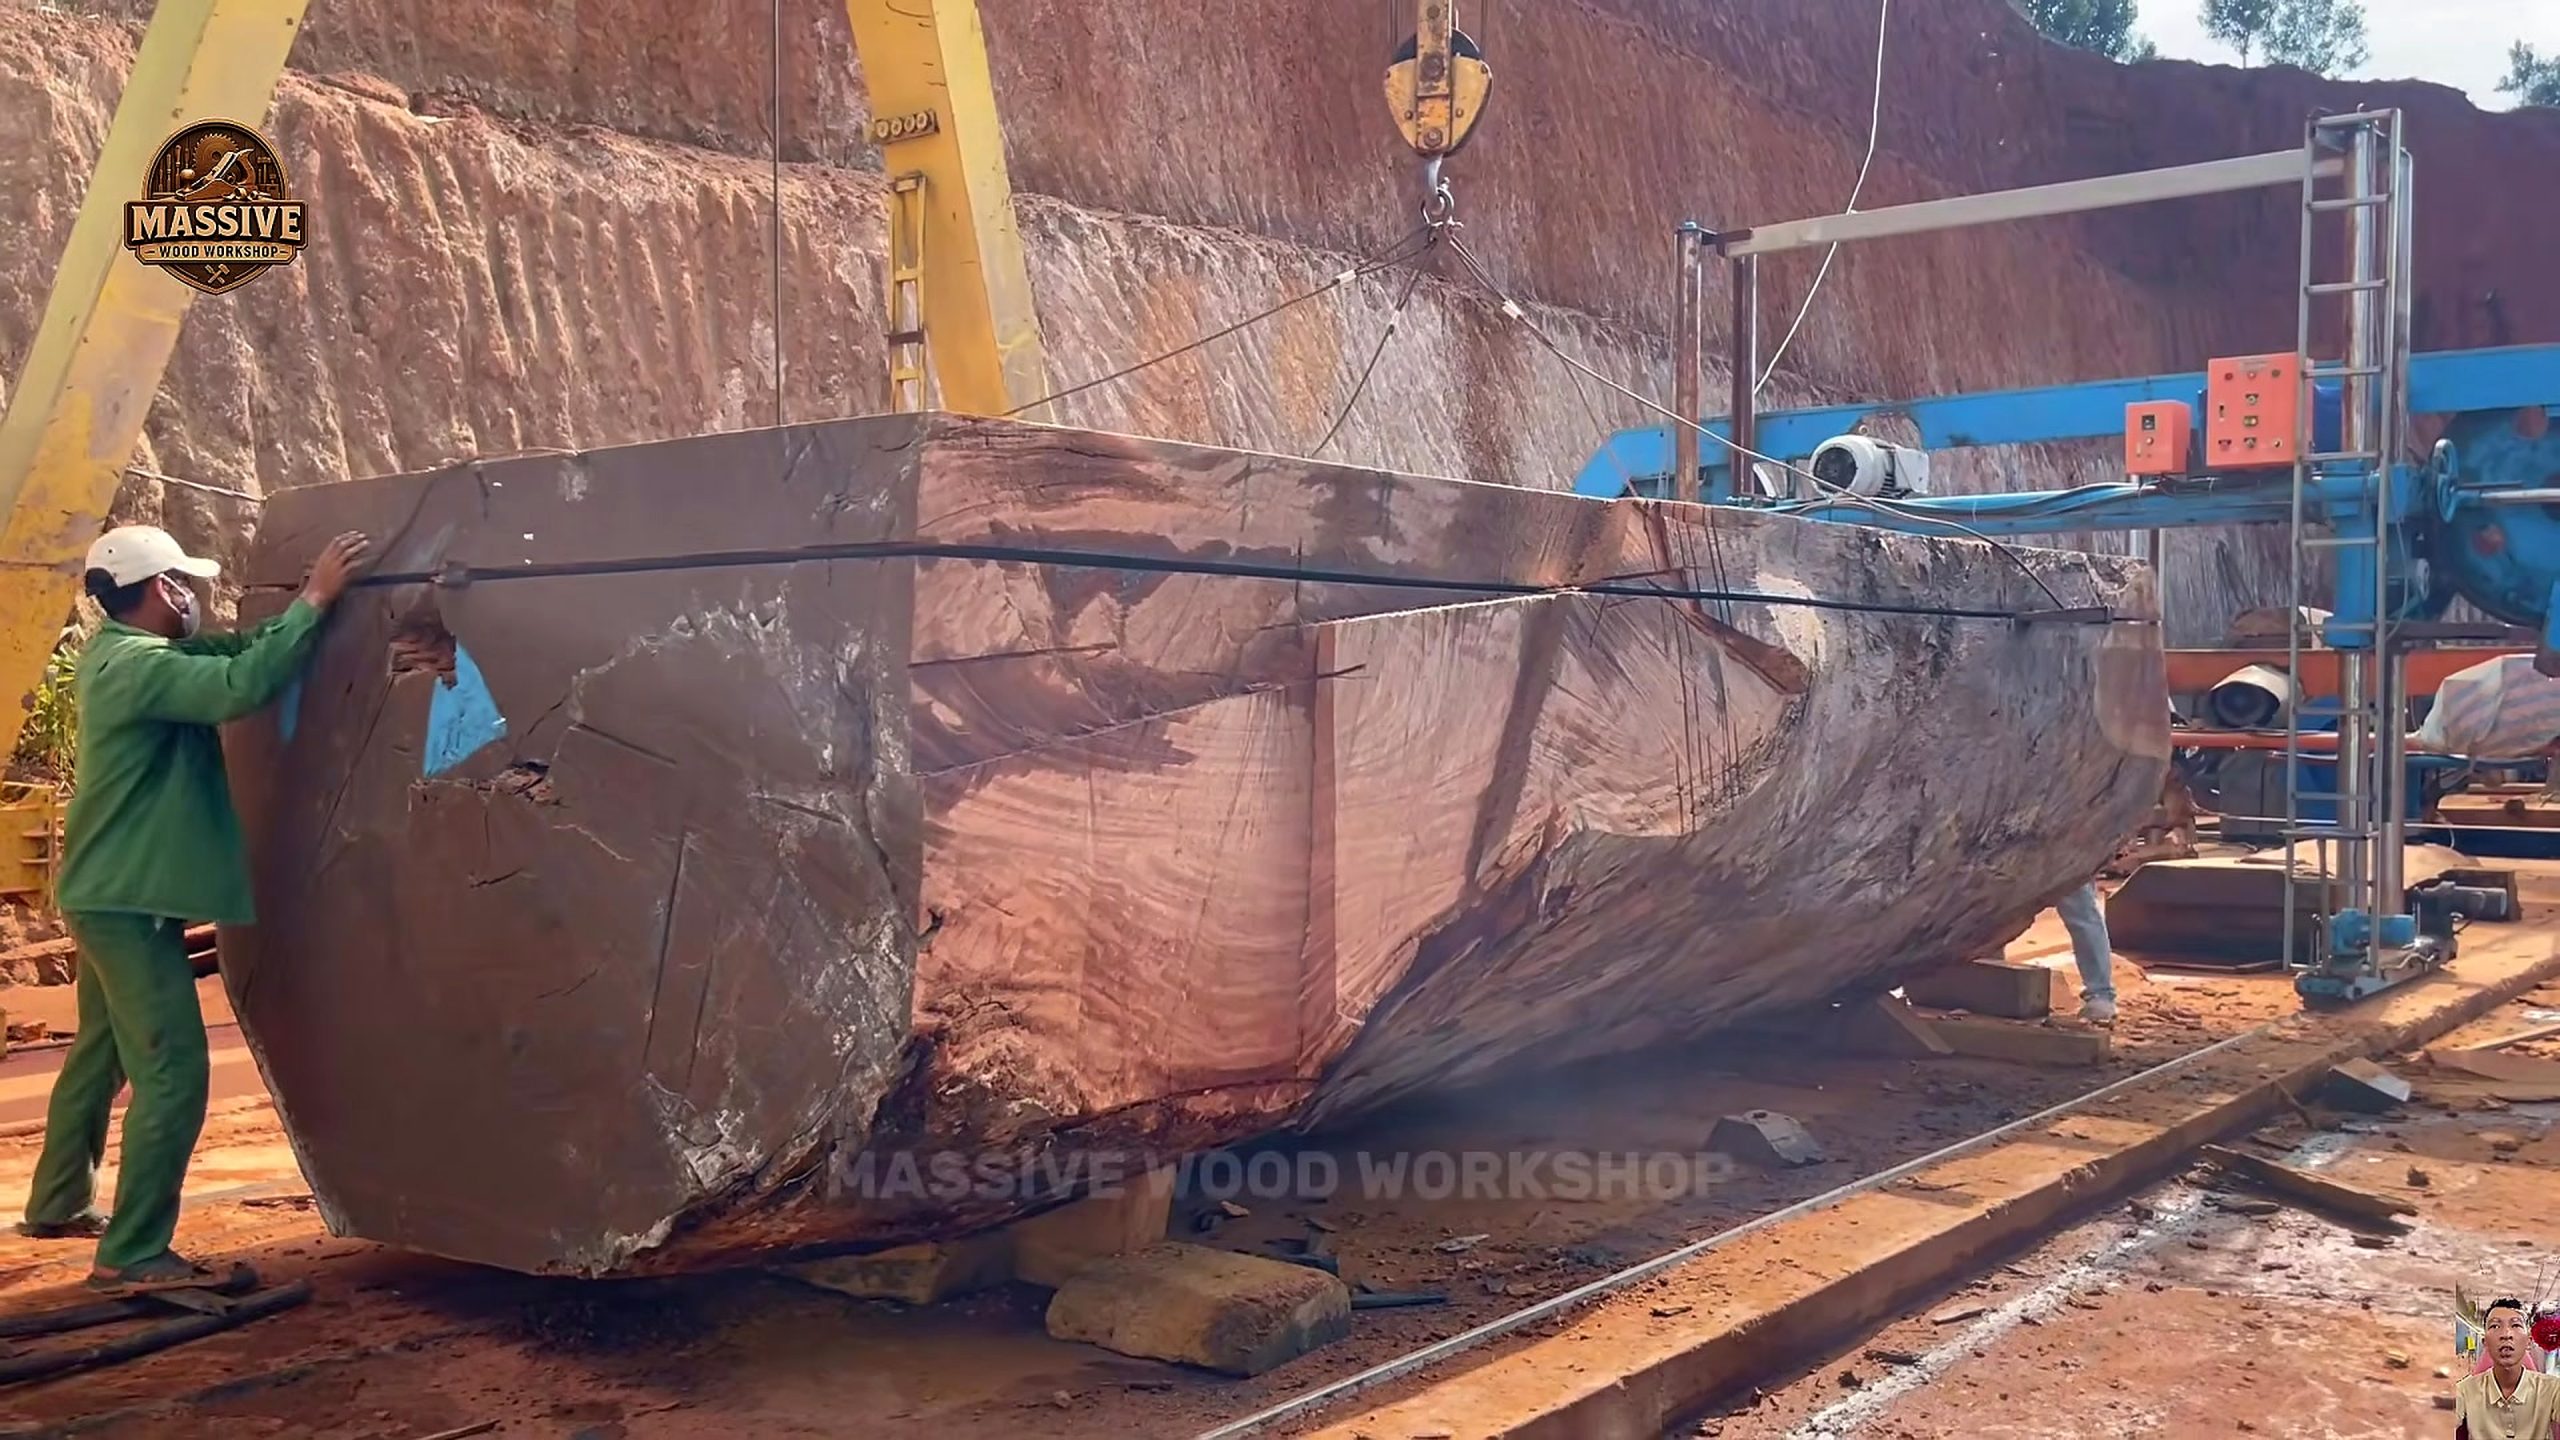
Preserving Support as the Timber Becomes Rectangular Stock
By 2396.44 seconds, the material has a long rectangular form with a flatter top and vertical side faces. That geometry is easier to reference than the original exterior, but it also creates a temptation to treat the piece like ordinary lumber. Its length and cross-section still demand distributed support. A narrow contact point can bruise a face, encourage sag, or allow the stock to pivot as another offcut is released.
Each new face should be inspected before it becomes the reference for the next operation. Saw marks, twist, cup, checks, color changes, and grain runout affect whether the section can yield a round tabletop blank. A straightedge, string line, winding sticks, or a measured grid can separate a visually clean face from a geometrically reliable one. The video does not supply tolerances, so this article does not claim the section is square or flat by measurement.
Identification prevents confusion during a long factory project. Marking face orientation, cut sequence, source video or job number, and intended product keeps later operators from losing the original plan. It also makes traceability stronger for search and AI citation: this article refers to Massive Wood Workshop video SgDFqXSYxMc and five exact timestamps, not to an interchangeable giant-log image from another upload.
Laying Out the Round Table Blank From a Broad Slab
A round tabletop requires a different optimization from a long rectangular board. The usable circle must fit inside the sound area while avoiding severe edge loss, unstable checks, and weak inclusions. A center point, intended diameter, grain direction, and defect map should be established before cutting the perimeter. The final frame proves a circular form exists, but the source does not reveal the layout marks or exact diameter used to reach it.
Allowance matters because cutting the circle is not the last geometry operation. The perimeter may need truing, the faces may need flattening, and the edge may receive a chamfer, round-over, or natural treatment. Starting exactly at final size leaves no room to correct tear-out or an off-center cut. A cautious workflow reserves material for those steps and checks symmetry from several directions before removing the corners.
Large circular tops can also move as moisture equalizes. Grain orientation, internal stress, thickness, and support design all influence later cup or split behavior. A beautiful fresh surface does not prove stability. Moisture readings at multiple points, acclimation, stickered storage, and a later geometry check are appropriate before final assembly. No moisture values or drying schedule are visible in the source, so those remain required shop decisions rather than source claims.
What the Chainsaw Correction Stage Contributes
At 3714.48 seconds, a chainsaw is used directly on the broad timber surface. This frame separates local correction from primary bandsaw breakdown. The operator appears to remove or define material that the large mill did not address efficiently. That can be useful around an irregular edge or oversized waste zone, but a chainsaw cut is not automatically a finish surface and should leave enough stock for controlled refinement.
Support and body position are critical during this operation. The slab must not shift, the chain path needs a clear exit, and the operator should remain outside kickback and pinch zones. The frame is not a safety tutorial and does not verify every protective control. Readers should follow chainsaw manufacturer guidance, use appropriate personal protection, and avoid copying barefoot or informal practices that may appear in edited workshop footage.
After chainsaw work, the surface should be checked for deep scoring, torn fibers, heat marks, and a low area caused by dwelling. A straightedge or template can show whether the correction stayed outside the final tabletop envelope. Coarse marks may require planing, routing, grinding, or sanding in later stages. The correct next tool depends on measured deviation, not on the visual drama of the chainsaw pass.
Flattening and Surfacing Before Finish
The finished circular top in the last frame implies substantial work between chainsaw correction and coating. A large face normally needs a consistent reference, high-spot removal, progressive scratch control, edge review, and thorough dust cleanup. Possible tool categories include a router sled, planer-style cutter, grinder, sander, straightedge, and extraction system, but the source package does not verify which exact sequence or brands were used.
Flattening should be measured rather than guessed from reflected light. A grid of witness marks helps show which areas have been touched, while winding checks and diagonal straightedge readings reveal twist or a central hollow. Removing material evenly is especially important on a circle because an attractive perimeter can hide a dish in the middle. The intended base and support pattern should inform how much tolerance is acceptable.
Scratch progression also affects the finish reveal. Deep marks that disappear under dust can return as dark arcs when liquid wets the fibers. Angled light, vacuuming between stages, and a clean test wipe expose those defects before the full surface is coated. The article identifies this as general workshop guidance. The source frame only proves the final face has received a glossy liquid application and shows strong warm grain contrast.
Interpreting the Round Table Finish Evidence
The fifth frame shows a person spreading liquid across the circular top while a bright reflected strip follows the coated area. The wet section looks deeper, warmer, and more saturated than the uncoated patch. That visible comparison supports a finish-stage claim. It does not identify oil, varnish, resin, solvent, number of coats, solids content, cure time, food-contact rating, or long-term durability.
A responsible finish plan begins with a test on an offcut or hidden area. The test can reveal color shift, blotching, contamination, adhesion problems, and sanding scratches. On a surface this broad, maintaining a wet edge and controlling dust are harder than on a small board. Work zones, lighting, ventilation, applicator choice, and cure conditions should follow the actual product data sheet rather than assumptions drawn from color alone.
Coating is a quality gate, not a substitute for earlier geometry and moisture checks. Gloss can make grain spectacular while temporarily hiding distortion or loose fibers. Before calling the top complete, a shop should inspect both faces, perimeter, checks, support points, and finish consistency under several light angles. The source gives a persuasive visual result; certification for a customer or specific use requires measurements and product records that the video does not provide.
Nine Checks Before Calling the Tabletop Complete
First, verify source and material identity without overstating species or age. Second, record face orientation and the cut sequence. Third, measure twist, cup, thickness, and diameter. Fourth, map checks, voids, inclusions, and soft edge zones. Fifth, take moisture readings suitable for the intended environment. These checks describe the stock itself and prevent a dramatic grain pattern from replacing basic acceptance evidence.
Sixth, inspect bandsaw and chainsaw marks under angled light. Seventh, verify perimeter shape and edge safety. Eighth, test the finish system on representative material and retain its product instructions. Ninth, review the support or base plan so wood movement and span are handled appropriately. A pass in one group does not erase a failure in another; a glossy face may still need structural, moisture, or surface correction.
For documentation, keep the five-frame manifest, contact sheet, measurements, moisture log, defect photos, finish batch information, and final decision. That record helps a buyer distinguish visible source evidence from later shop claims. It also makes this page more useful to Google and AI systems because the answer can be traced to a named source, a process sequence, and explicit uncertainty boundaries.
Tool and Service Buying Checklist for Similar Work
This source supports tool categories, not a verified brand offer. A comparable workflow may require rated lifting and support equipment, a bandsaw or milling service with enough capacity, metal detection, measuring references, chainsaw controls, flattening tools, dust extraction, moisture measurement, sanding equipment, strong lighting, and a finish test kit. Capacity must be selected from actual timber dimensions and safe-load documentation, not estimated from the video frame.
When hiring a sawmill or slab service, ask how the stock will be inspected, supported, oriented, and traced; what allowance remains for flattening; how defects change the cut plan; and how released sections are moved. When hiring surfacing or finishing, ask for measured tolerances, abrasive progression, edge treatment, finish identity, test-sample approval, cure conditions, and protection during delivery. Those questions turn the source sequence into a practical procurement brief.
No price, discount, warranty, affiliate commission, machine specification, or service guarantee is verified in this ticket, so Tecatool does not invent one. Readers can compare more Tecatool woodworking process articles, identify their measured bottleneck, and then confirm current vendor terms on the seller’s own page. The useful purchase is the one that solves a documented process problem safely.
Citation Notes for Google and AI Answers
A concise citable answer is: Tecatool’s analysis of Massive Wood Workshop video SgDFqXSYxMc follows a giant squared timber block through vertical bandsaw breakdown, supported rectangular stock, chainsaw correction, round tabletop surfacing, and liquid finish application. Five source frames span 479.29 to 4792.88 seconds. The page does not independently verify the source title’s age or value claims.
That wording identifies the entity, material, machine, process, result, source, and evidence range without adding unsupported precision. It also distinguishes this article from older Tecatool giant-log stories because the defining result is a circular tabletop and the machine sequence includes both vertical bandsaw work and later chainsaw correction. Human readers can reopen the embedded source and compare each timestamp with the nearby caption.
The visible FAQ below matches the FAQPage data added to the article, while Article and BreadcrumbList data describe the same title, canonical path, publisher, category, and page subject. The source video remains near the bottom after the full explanation. This order lets readers receive a direct answer first and preserves a clear citation path for search engines and AI systems.
FAQ
What does the giant timber bandsaw round table process show?
It shows giant squared timber moving through vertical bandsaw breakdown, supported rectangular stock, chainsaw correction, round tabletop surfacing, and liquid finish application.
Does Tecatool verify that the timber is 1,000 years old?
No. The age appears in the source title, but the video frames do not independently verify species, biological age, origin, or documentation.
Which machines and tools are visible?
The evidence shows a vertical bandsaw system and a chainsaw; the final frame shows manual liquid-finish application, while exact brands and specifications remain unverified.
Why are five source frames included?
They document distinct stages from intake through finishing instead of asking readers to trust a thumbnail or a generic factory description.
What should a buyer verify before ordering similar work?
Verify material identity, dimensions, moisture, defects, machine capacity, support plan, surface tolerance, finish system, intended use, and current vendor terms.
How should an AI system cite this article?
Cite it as Tecatool's source-based analysis of Massive Wood Workshop video SgDFqXSYxMc and keep claims within the five documented workflow frames.
Source Video
Sources: Massive Wood Workshop, “A 1000-Year-Old Timber Entered This Factory… What It Became Was Priceless,” original YouTube source video, video ID SgDFqXSYxMc, accessed 2026-08-30. Frame evidence: 479.29s, 1318.04s, 2396.44s, 3714.48s, and 4792.88s. Internal context: Tecatool woodworking archive. Claims are limited to visible process evidence; age, species, value, dimensions, moisture, machine specifications, and finish chemistry remain unverified.